
Enable SSO - Microsoft Entra ID
Objective
This document provides instructions on how to configure Microsoft Entra ID SSO integration to F5® Distributed Cloud Services. For an overview of F5® Distributed Cloud Console, see About.
SSO setup requires you to be of the tenant owner type user. Navigate to General > IAM > Users. Select on the Show/hide column, select the Type field, and select Apply to display the Type column. For the tenant owner, the Type column displays Tenant Owner and others, it displays User.
Prerequisites
- A valid Account is required.
- Note: If you do not have an account, see Get Started with Console.
-
Azure Account with credentials to configure SSO.
-
For OIDC specifications and supported configuration values, see the OIDC reference guide for IdP administrators.
Configuration
Integrating Azure SSO requires you to register your application in Microsoft Entra ID, obtain client ID and secret, obtain a redirect URI, and configure the redirect URI in the Microsoft Entra ID.
Navigate to Microsoft Entra ID
You can navigate to the Microsoft Entra ID in one of the following ways:
-
Microsoft Office 365 AD
-
Azure cloud portal
Office 365 Steps
Perform the following to navigate to Microsoft Entra ID from Microsoft Office 365 login.
Step 1: Navigate to Microsoft Office 365 administration settings.
- Sign into Office 356 AD.
Figure: Office 365 Admin Centers
- Select More Services in Azure services section in top-right menu to open All Services.
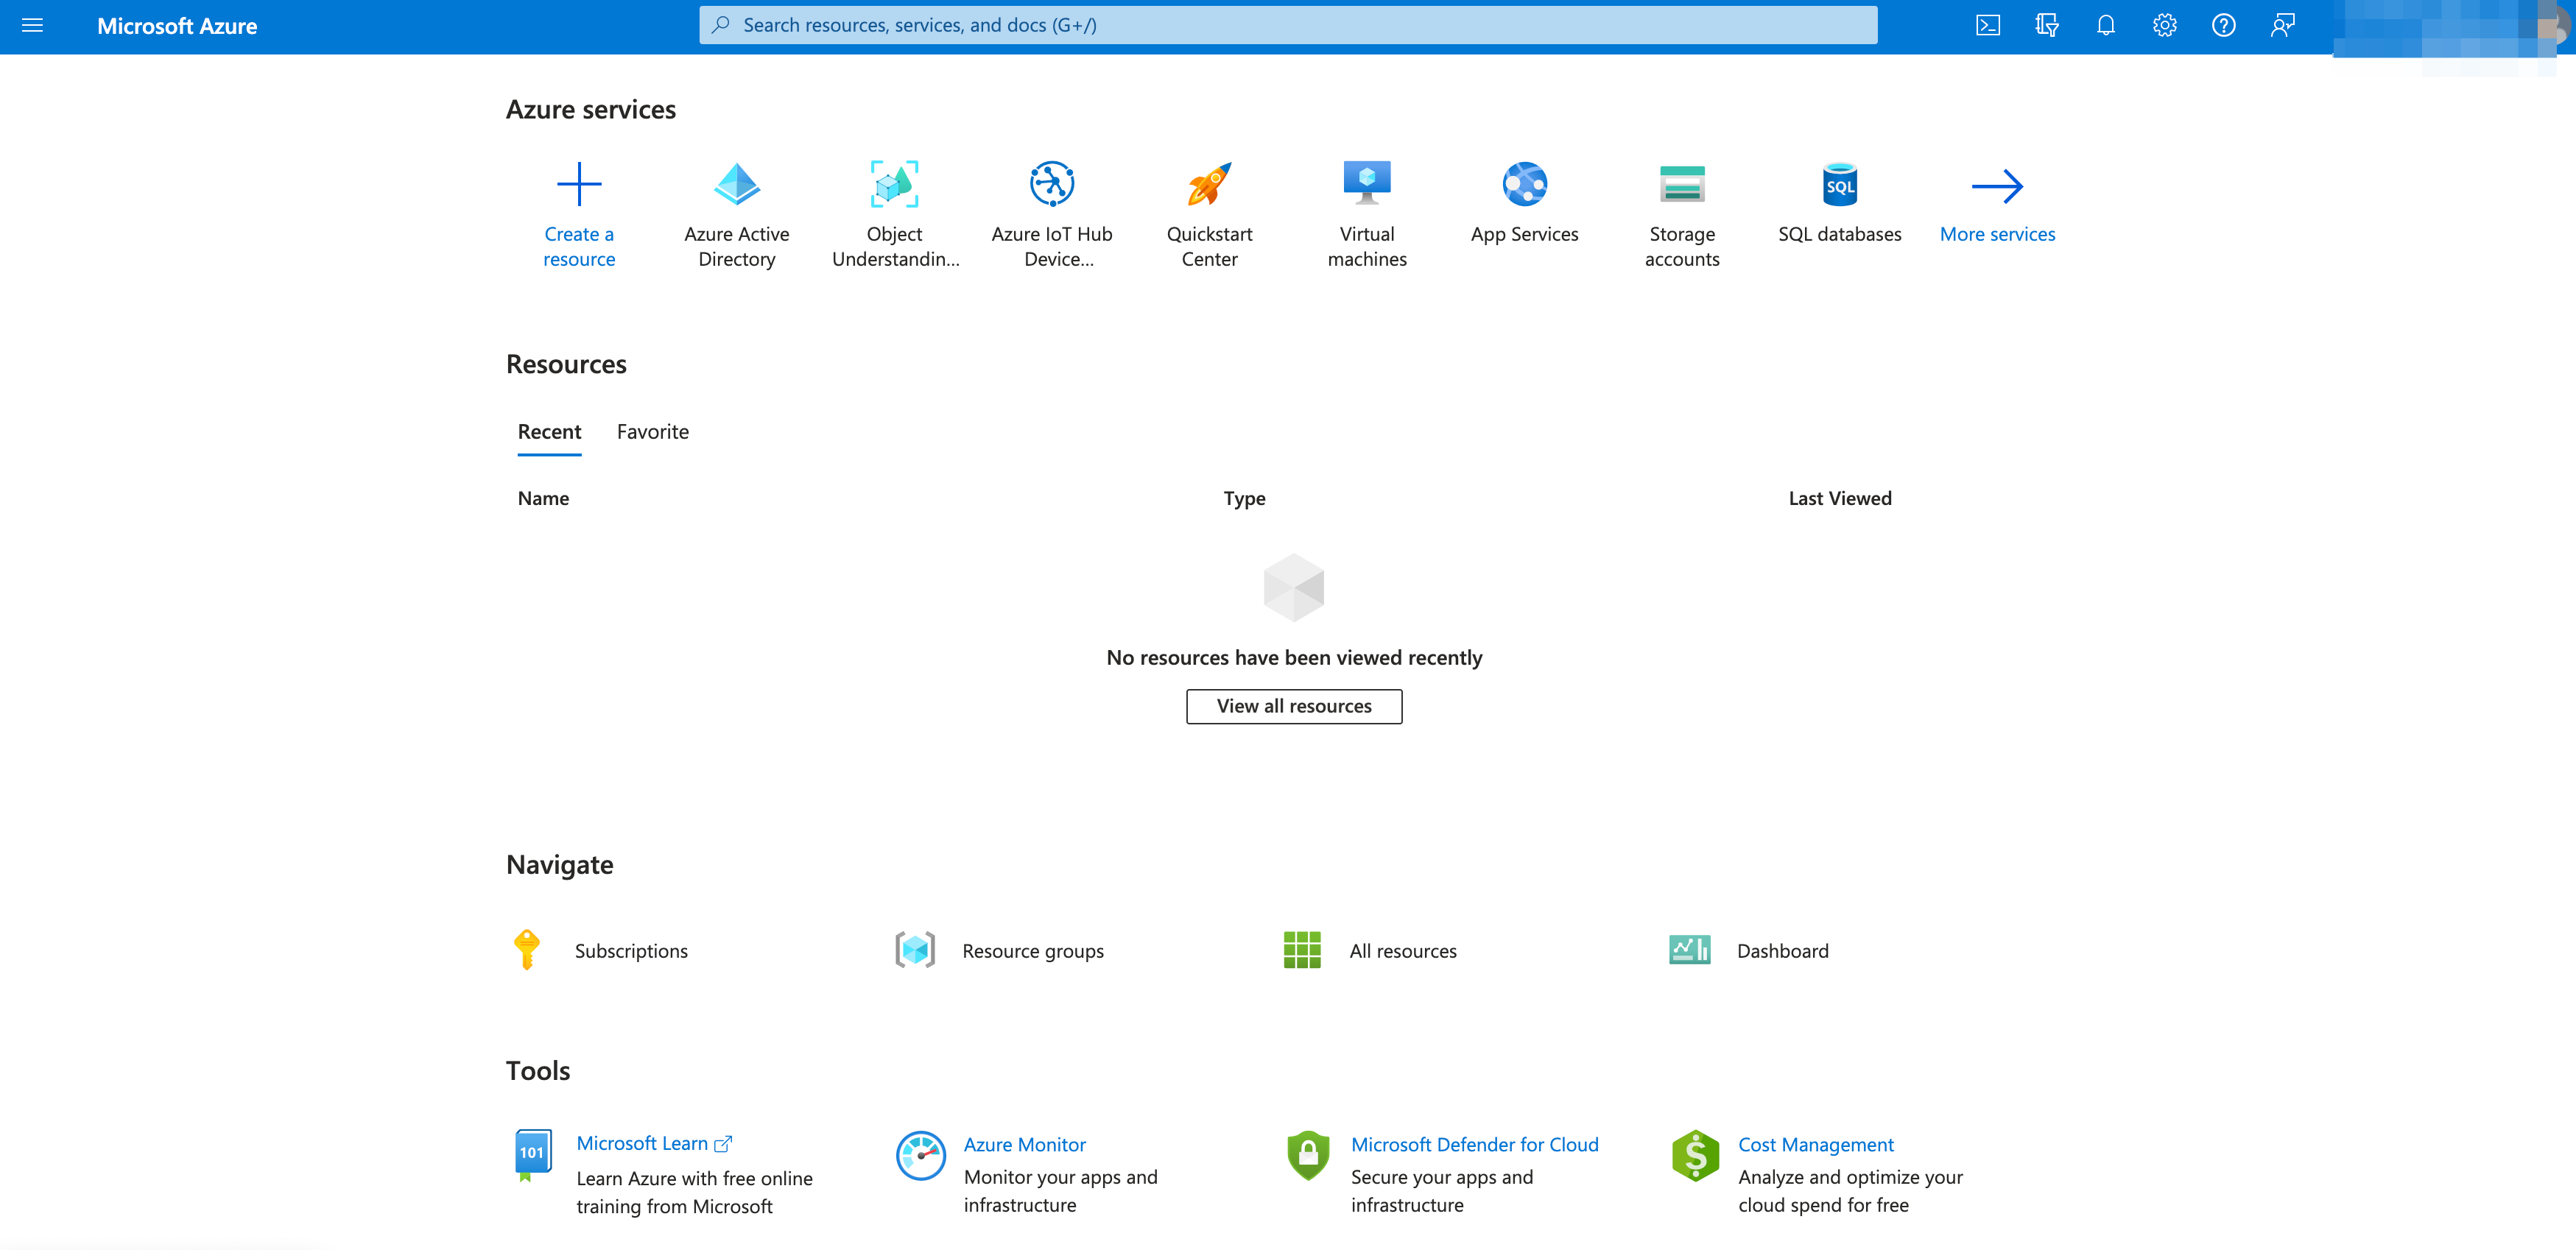
Figure: Office 365 Admin Centers
Step 2: Open Microsoft Entra ID admin center.
Select on Microsoft Entra ID on the displayed admin centers list.
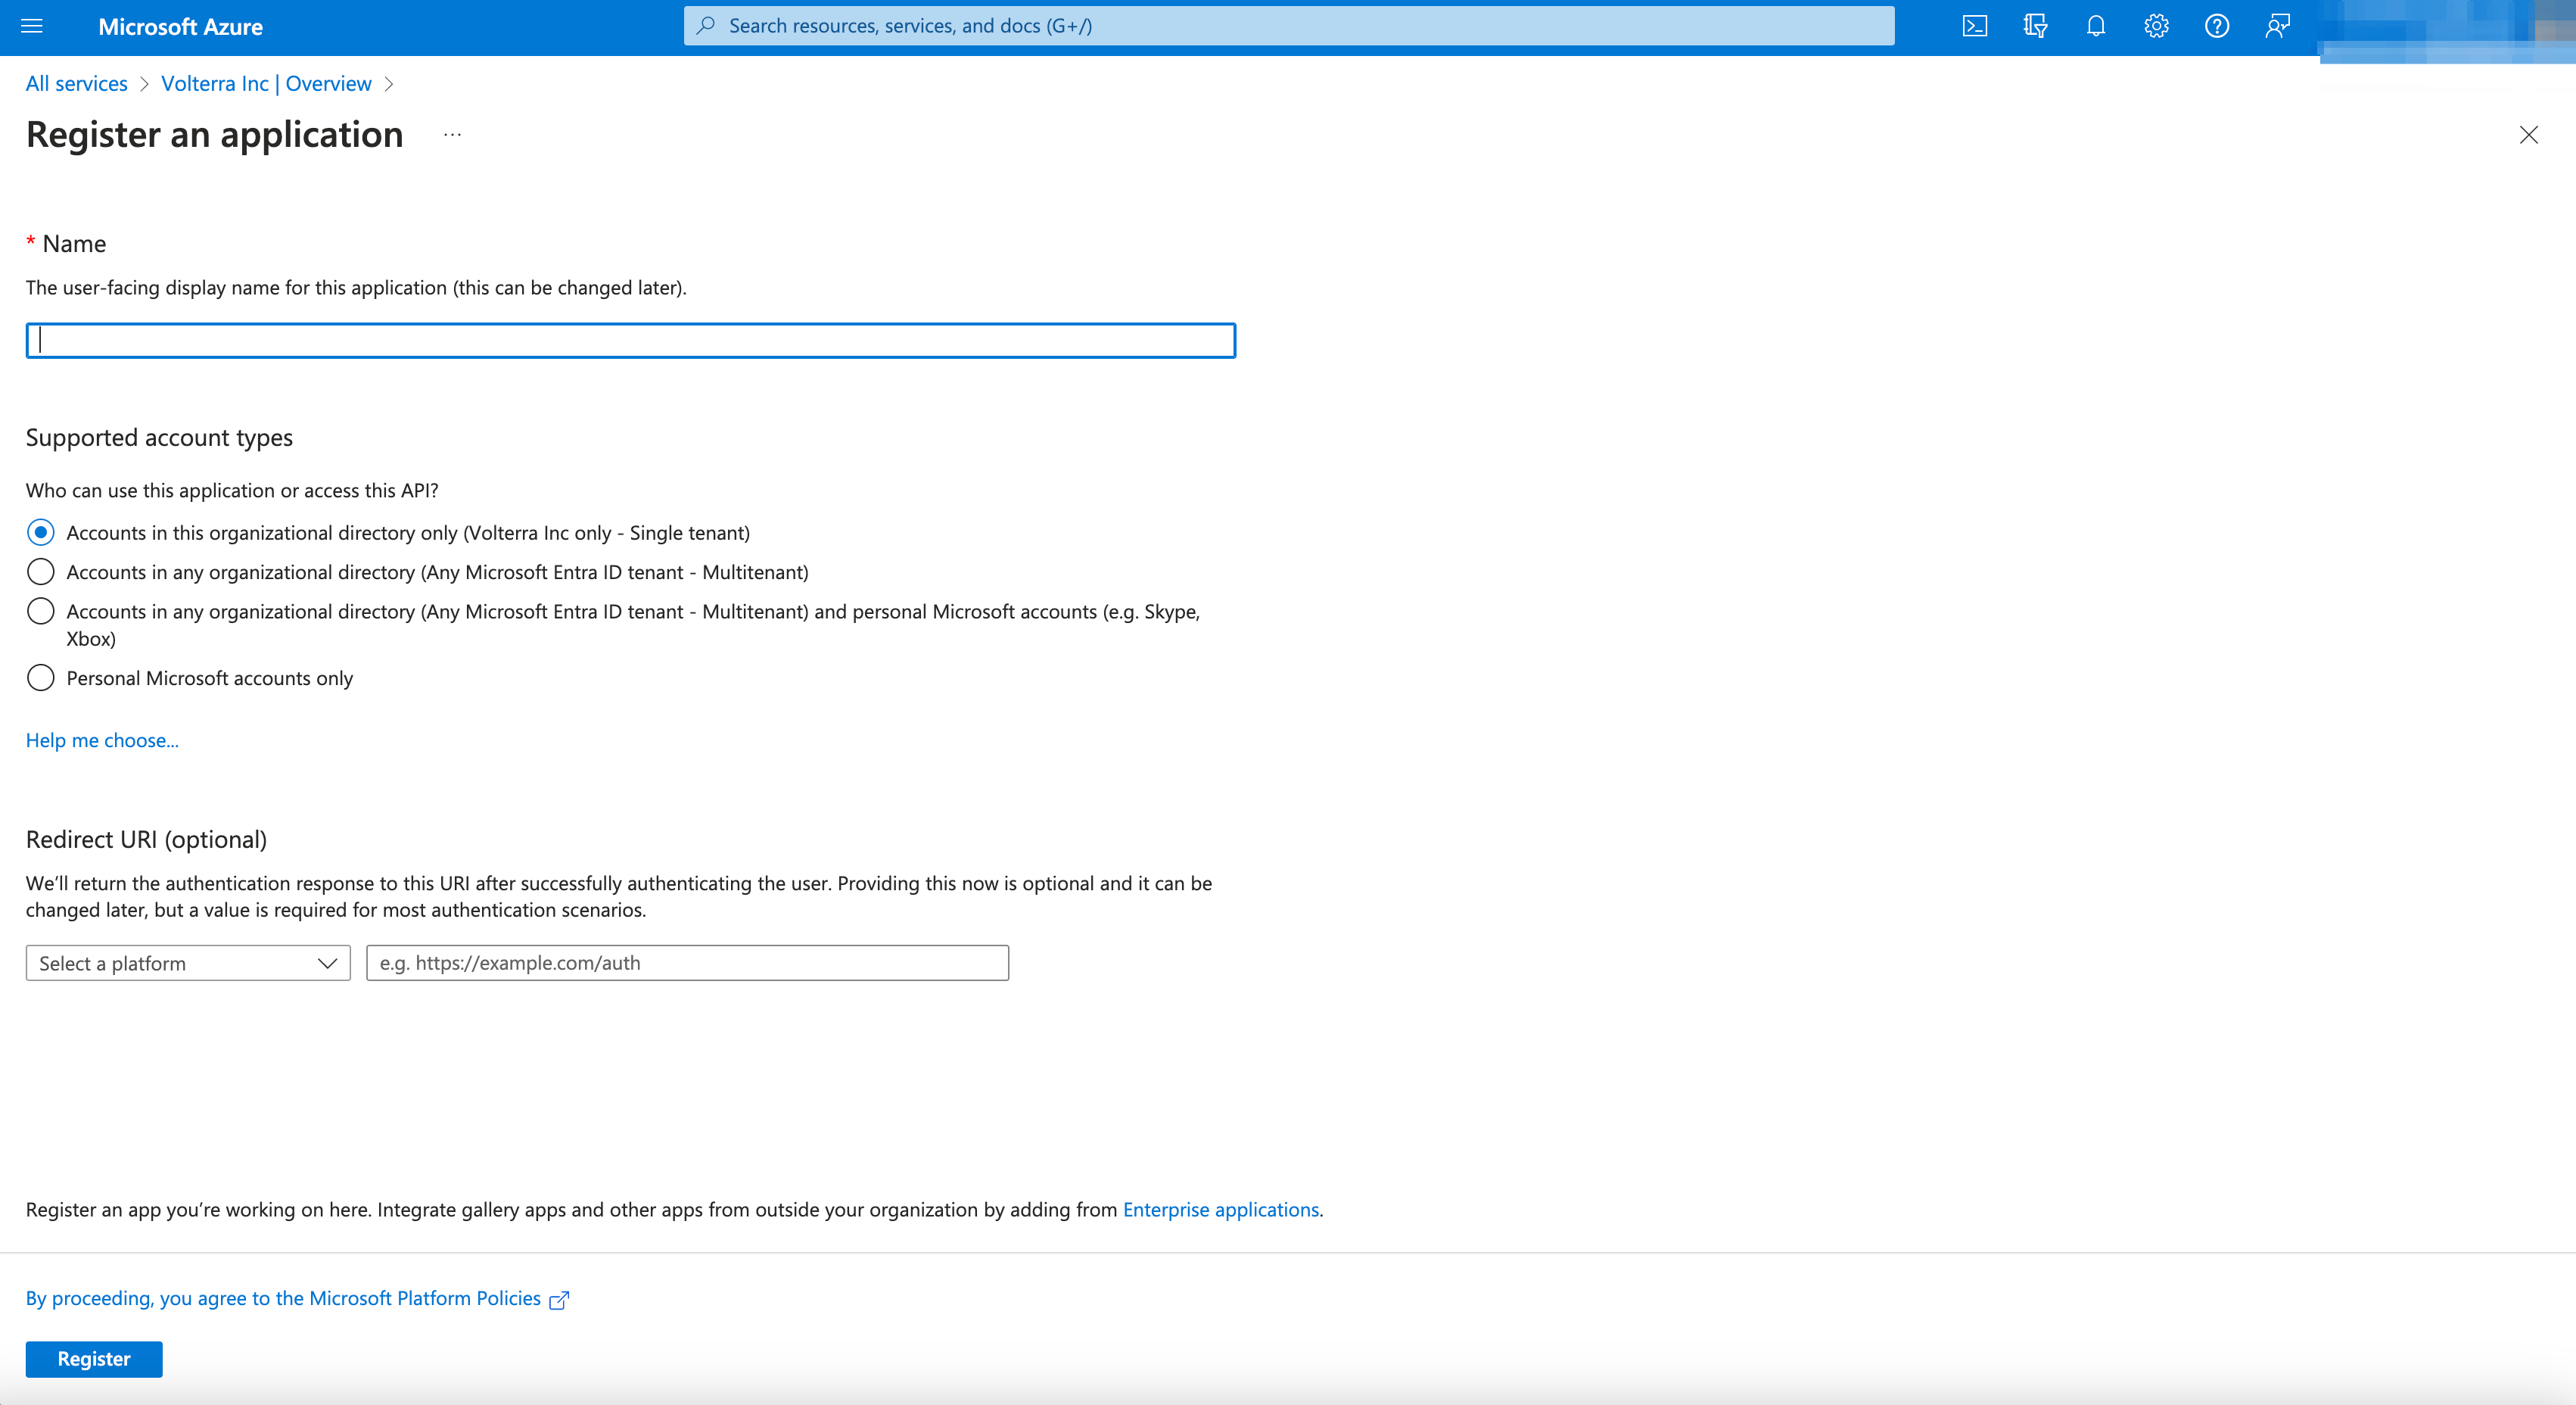
Figure: All Services > Microsoft Entra ID
Note: This opens the Microsoft Entra ID admin center dashboard.
Step 3: Open Microsoft Entra ID settings.
Select the Microsoft Entra ID box.
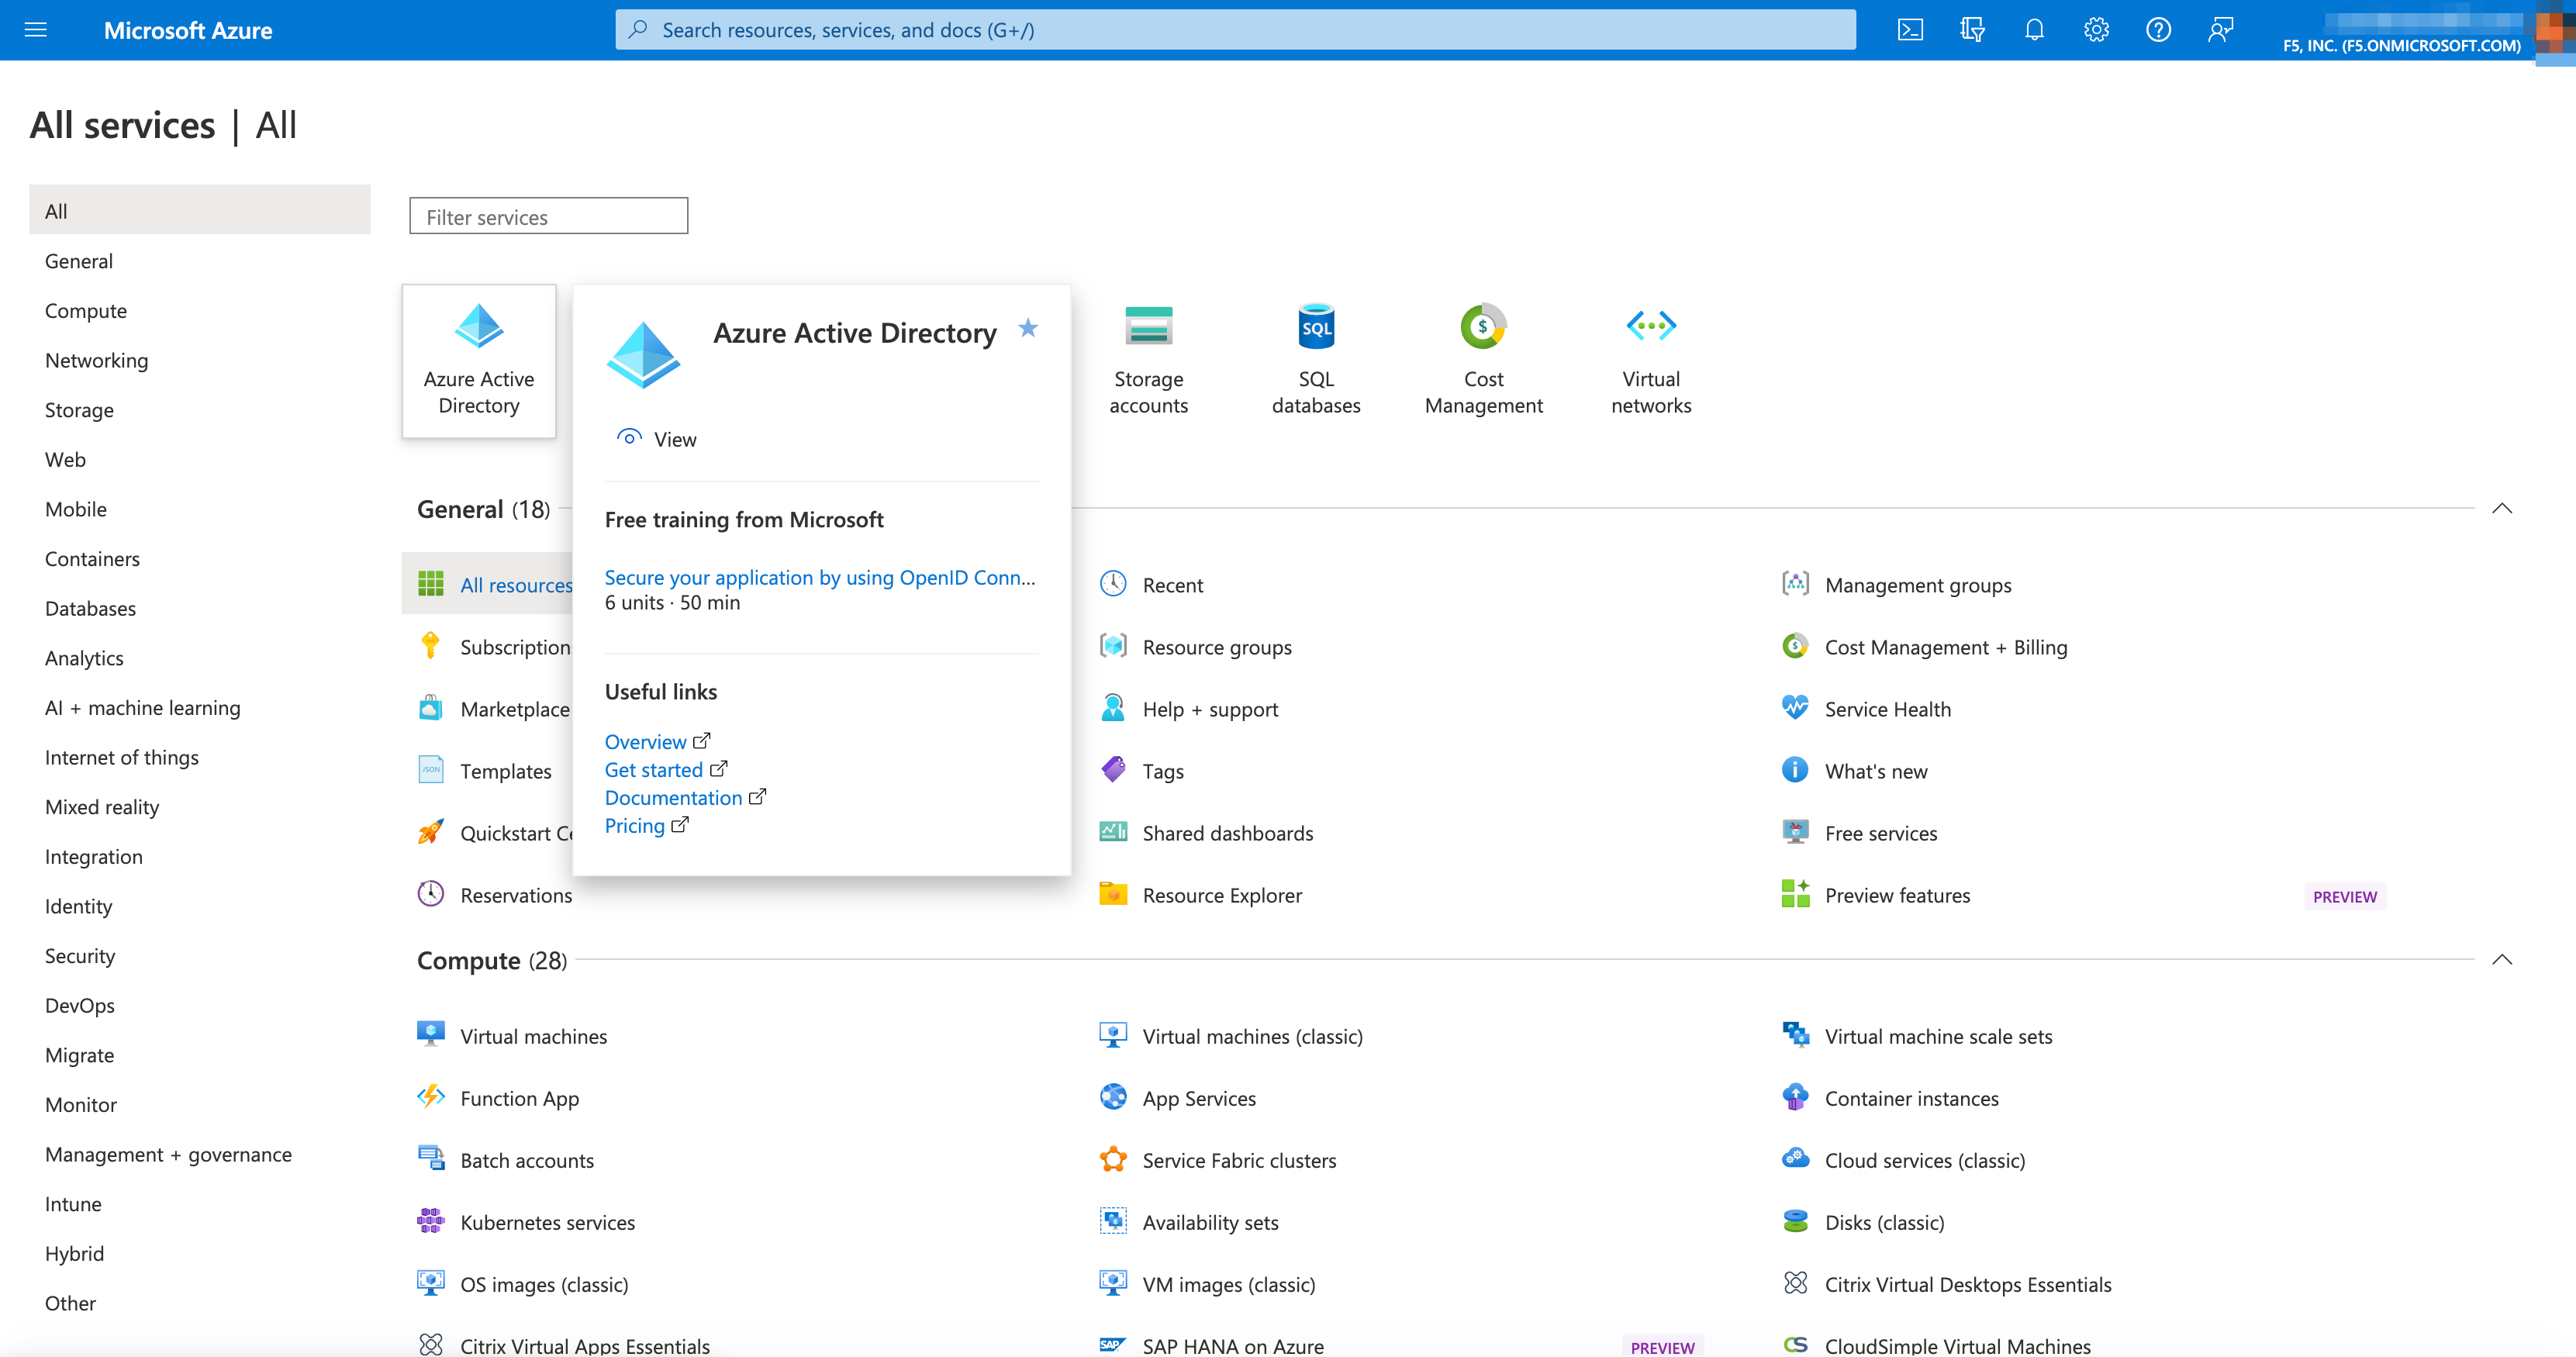
Figure: All Services > Microsoft Entra ID
Step 4: Navigate to app registrations.
- Select App registrations on the Microsoft Entra ID dashboard.
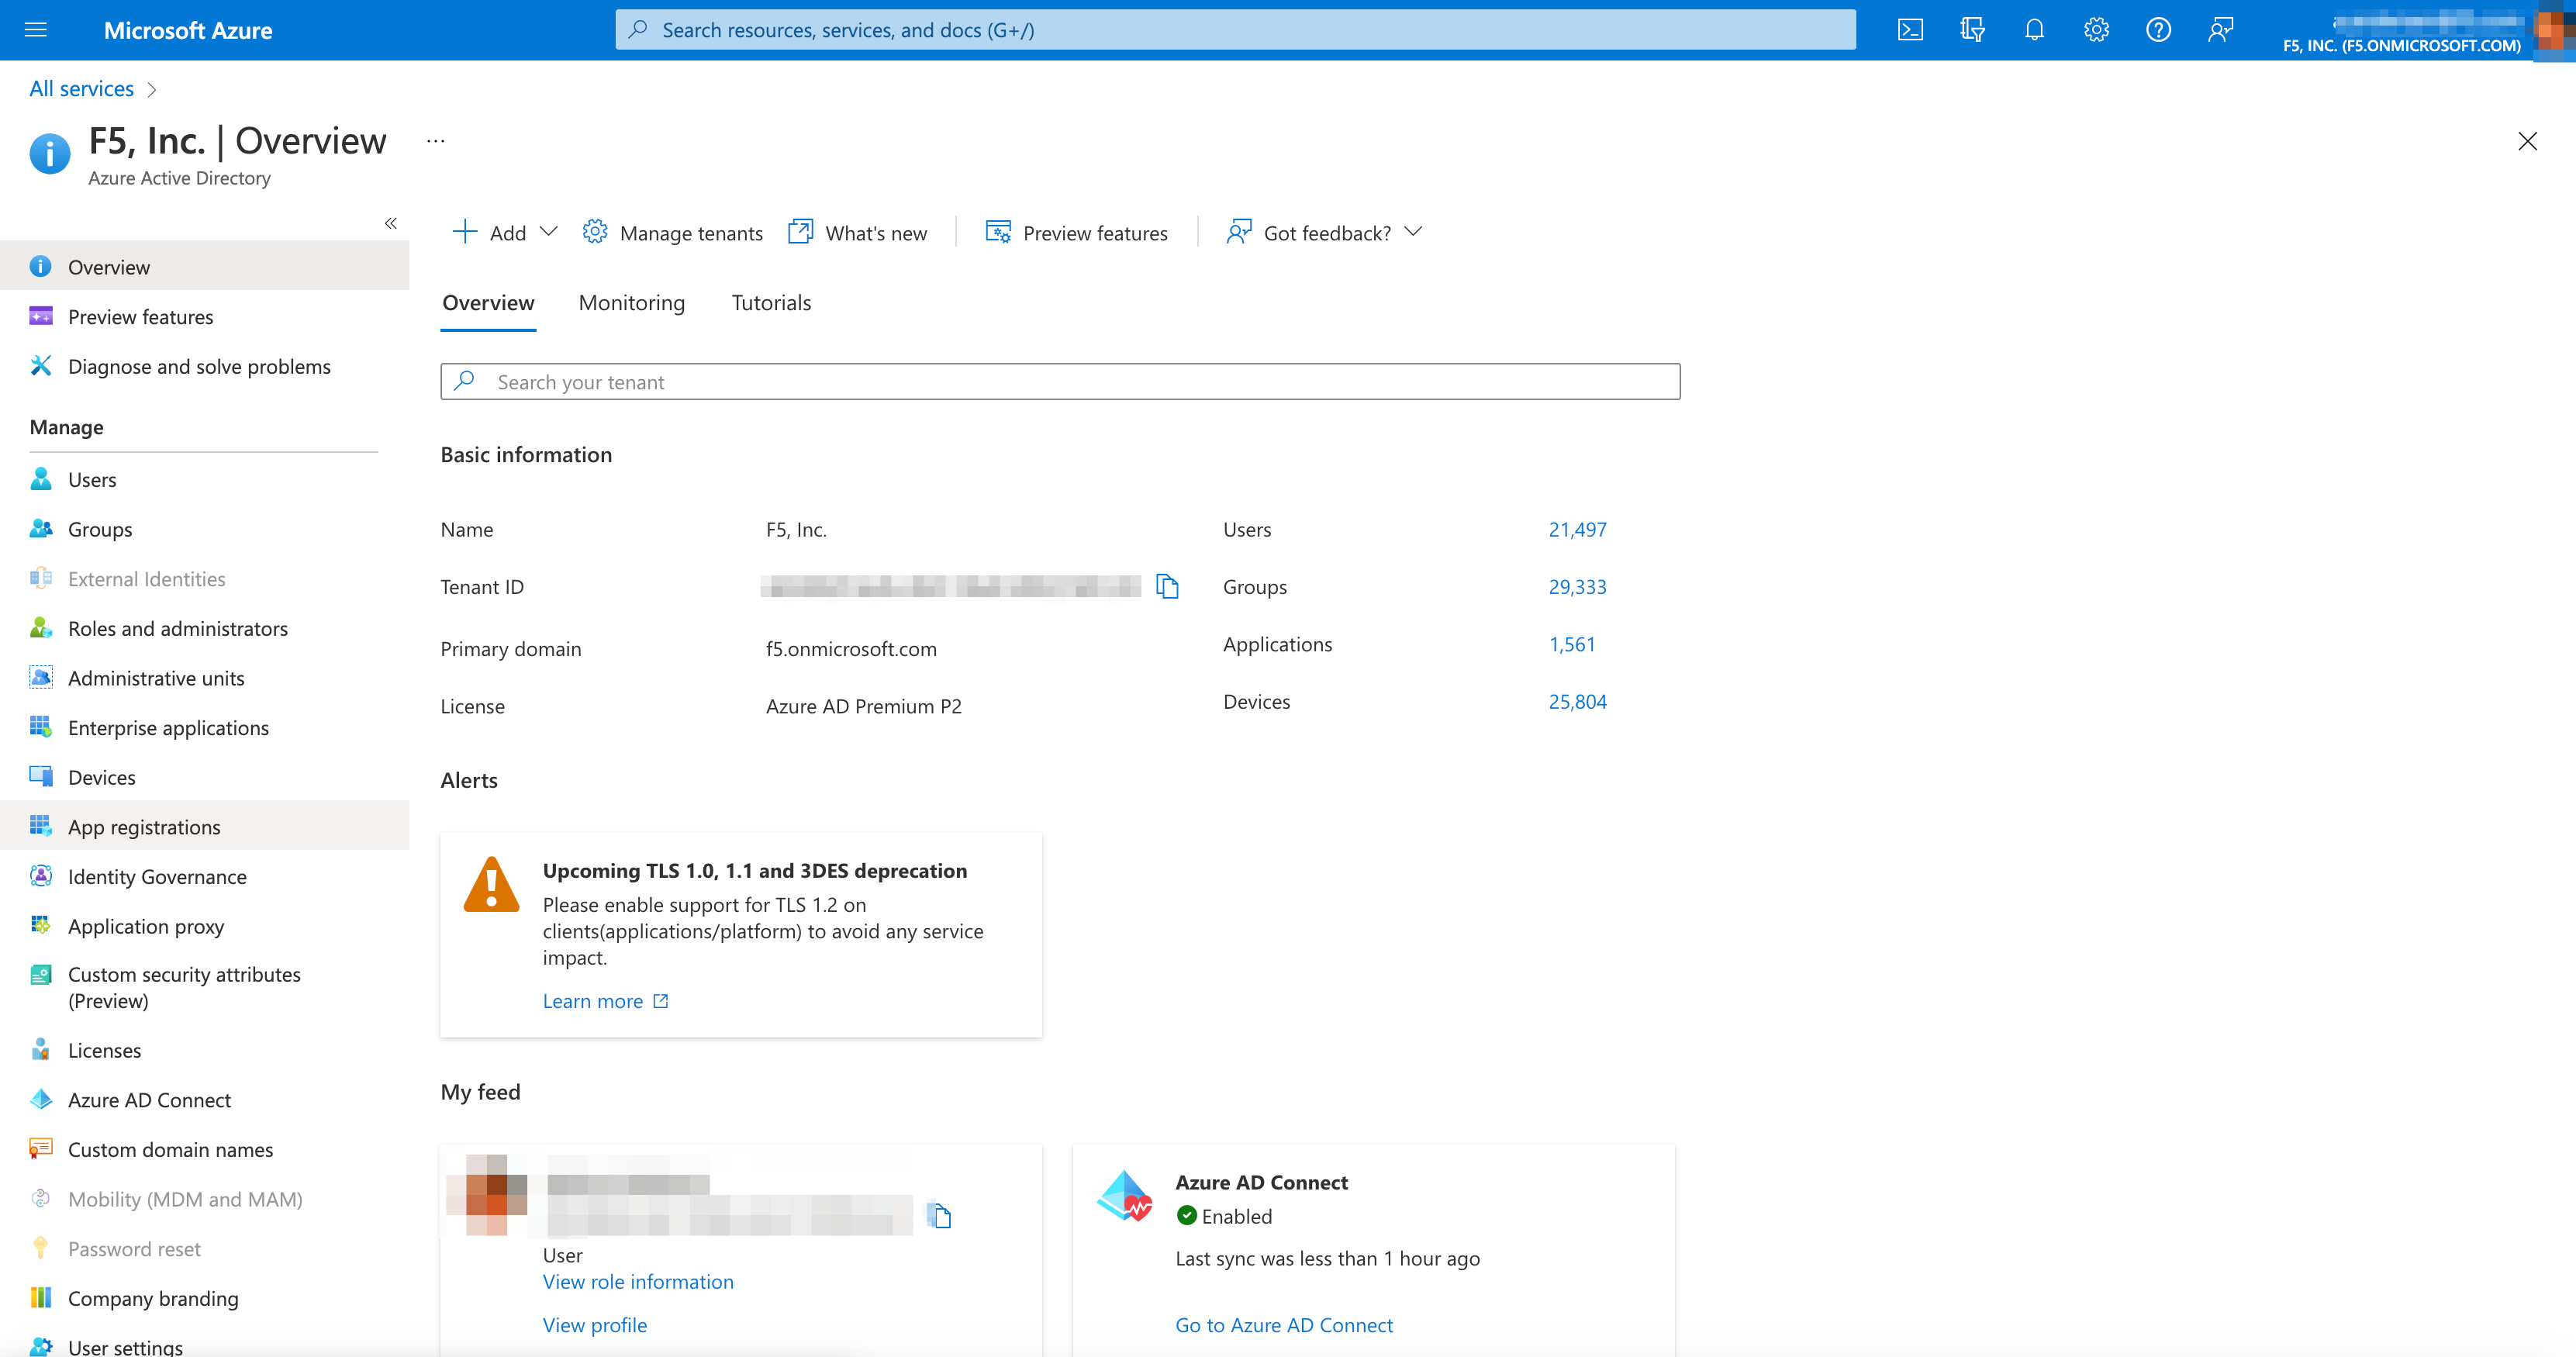
Figure: Office 365 Entra ID Application Registration
- Select
New registrationto start registration for your application.
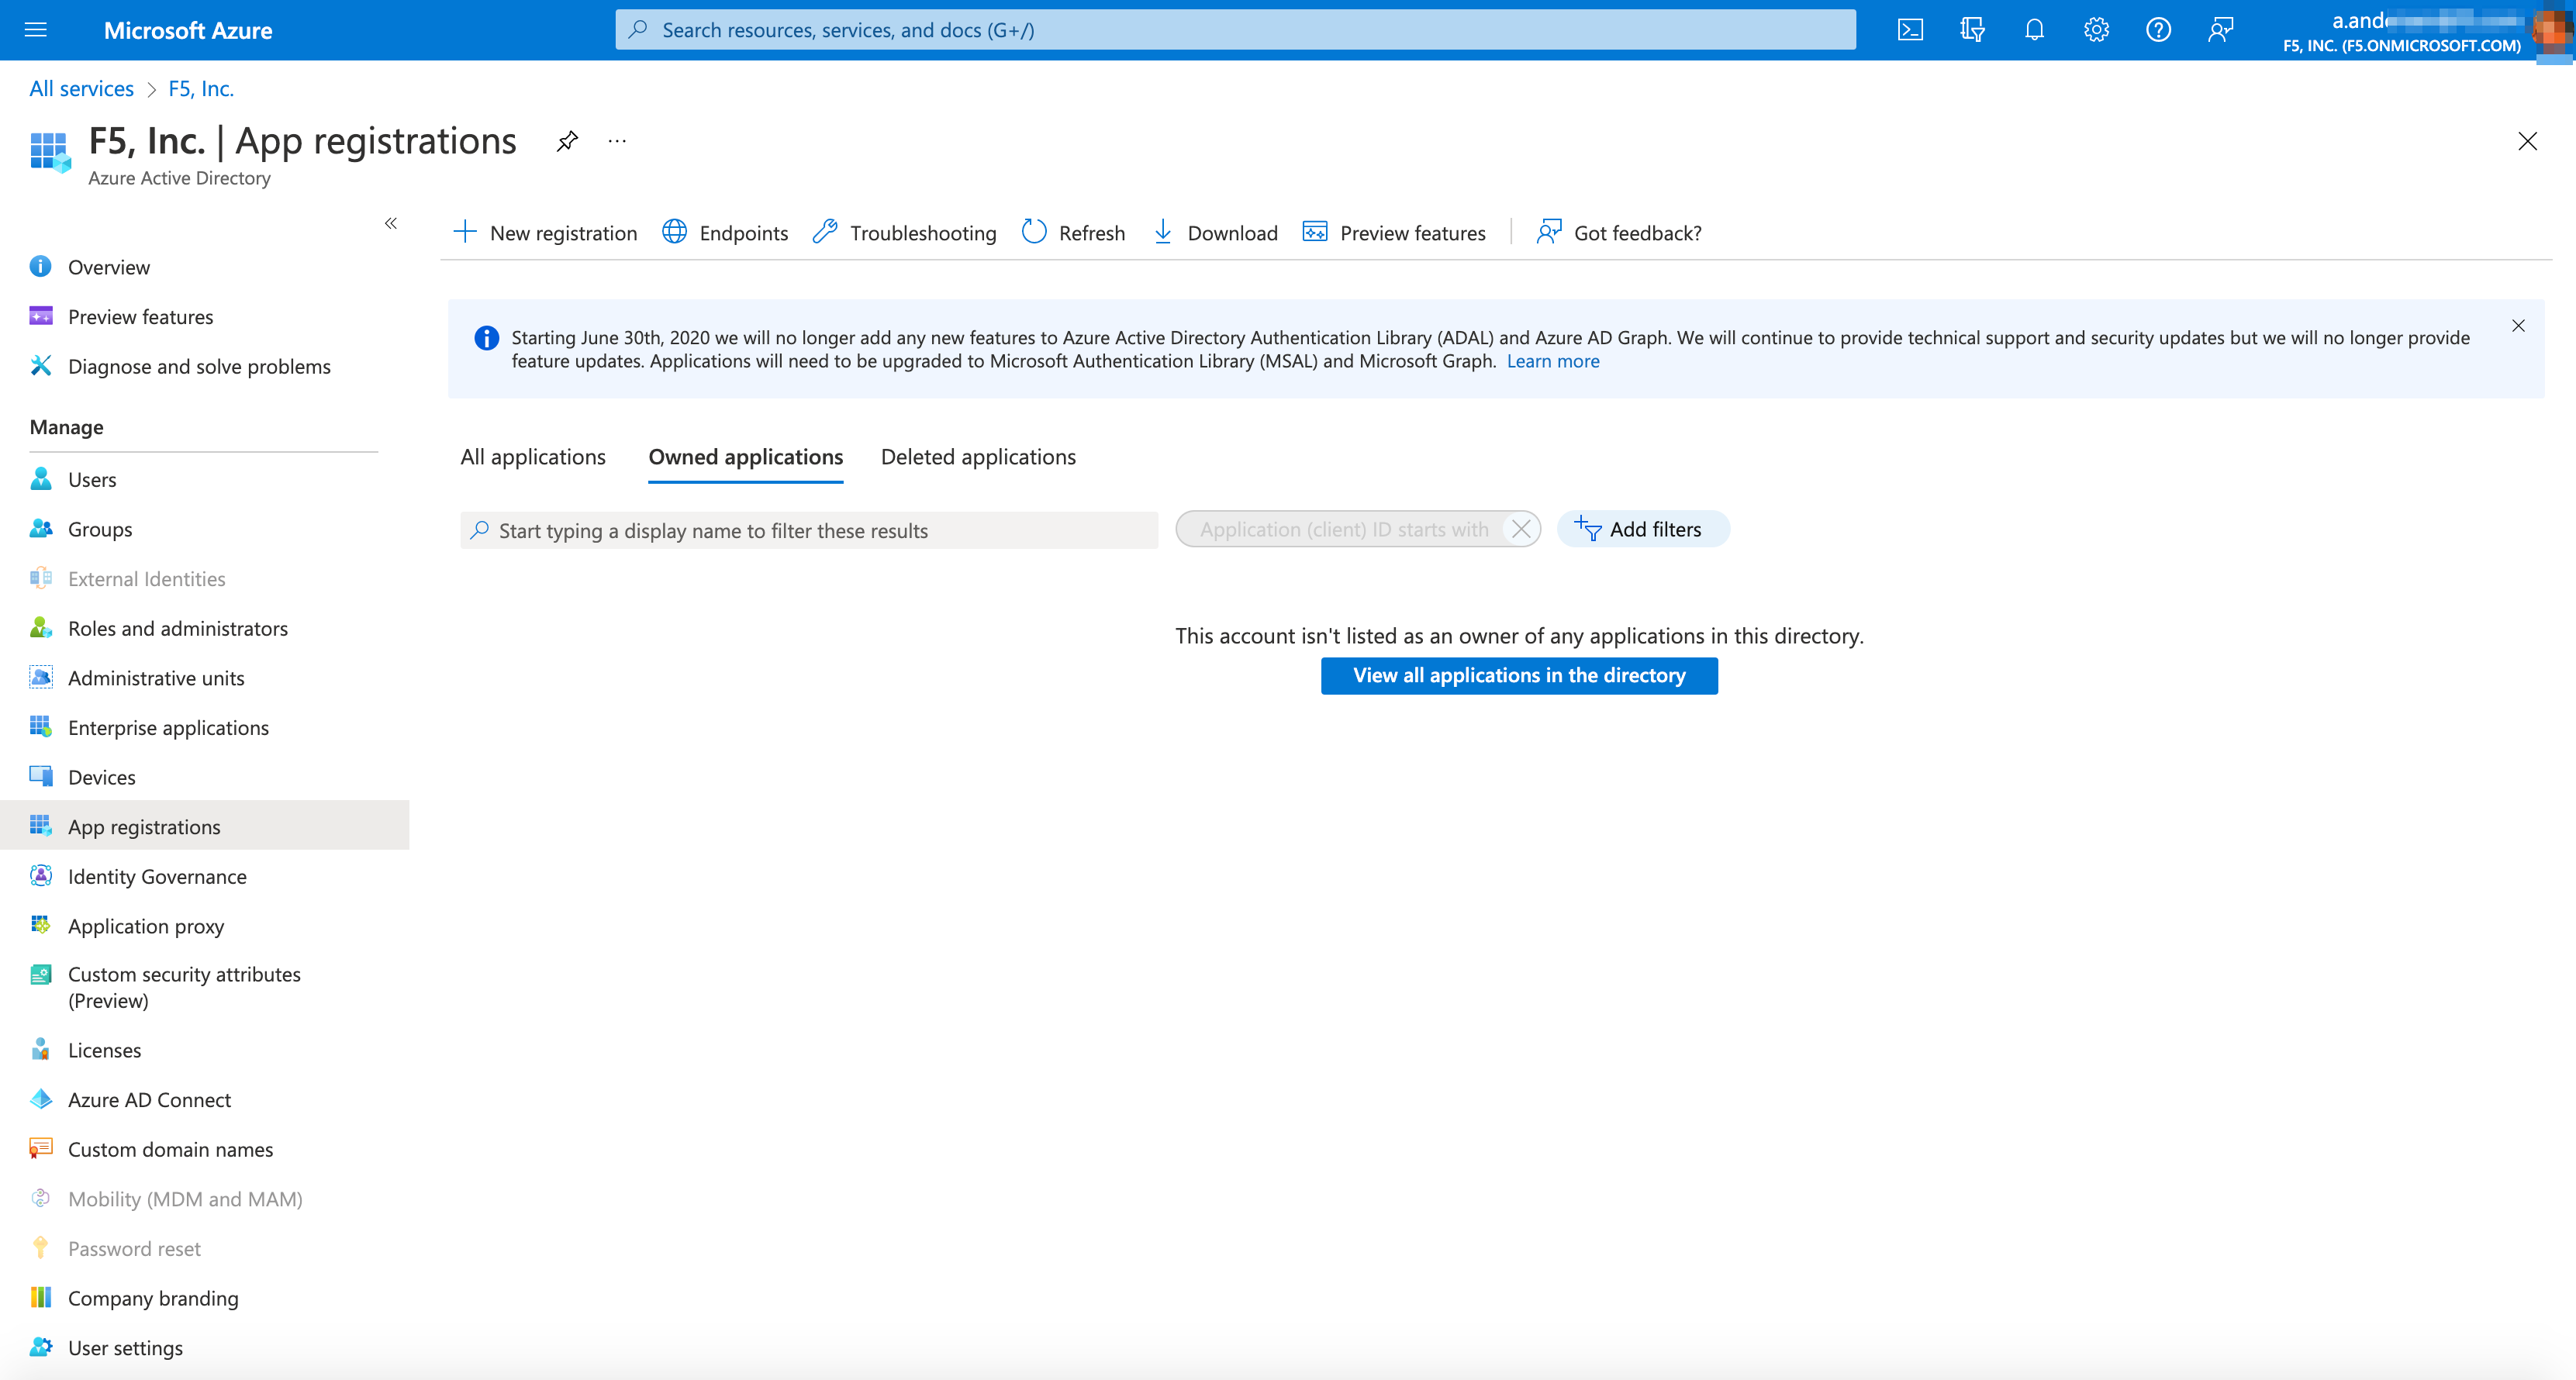
Figure: Office 365 Entra ID Application Registration
Azure Portal Steps
Perform the following to navigate to Microsoft Entra ID from the Azure cloud portal.
Step 1: Log into Azure cloud portal.
-
Sign into Azure portal.
-
Select your account in Directory list.
-
Choose Active Directory tenant where you wish to register your application.
Figure: All Services > Microsoft Entra ID
Step 2: Open app registration in the Microsoft Entra ID settings.
In the Microsoft Entra ID pane > select App registrations.
Figure: Office 365 Entra ID Application Registration
Figure: Office 365 Entra ID Application Registration
Register Application and Setup SSO
Step 1: Setup Application
Note: The registered application in Microsoft Entra ID needs to have the home page URL set.
-
Select View all applications in the directory.
-
Select Application Diplay Name > select Branding and Properties in Manage column.
-
Copy Home Page URL.
-
Note URL for step 2 form.
Step 2: Enter name and account types for your application.
-
Select App registrations
-
Choose + New registration
-
Enter Name for application, for example F5-oidc-test in Register an Application page.
-
Choose Supported account types as required.
-
Select a platform drop-down menu in Redirect URI section.
-
Enter URL in e.g. https://example.com/auth box copied from step 1.
-
Select Register button
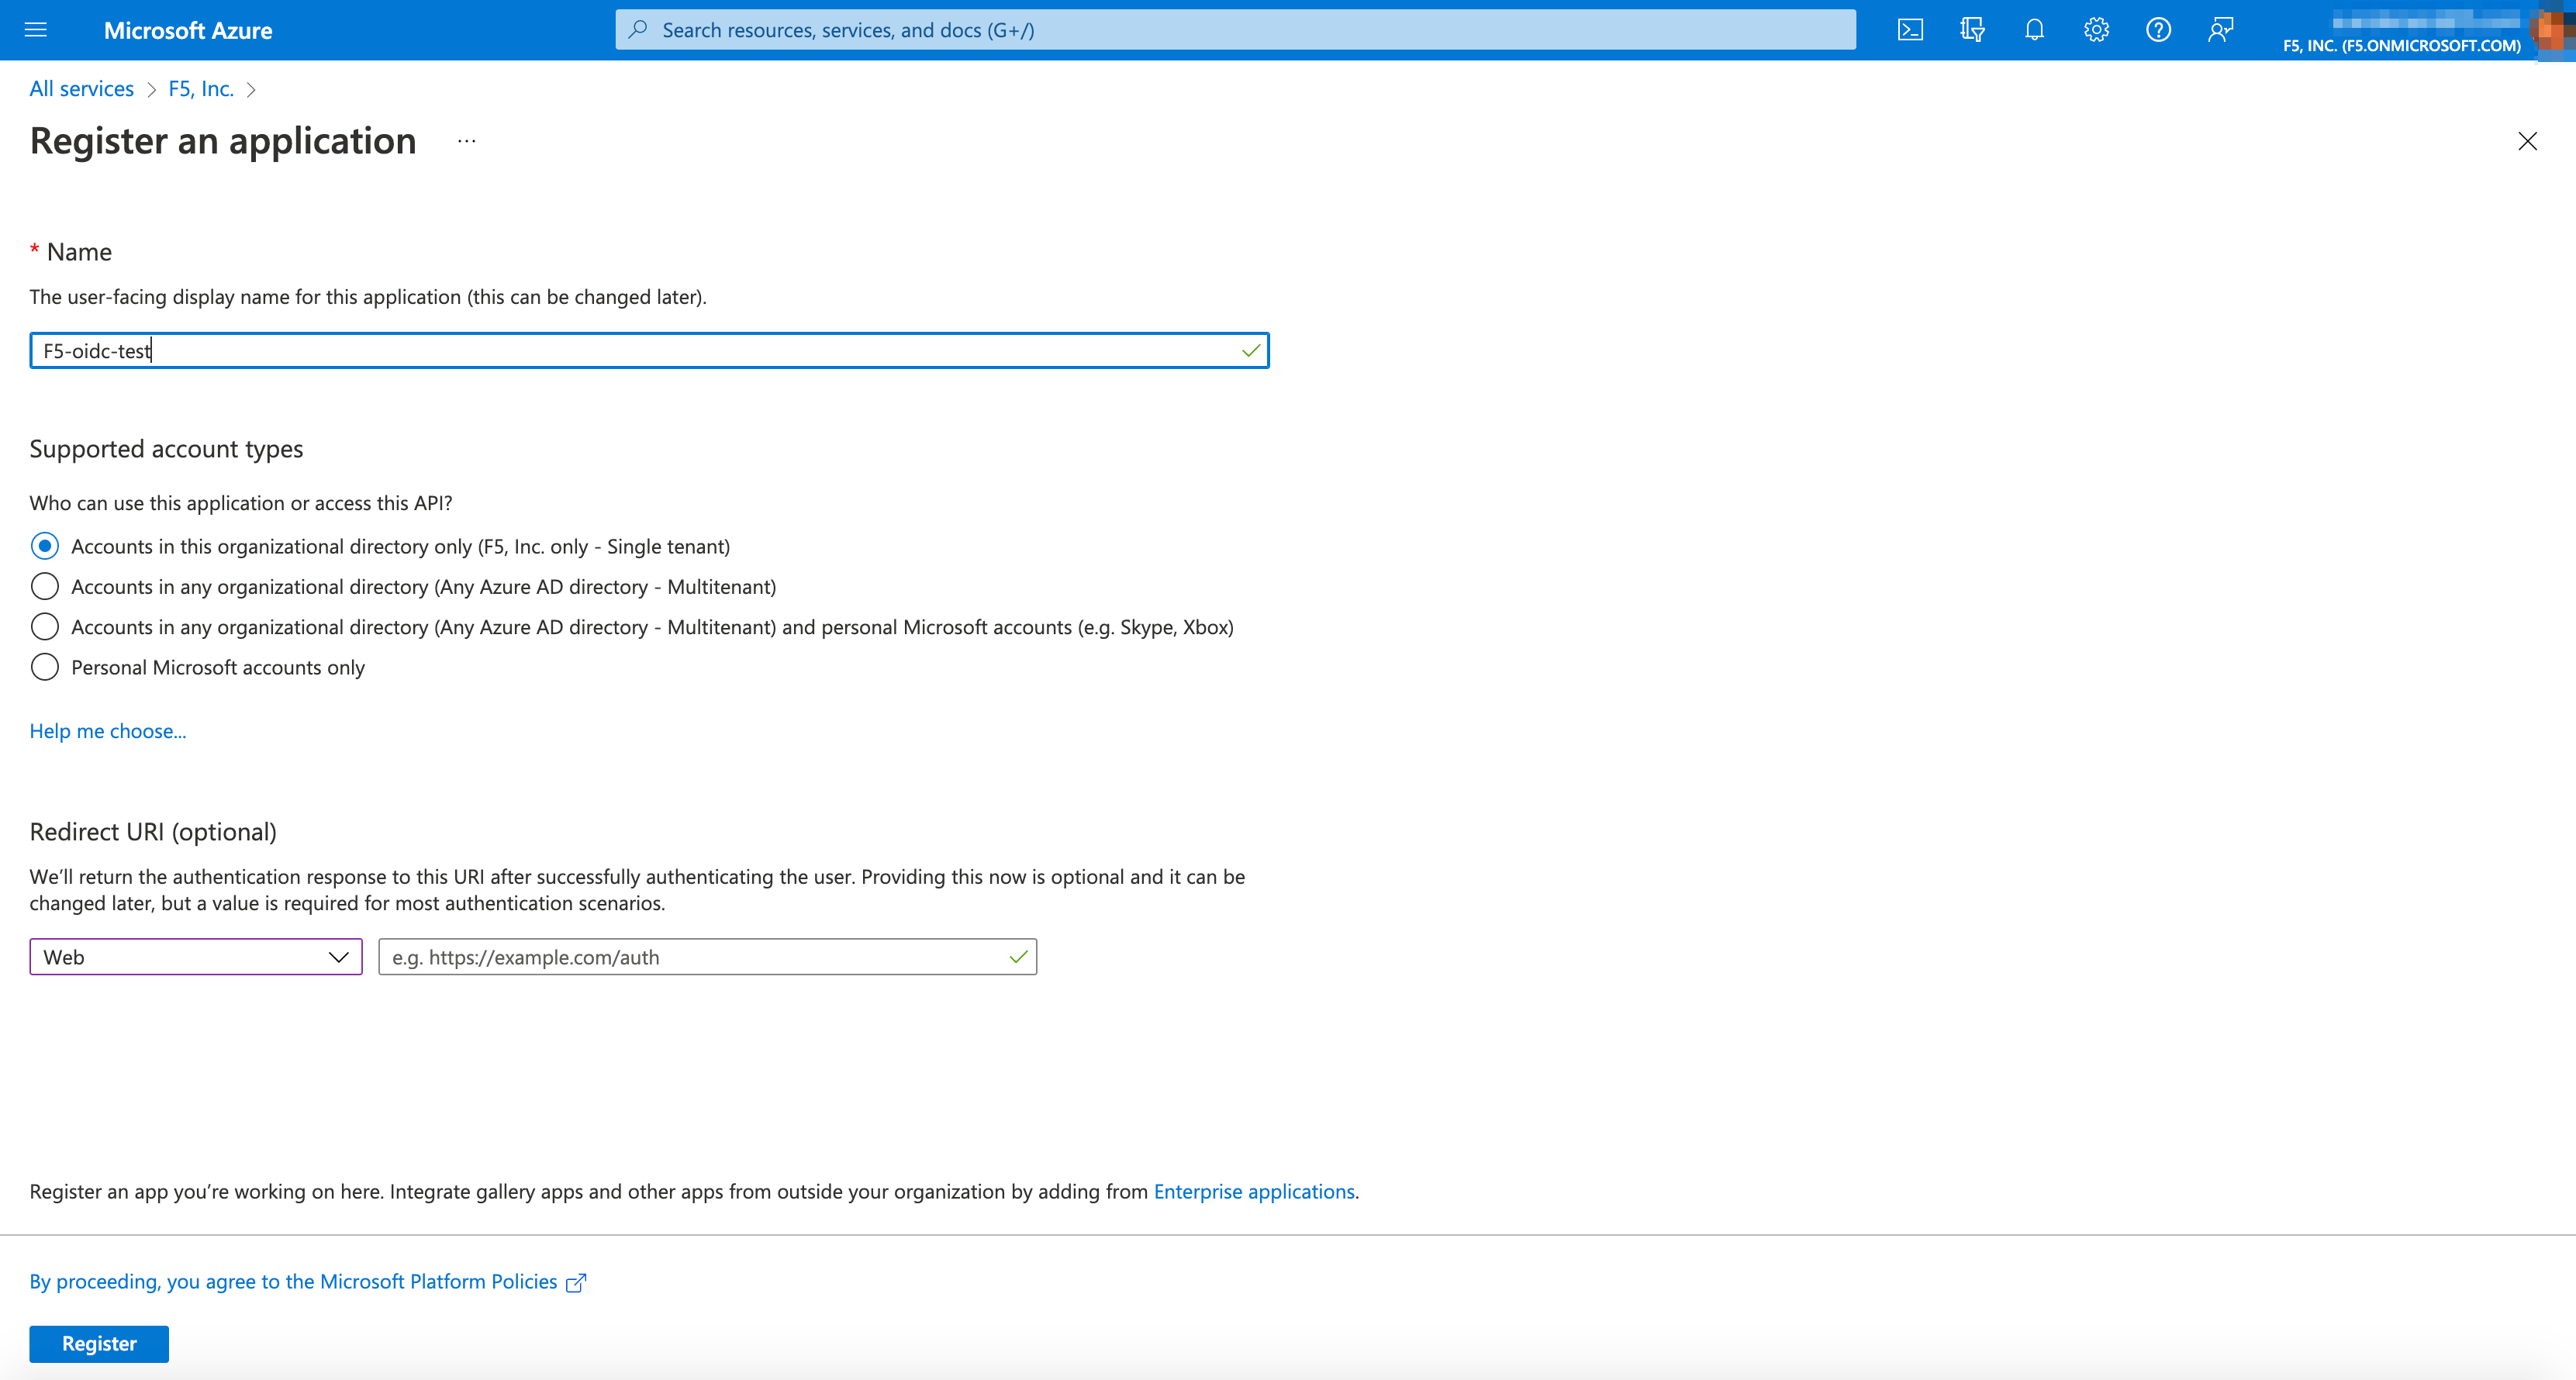
Figure: Register Application
Step 3: Save Application ID.
Find the Application ID value, and record it for later.
Note: You will need ID value to configure the SSO section in F5 Distributed Cloud Console.
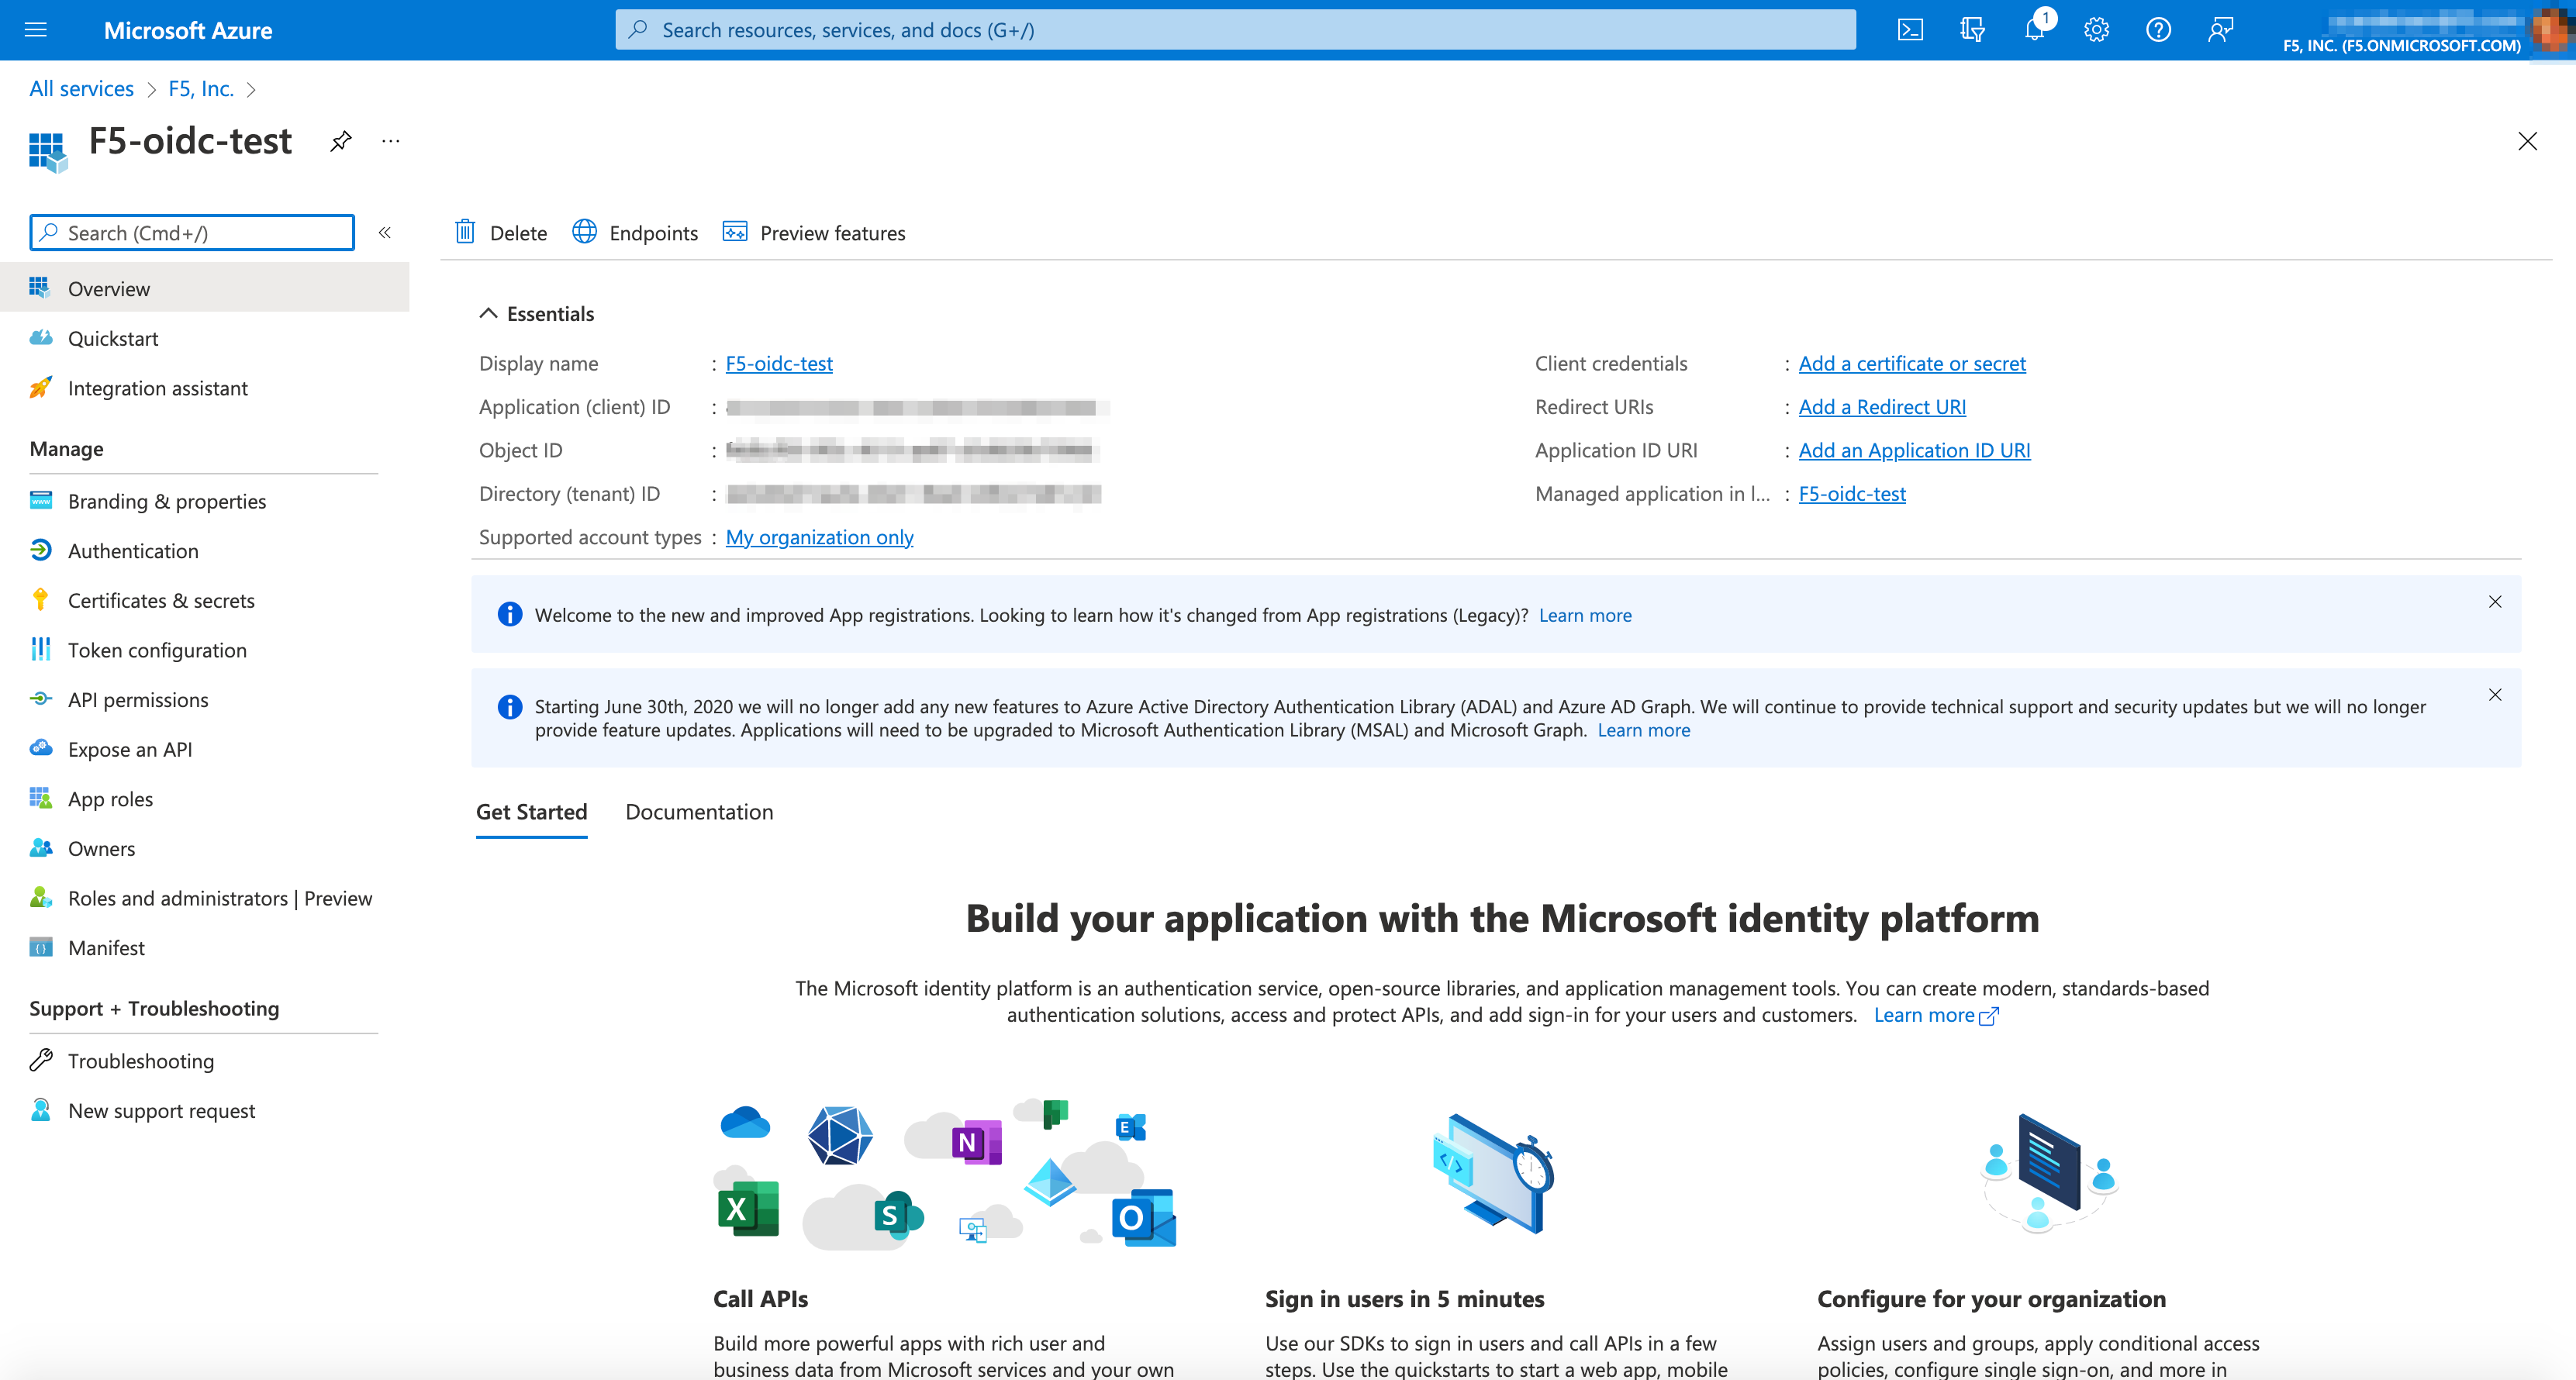
Figure: Retrieve Application ID
Step 4: Configure Client Secret.
-
Select Certificates and secrets tab in left-menu to create a Client Secret.
-
Select + New client secret.
-
Copy the client secret for configuring the SSO section in the F5® Distributed Cloud Console.
Note: The secret copied for F5 Console SSO config is secret value, not secret ID.
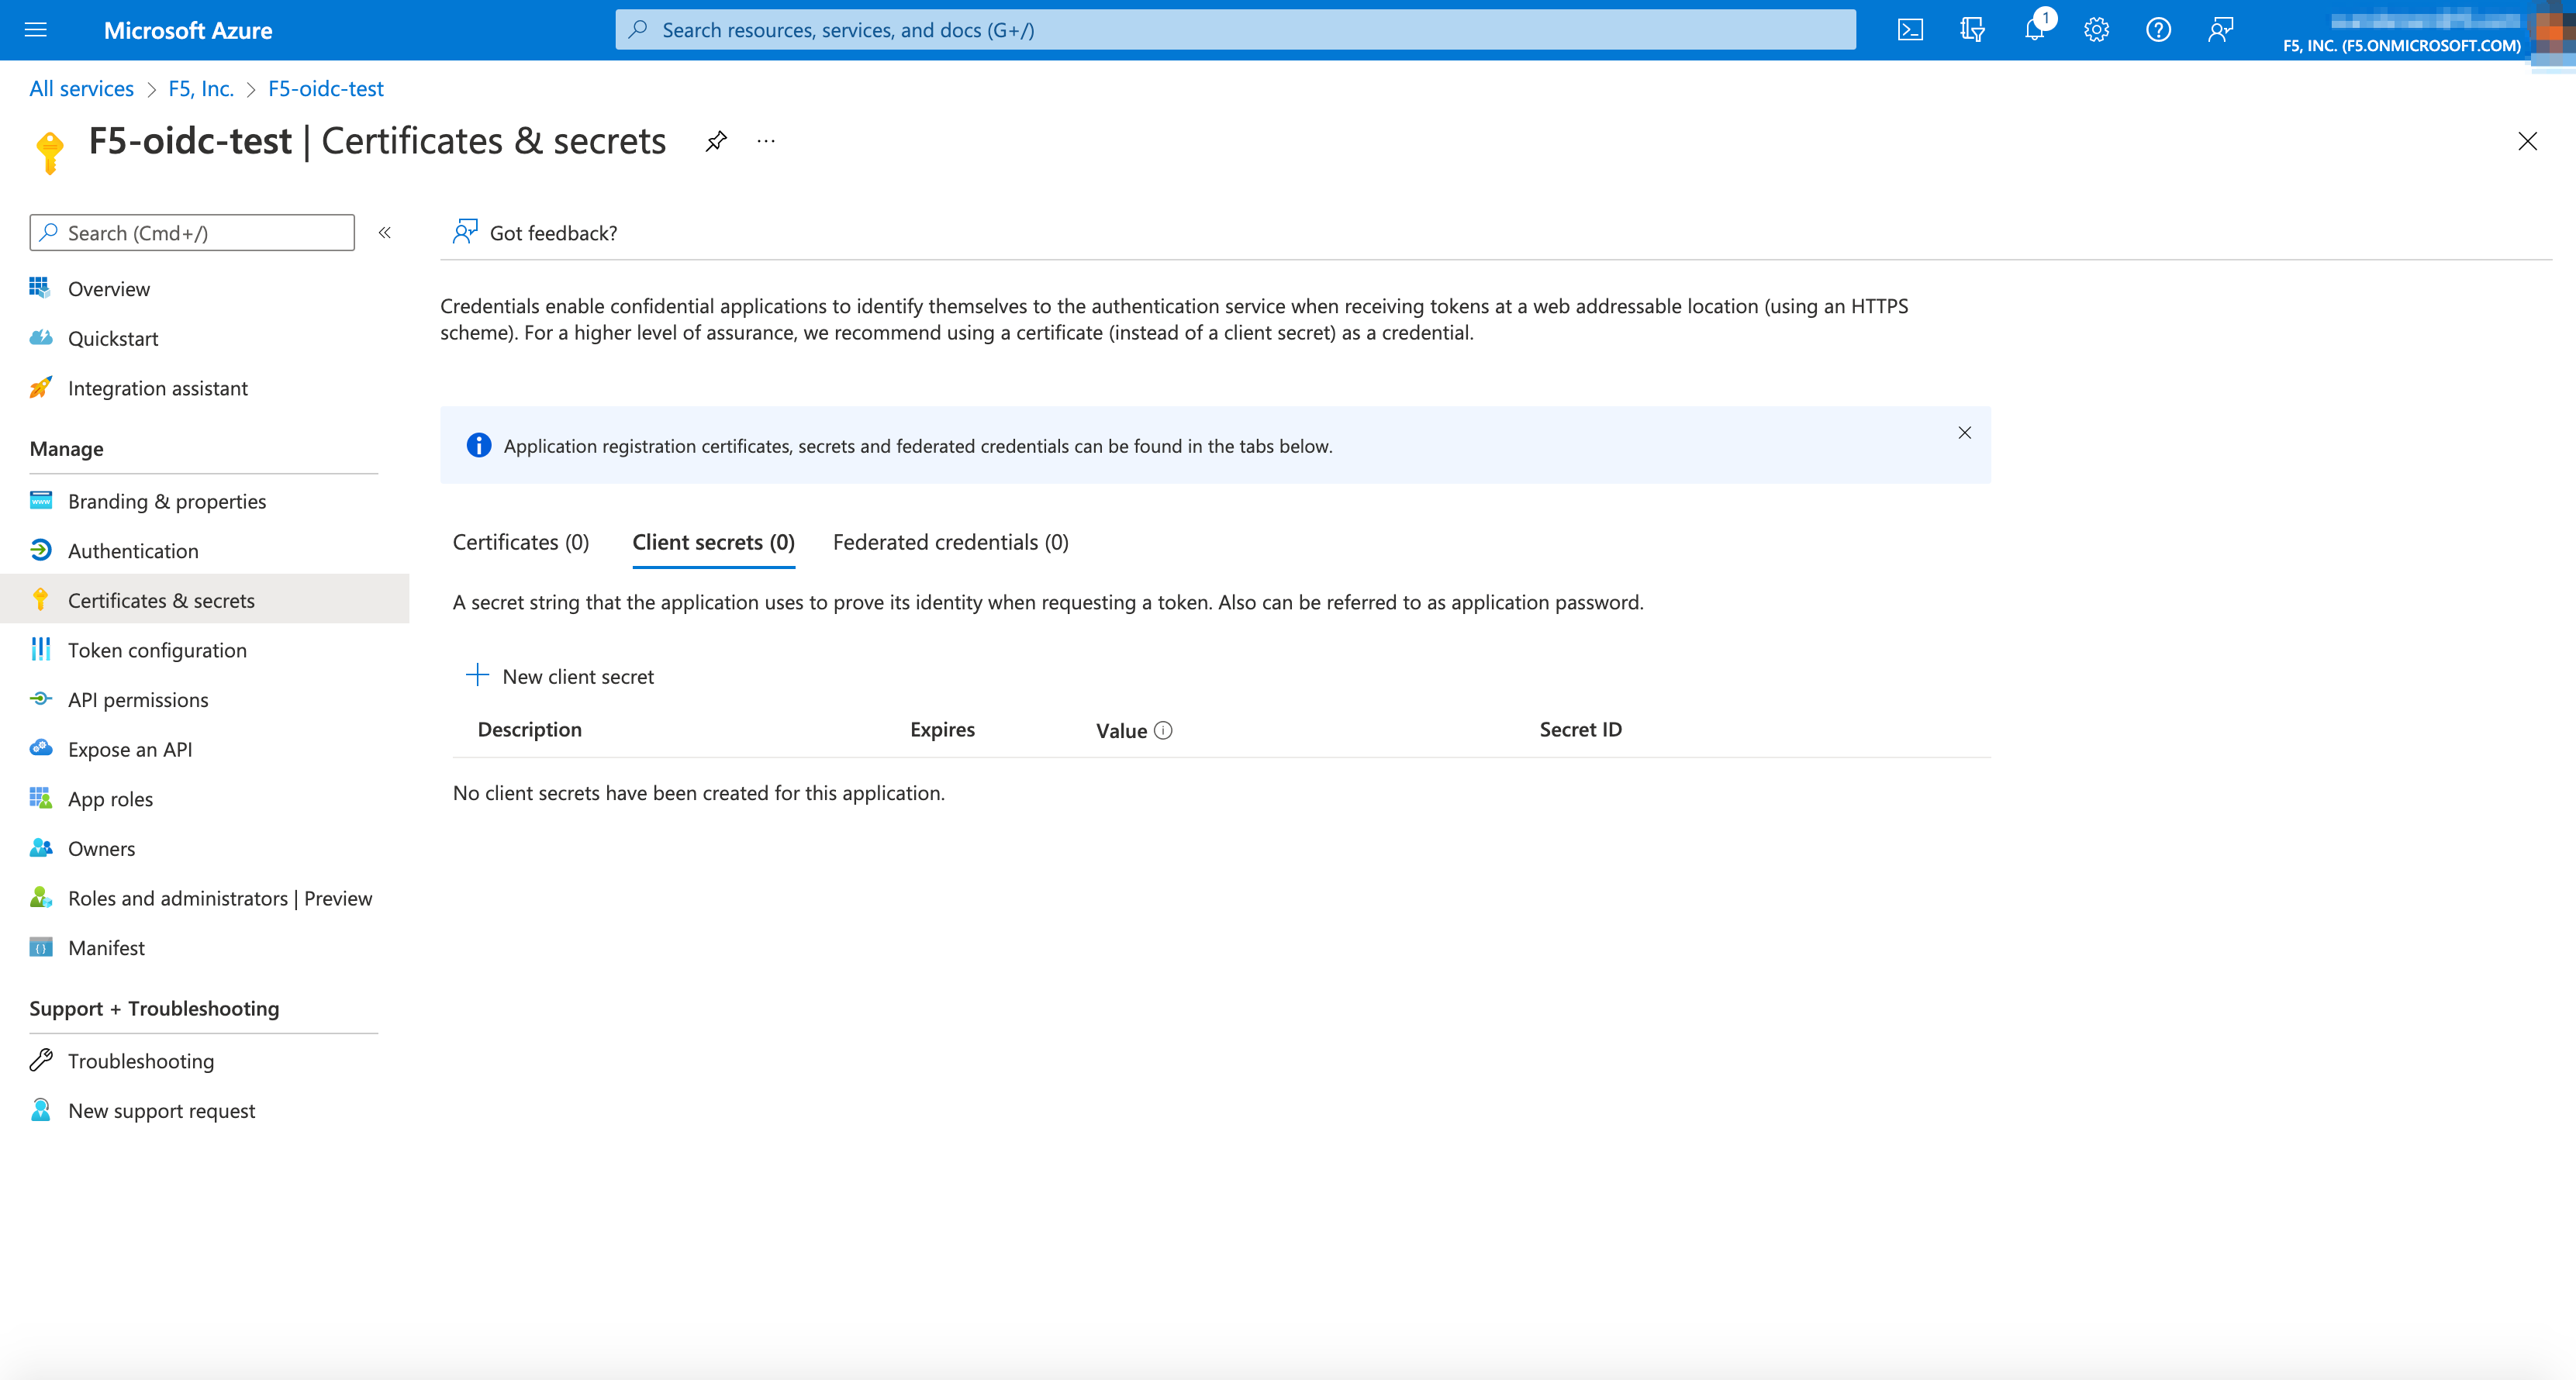
Figure: Create Client Secret
Step 5: Obtain a well-known URL.
Well-known URL describes a metadata document that contains most of the information required for an app to perform sign-in. This includes information such as the URLs to use and the location of the service's public signing keys. The same can be obtained using:
https://login.microsoftonline.com/{tenant}/.well-known/openid-configuration-
In App registrations > select Owned Applications > select Endpoints.
-
Copy the OpenID Connect metadata document URL.
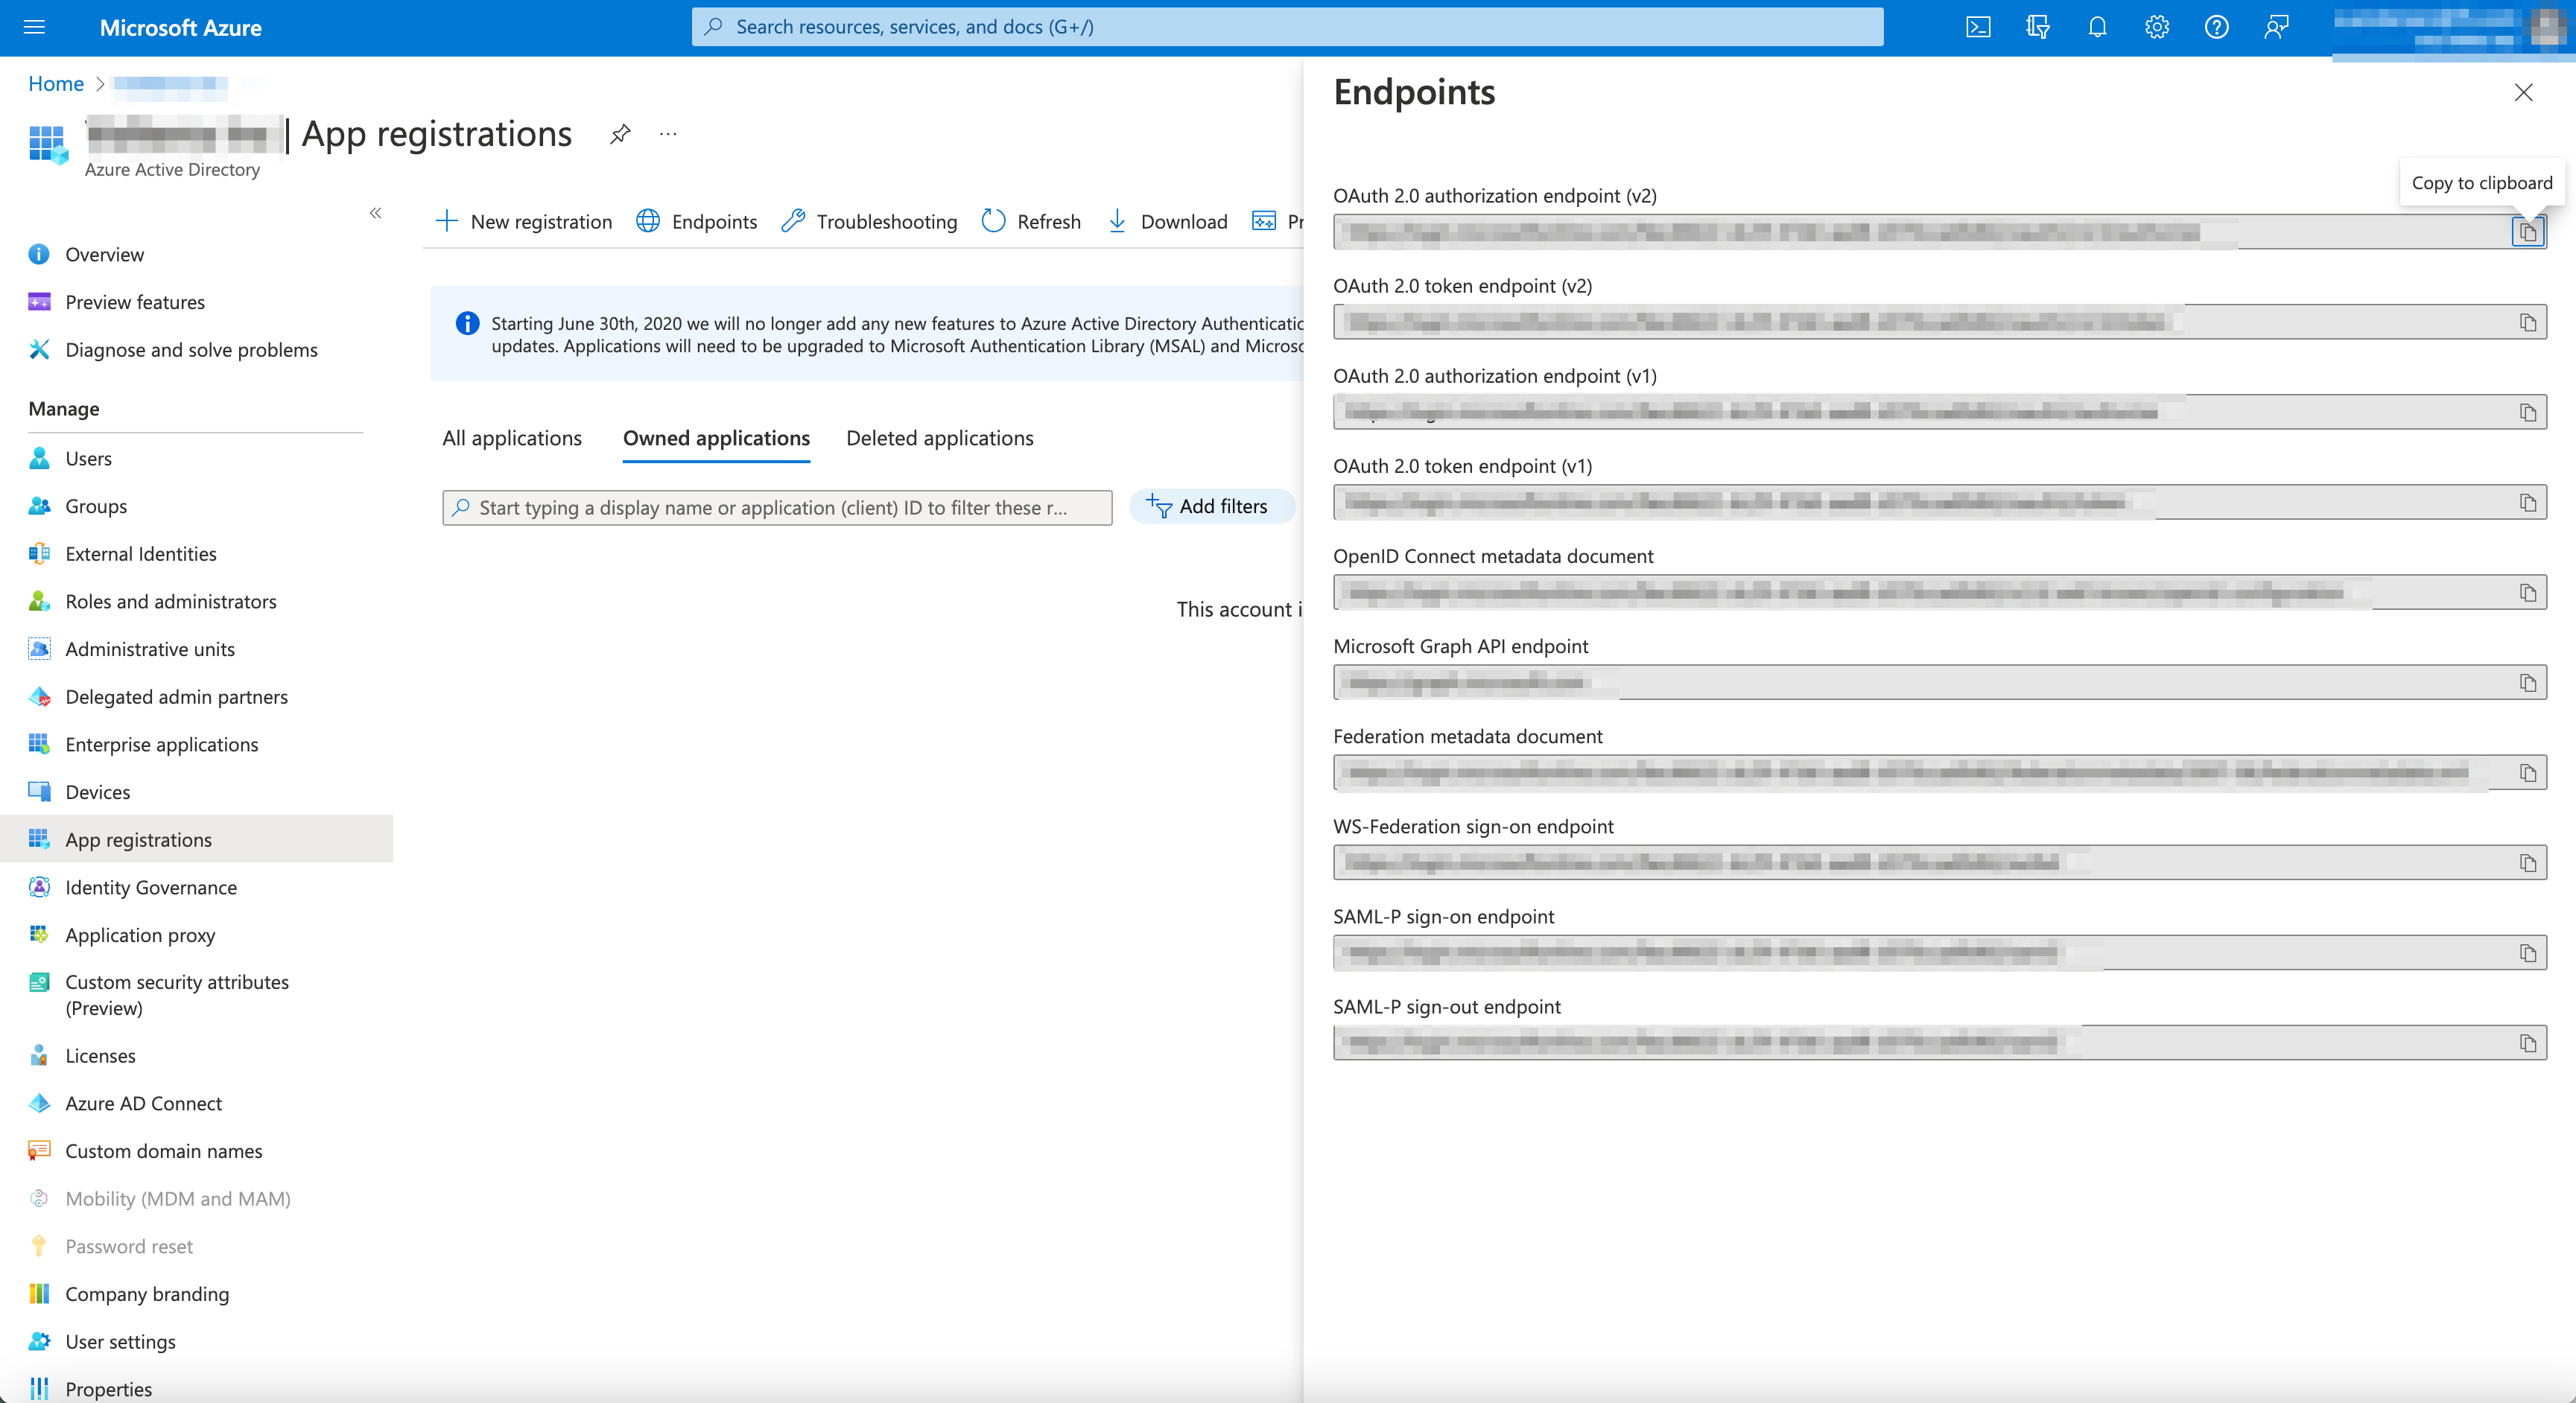
Figure: Homepage
- Import into SSO settings in F5 console.
Note: Replace
{tenant}with your Azure tenant ID. You can obtain your tenant from the Azure cloud portal by navigating to Microsoft Entra ID > Overview screen.
Step 6: Log into F5 Distributed Cloud Console, start configuring SSO.
- Open F5 Distributed Cloud Console home page, select Administration box.
Note: Home page is role based, and your home page may look different due to your role customization. Select All Services drop-down menu to discover all options. Customize Settings: Administration > Personal Management > My Account > Edit work domain & skills button > Advanced box > check Work Domain boxes > Save changes button.
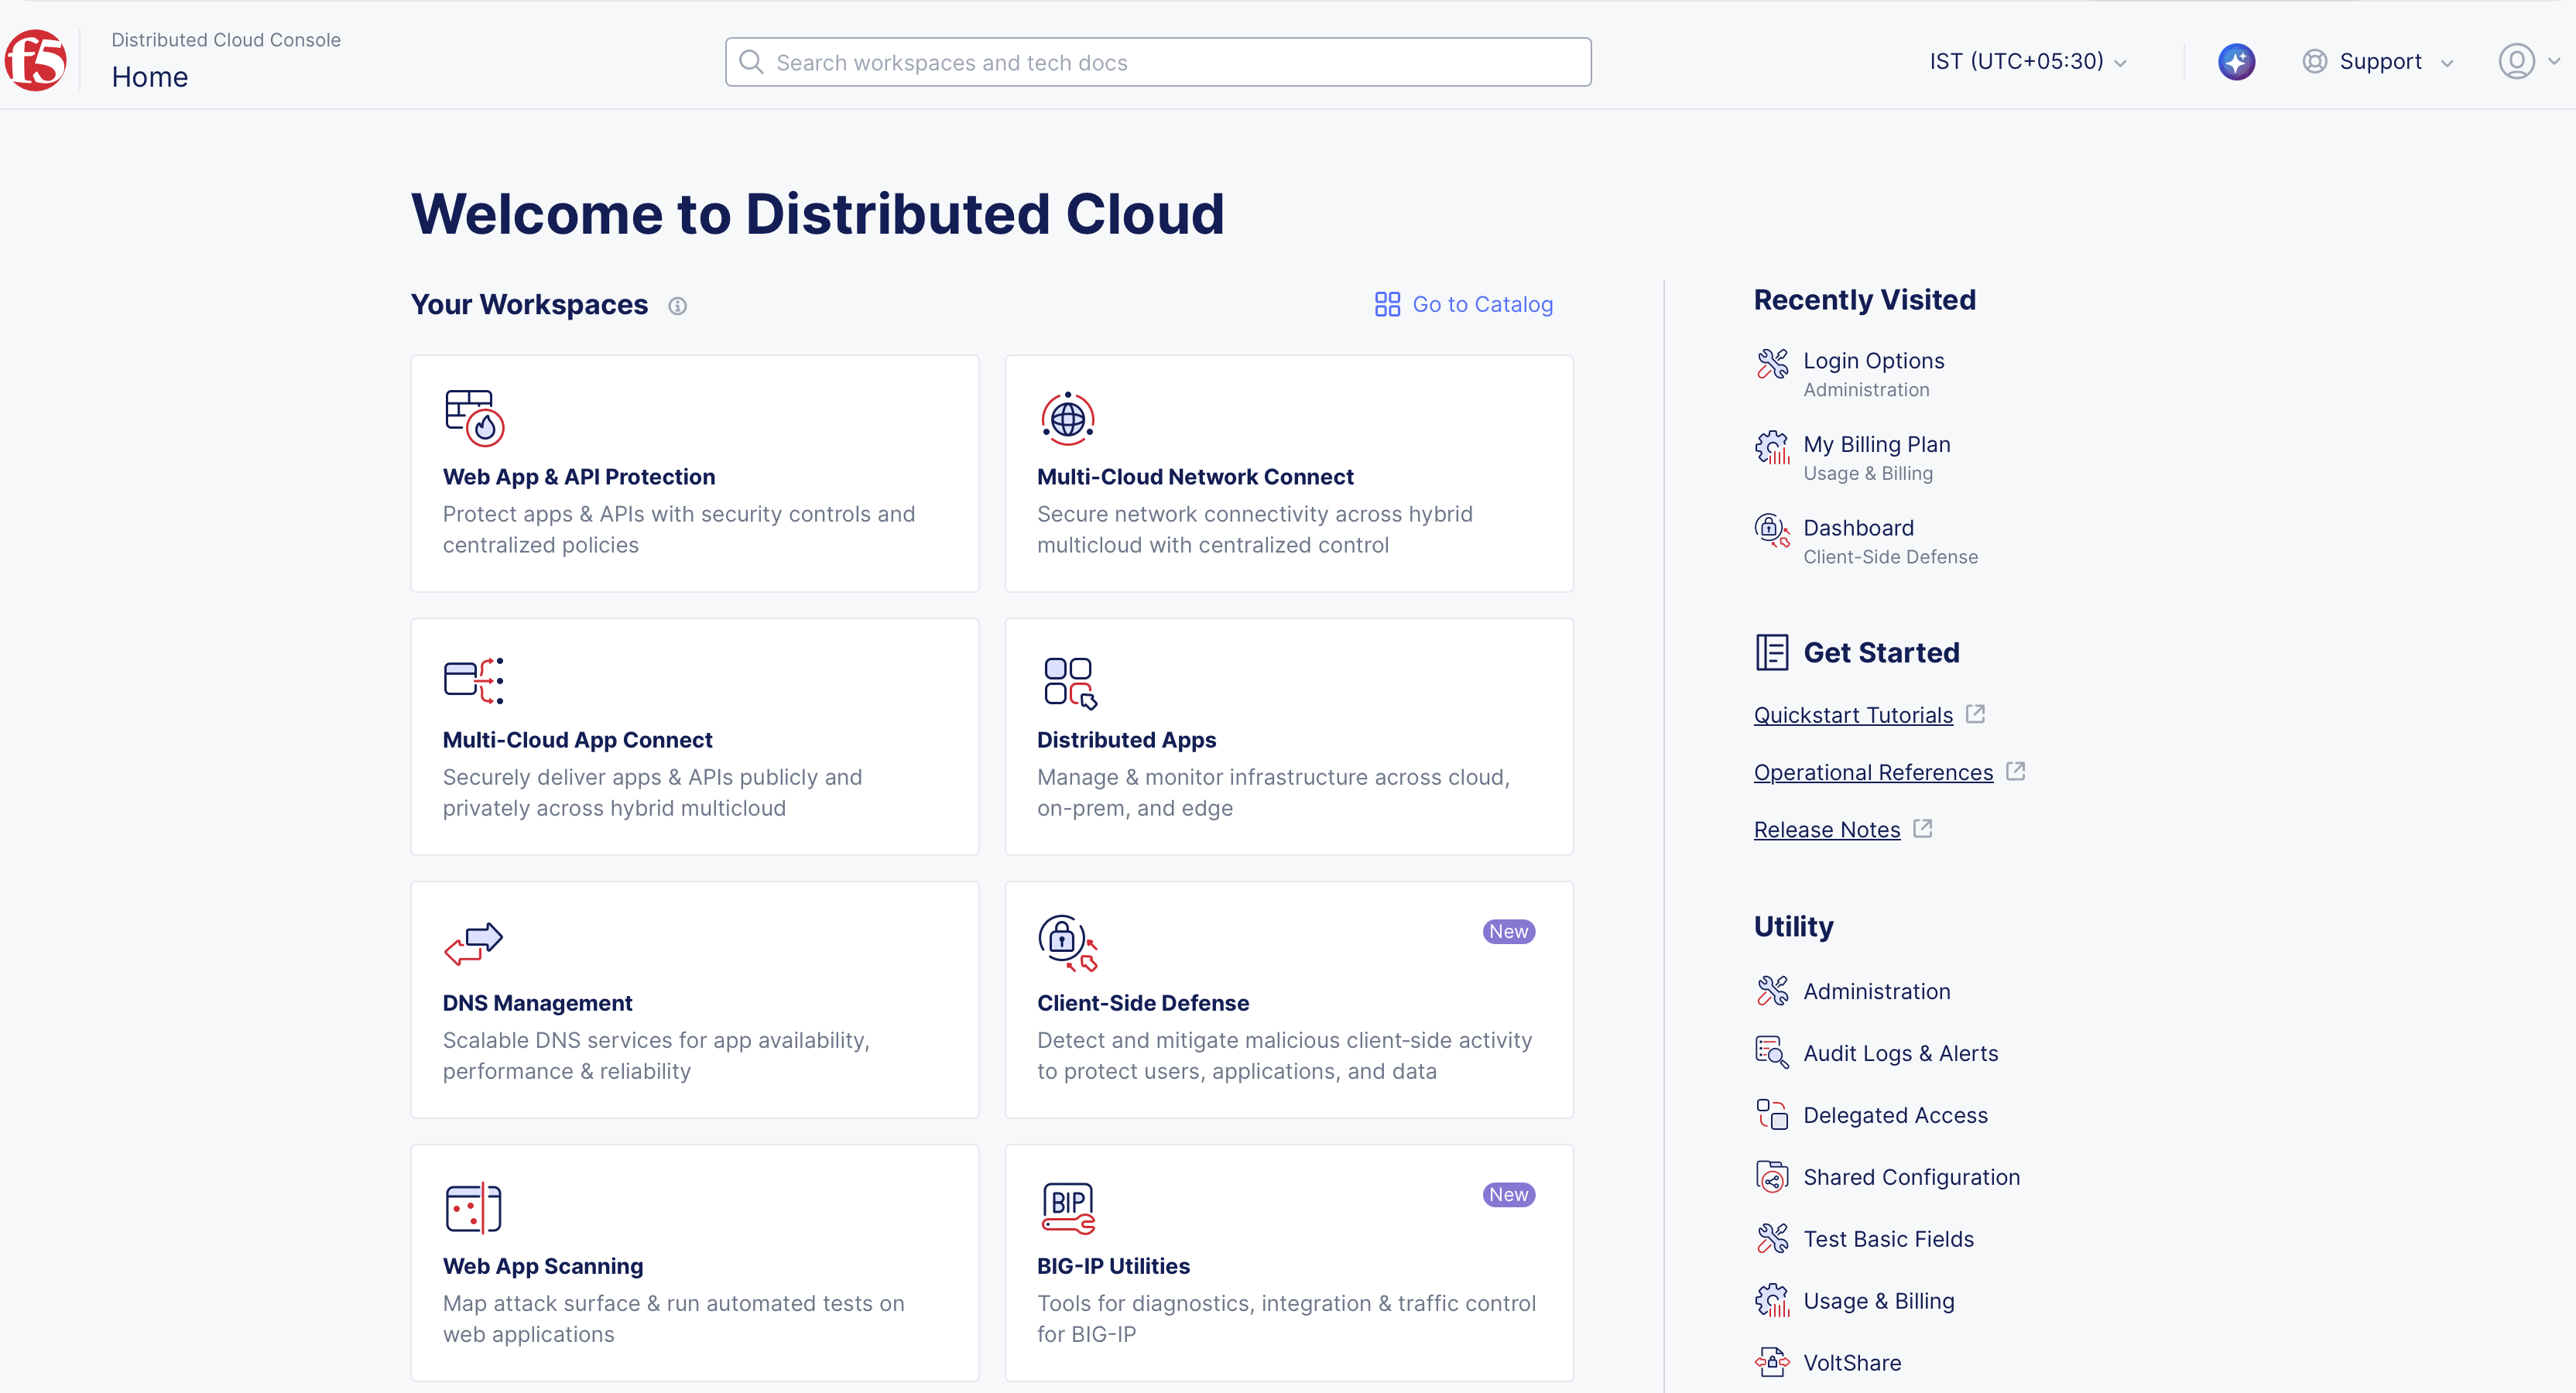
Figure: Home page
Note: Confirm Namespace feature is in correct namespace, drop-down selector located in upper-left corner. Not available in all services.
- Select Tenant Settings in left column menu > select Login Options.
Note: If options are not showing available, select Show link in Advanced nav options visible in bottom left corner. If needed, select Hide to minimize options from Advanced nav options mode.
- Select Set up SSO button.
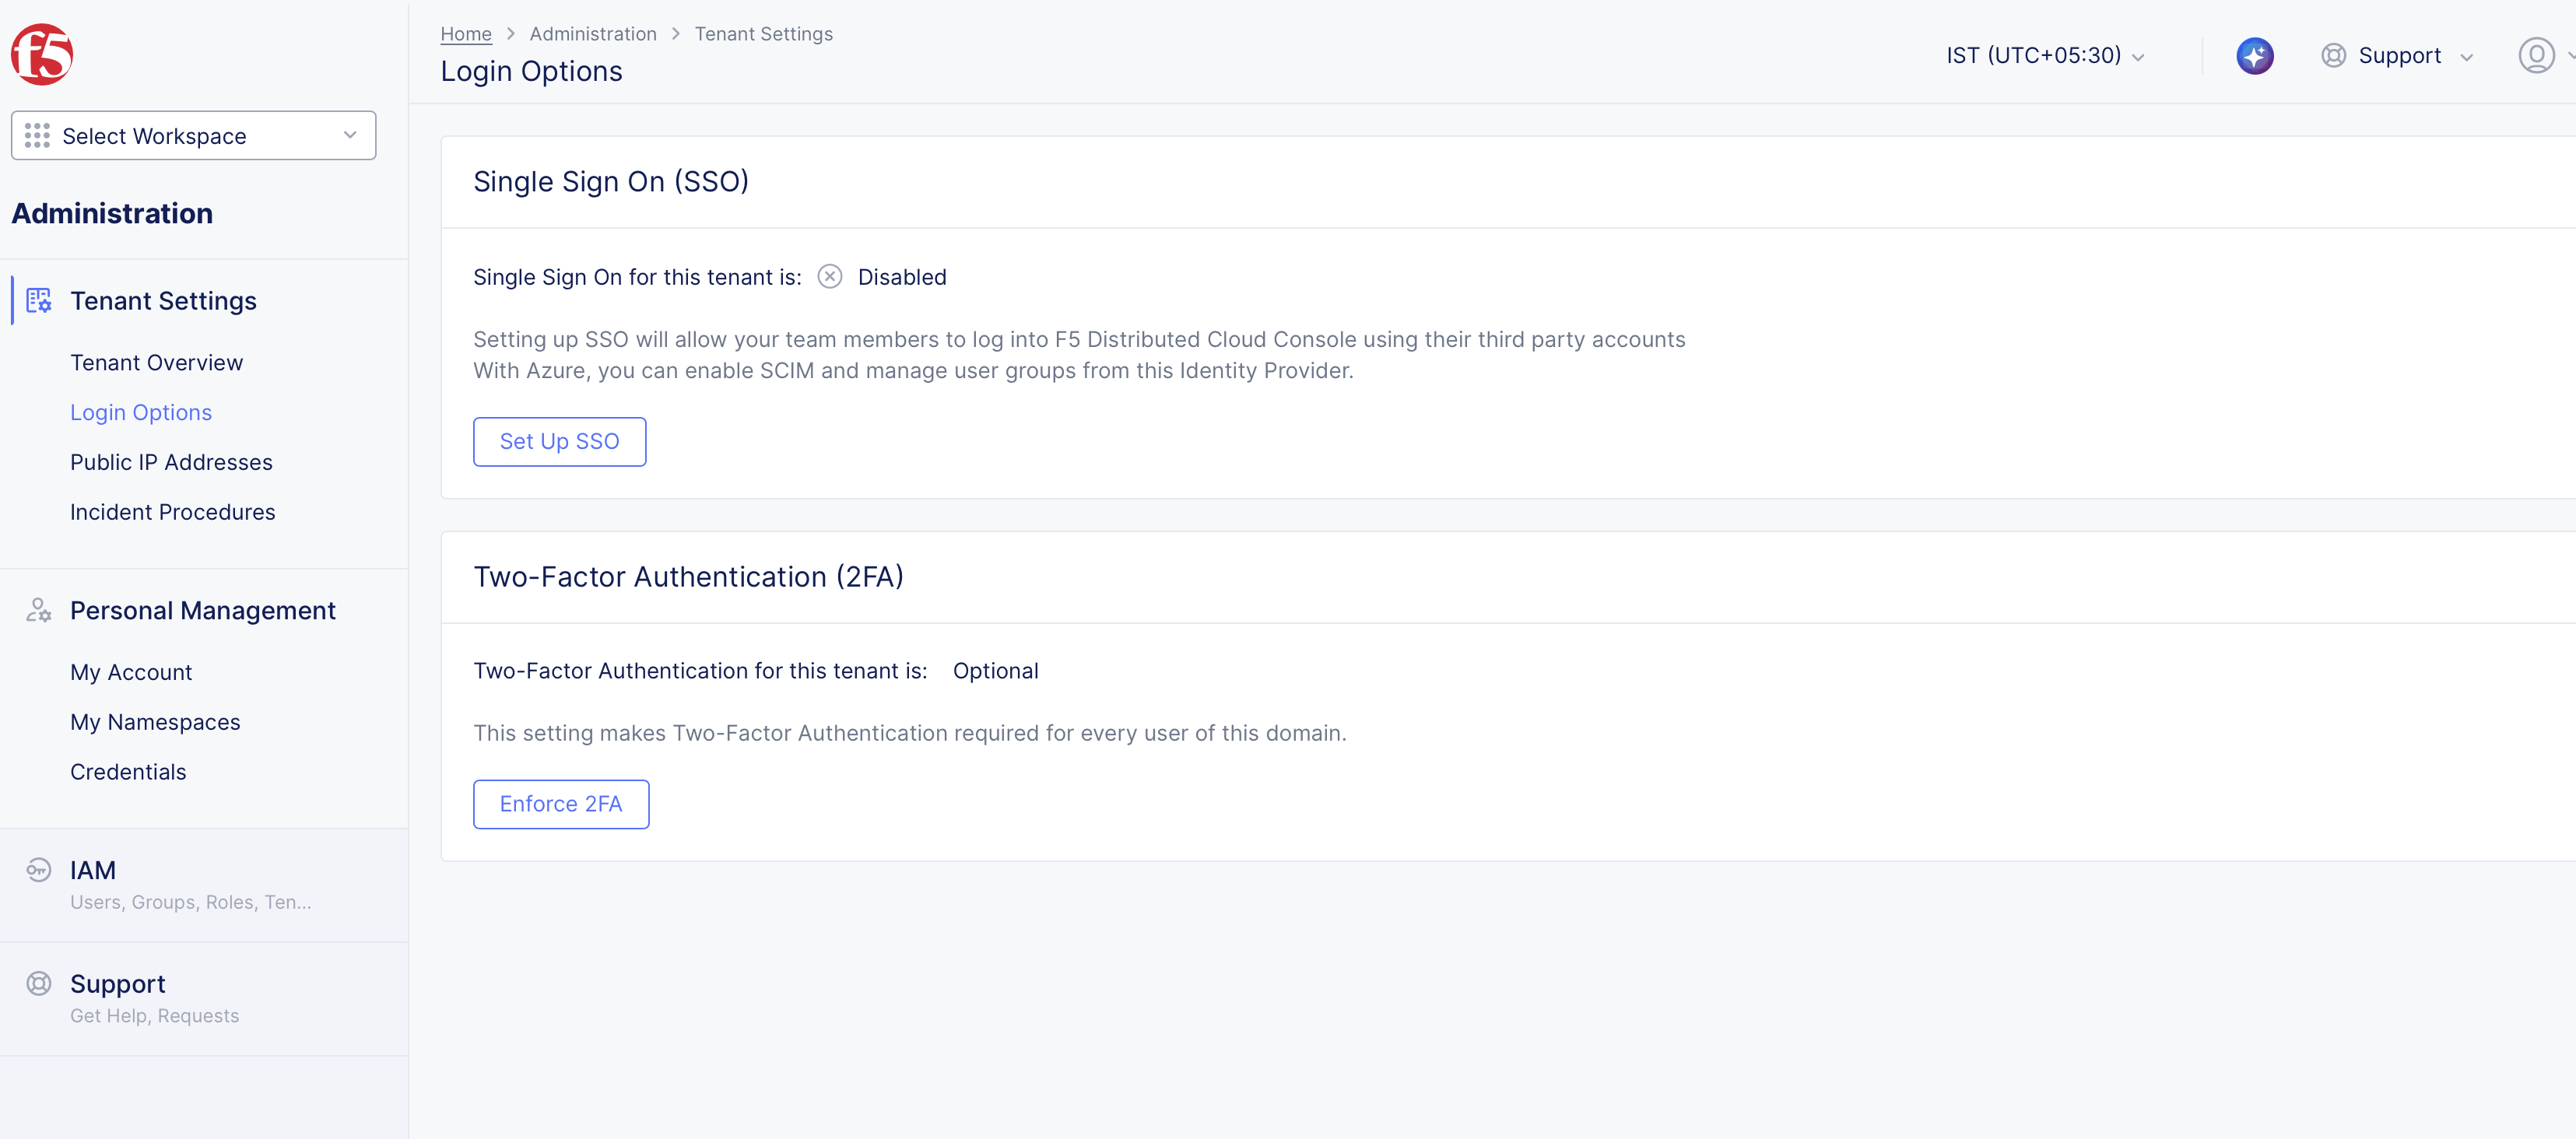
Figure: Set up SSO
-
Select Azure in Select Service Provider in pop-up window.
-
Select Continue button.
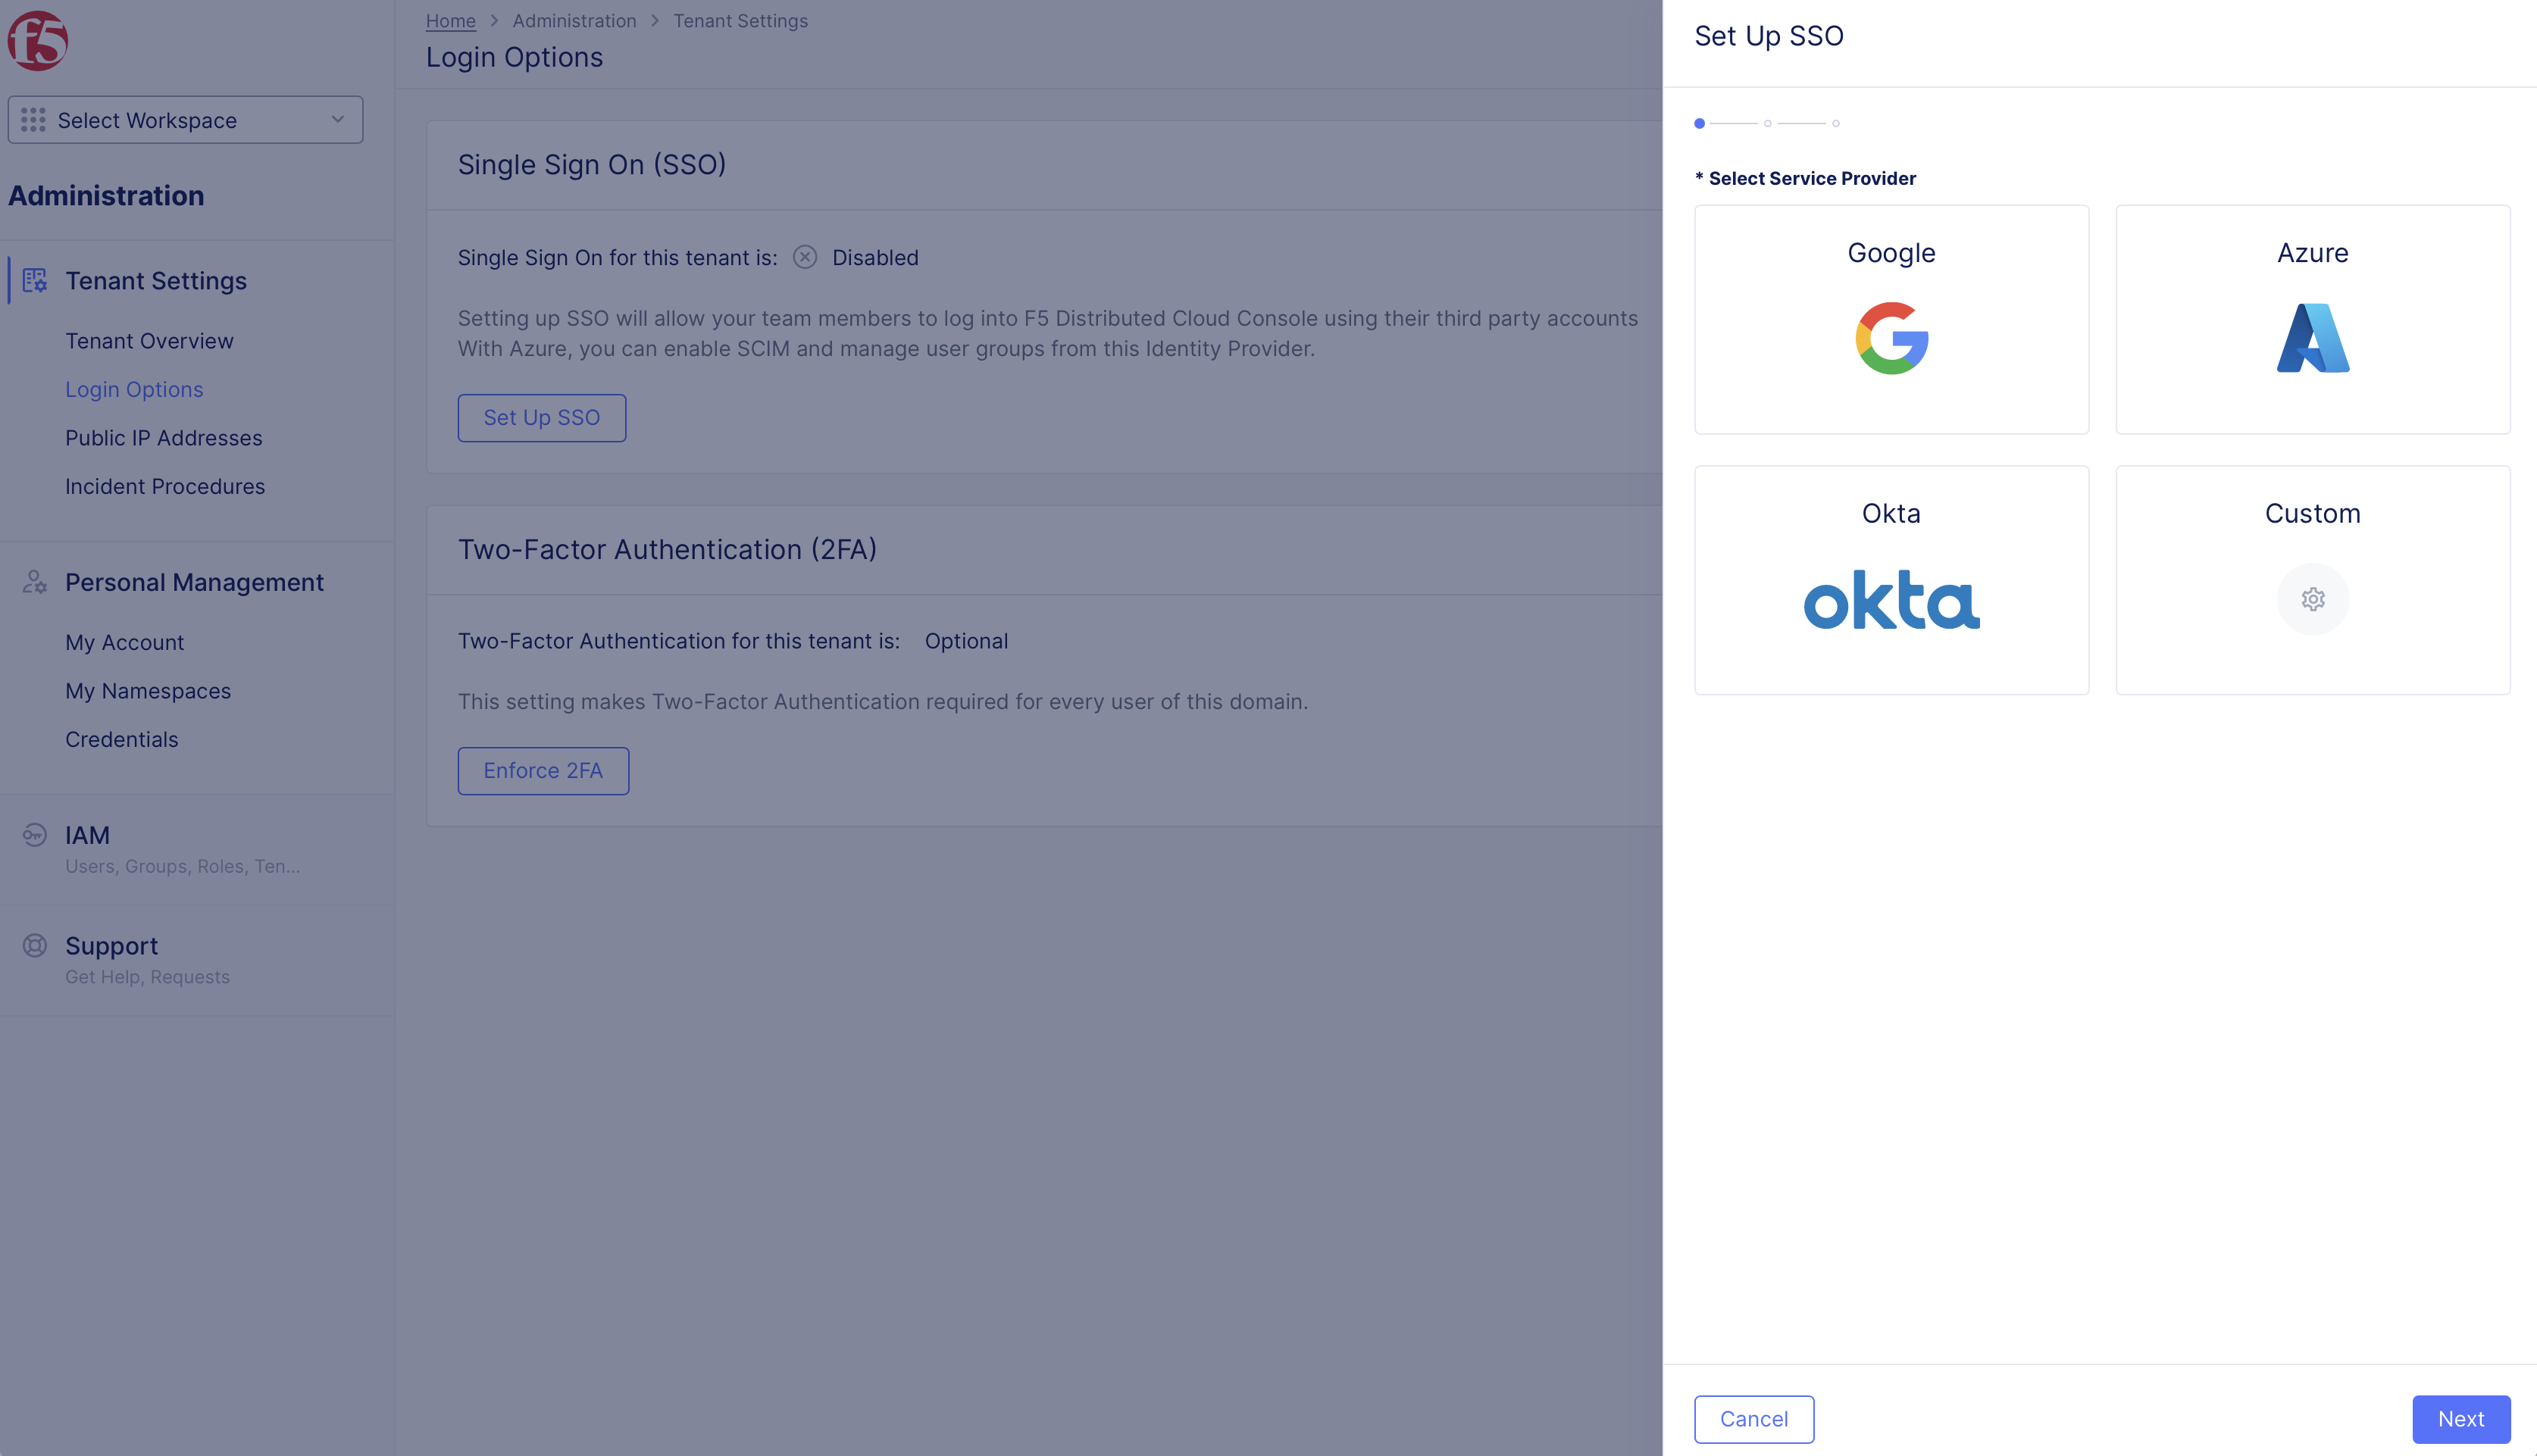
Figure: SSO Setup Page
Step 7: Configure Client ID, Authorization Code Flow, Client Authentication Method, Client Secret, and default scopes for Azure.
-
Provide Client ID obtained from previous steps.
-
Configure Basic Authorization under Authorization Code Flow. You can now configure Proof Key for Code Exchange (PKCE) as an alternative to the standard authorization code flow.
-
Provide Client Secret under Client Authentication Method. You can now use private key JSON Web Token (JWT) for client authentication as a more secure alternative to a basic client secret.
-
Enter Default Scopes.
Note: Multiple scope values are used by creating a space delimited, because it is the OIDC standard specification by IETF although we do handle automatic validation/modification.
Default Scopes: OpenID Connect (OIDC) introduces the concept of "scopes" from OAuth 2.0. A scope is a way to limit the amount of information and access given to an application. When a client application wants to access resources on behalf of a user, it requests specific scopes. These scopes inform the user of the type of access the application is requesting during the authorization process.
F5 Distributed Cloud recommends default scopes of openid profile email NOT openidprofileemail.
Note: Multiple scope values are used by creating a Space Delimited during SSO setup in F5 console.
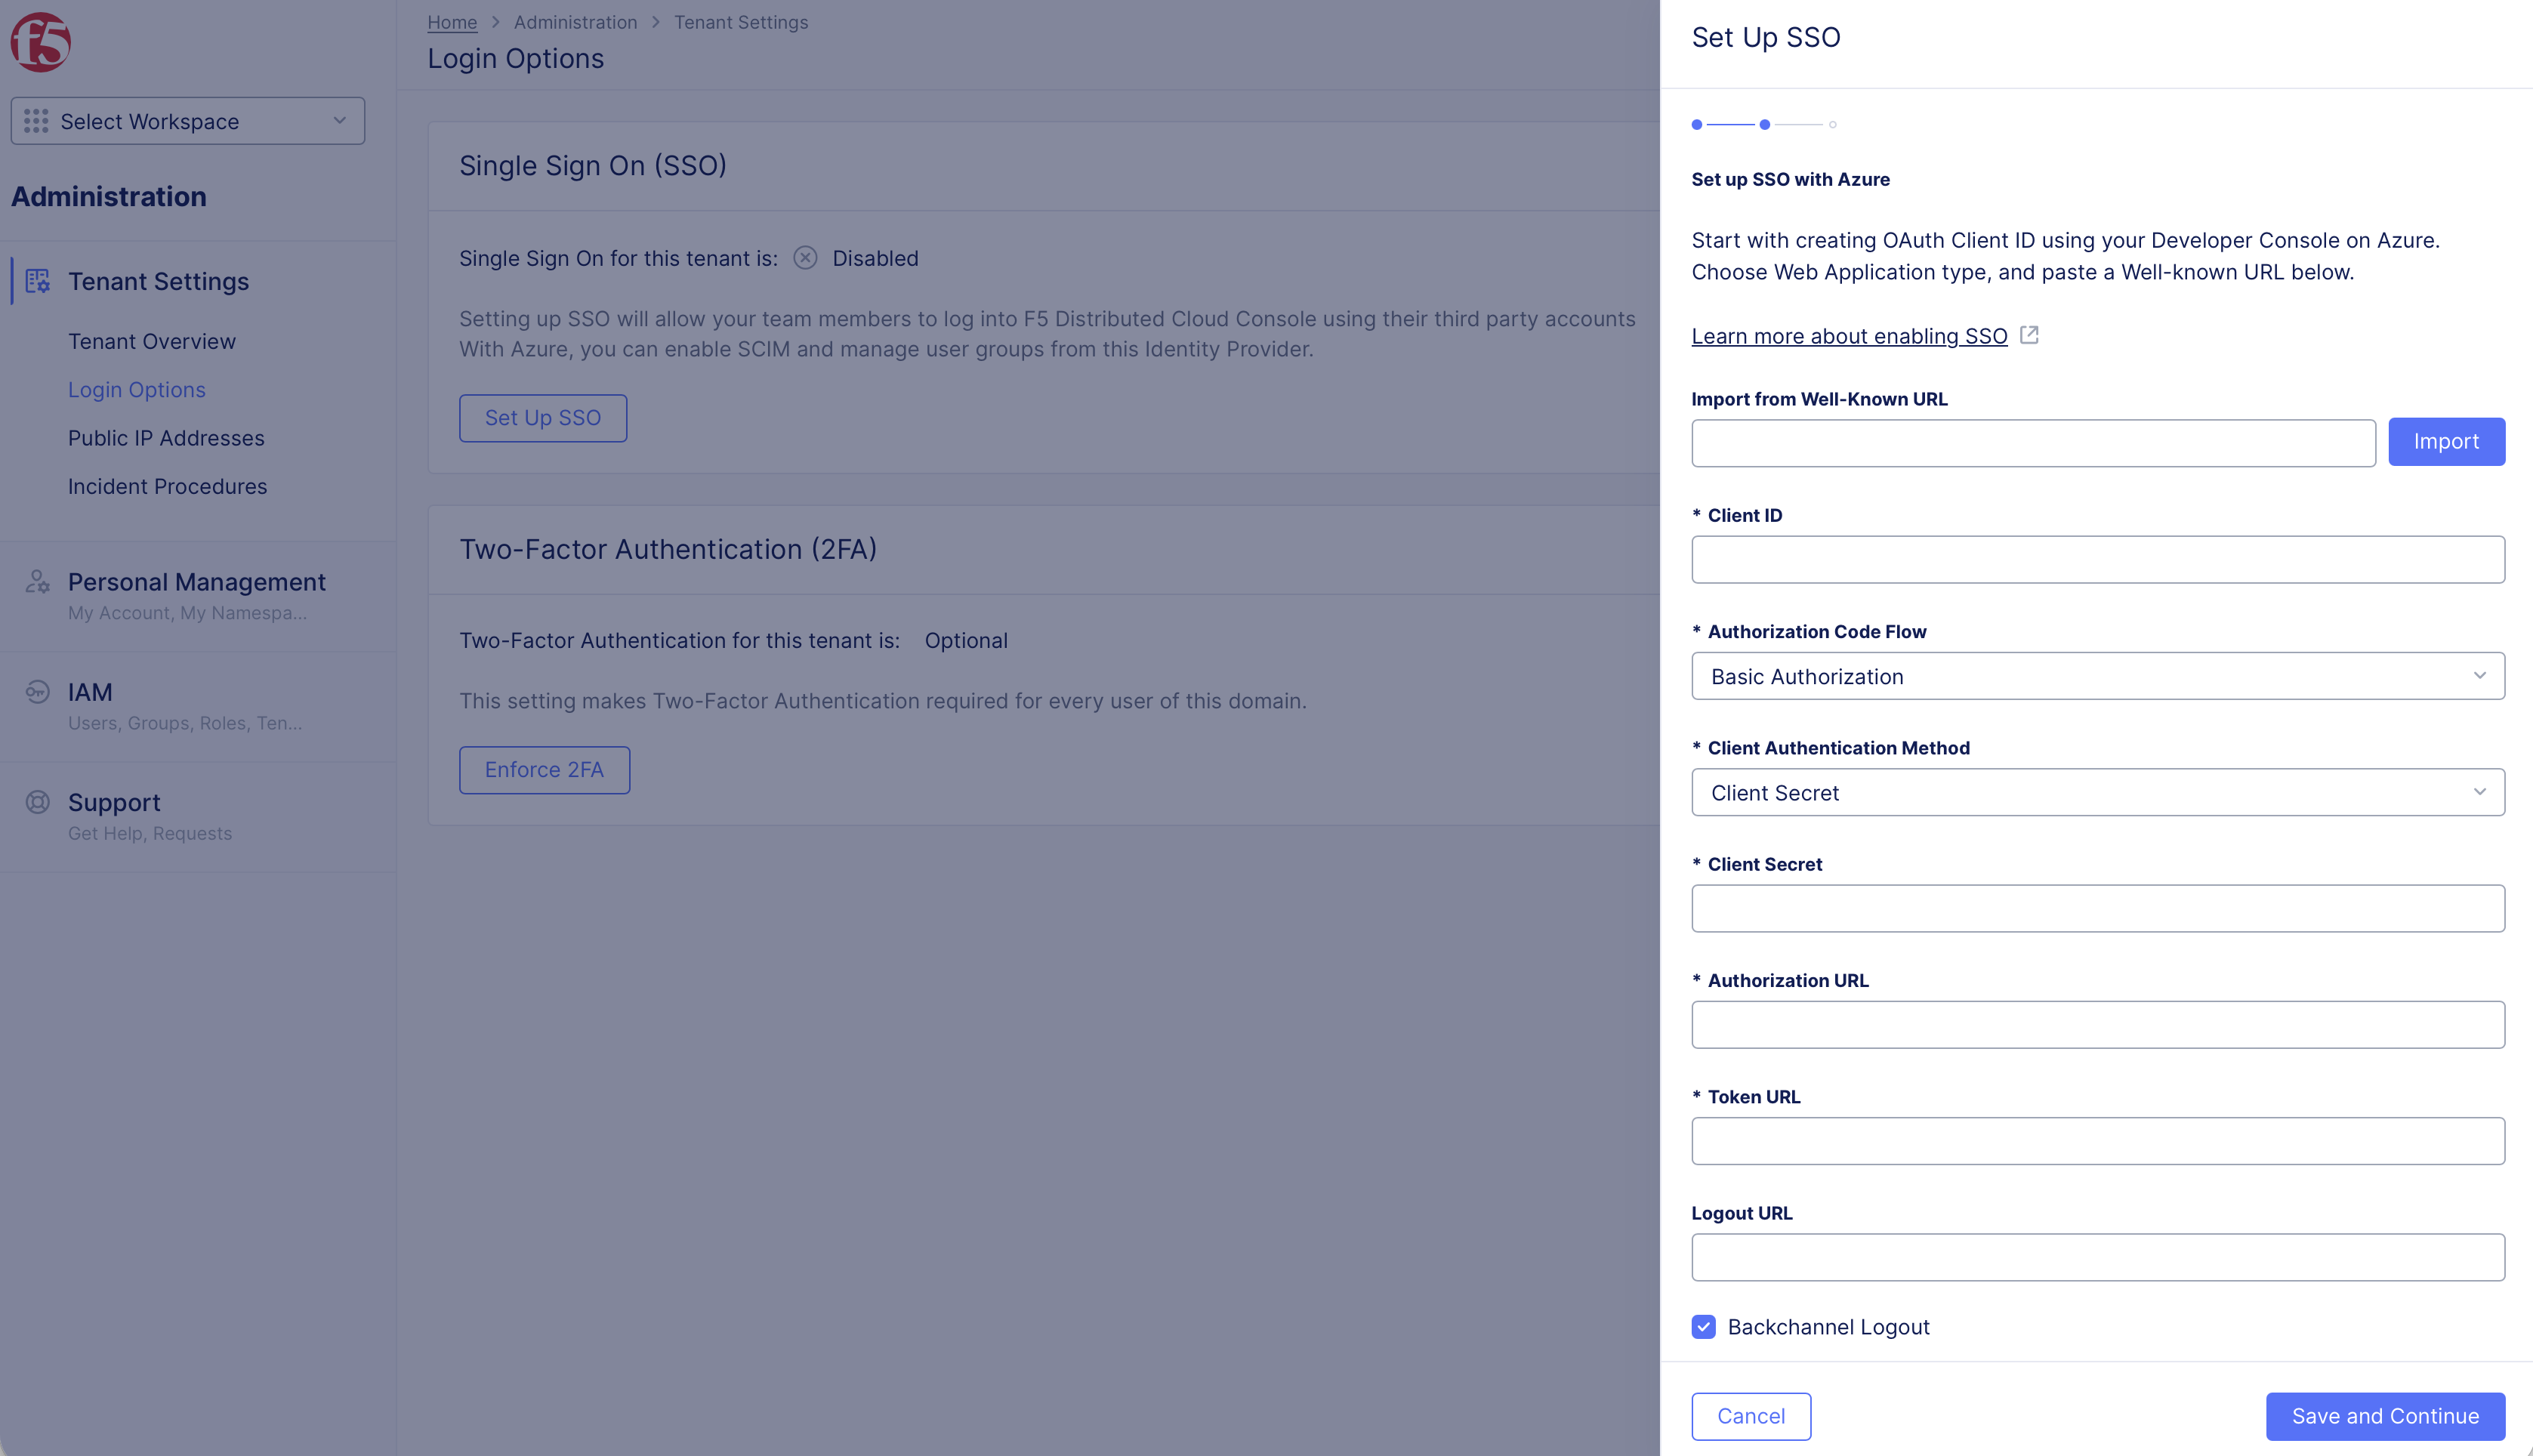
Figure: Default Scopes
Note: Any entered value will be combined with preset value: openid profile email NOT openidprofileemail. Input spaces between words to include multiple scope values. To avoid additional steps with form Update Account Information, confirm ID Token contains family_name (First Name), given_name (Last Name), email (Email Address) in customers IdP. OIDC standard specification by IETF - automatic validation/modification is supported on console, but not suggested in this form.
Step 8: Generate redirect URL.
-
Enter the Well-known URL in Import from well-known URL box.
-
Select Import to populate rest of the fields such as Authorization URL, Token URL and so on.
-
Select Save and Continue to obtain a Redirect URI.
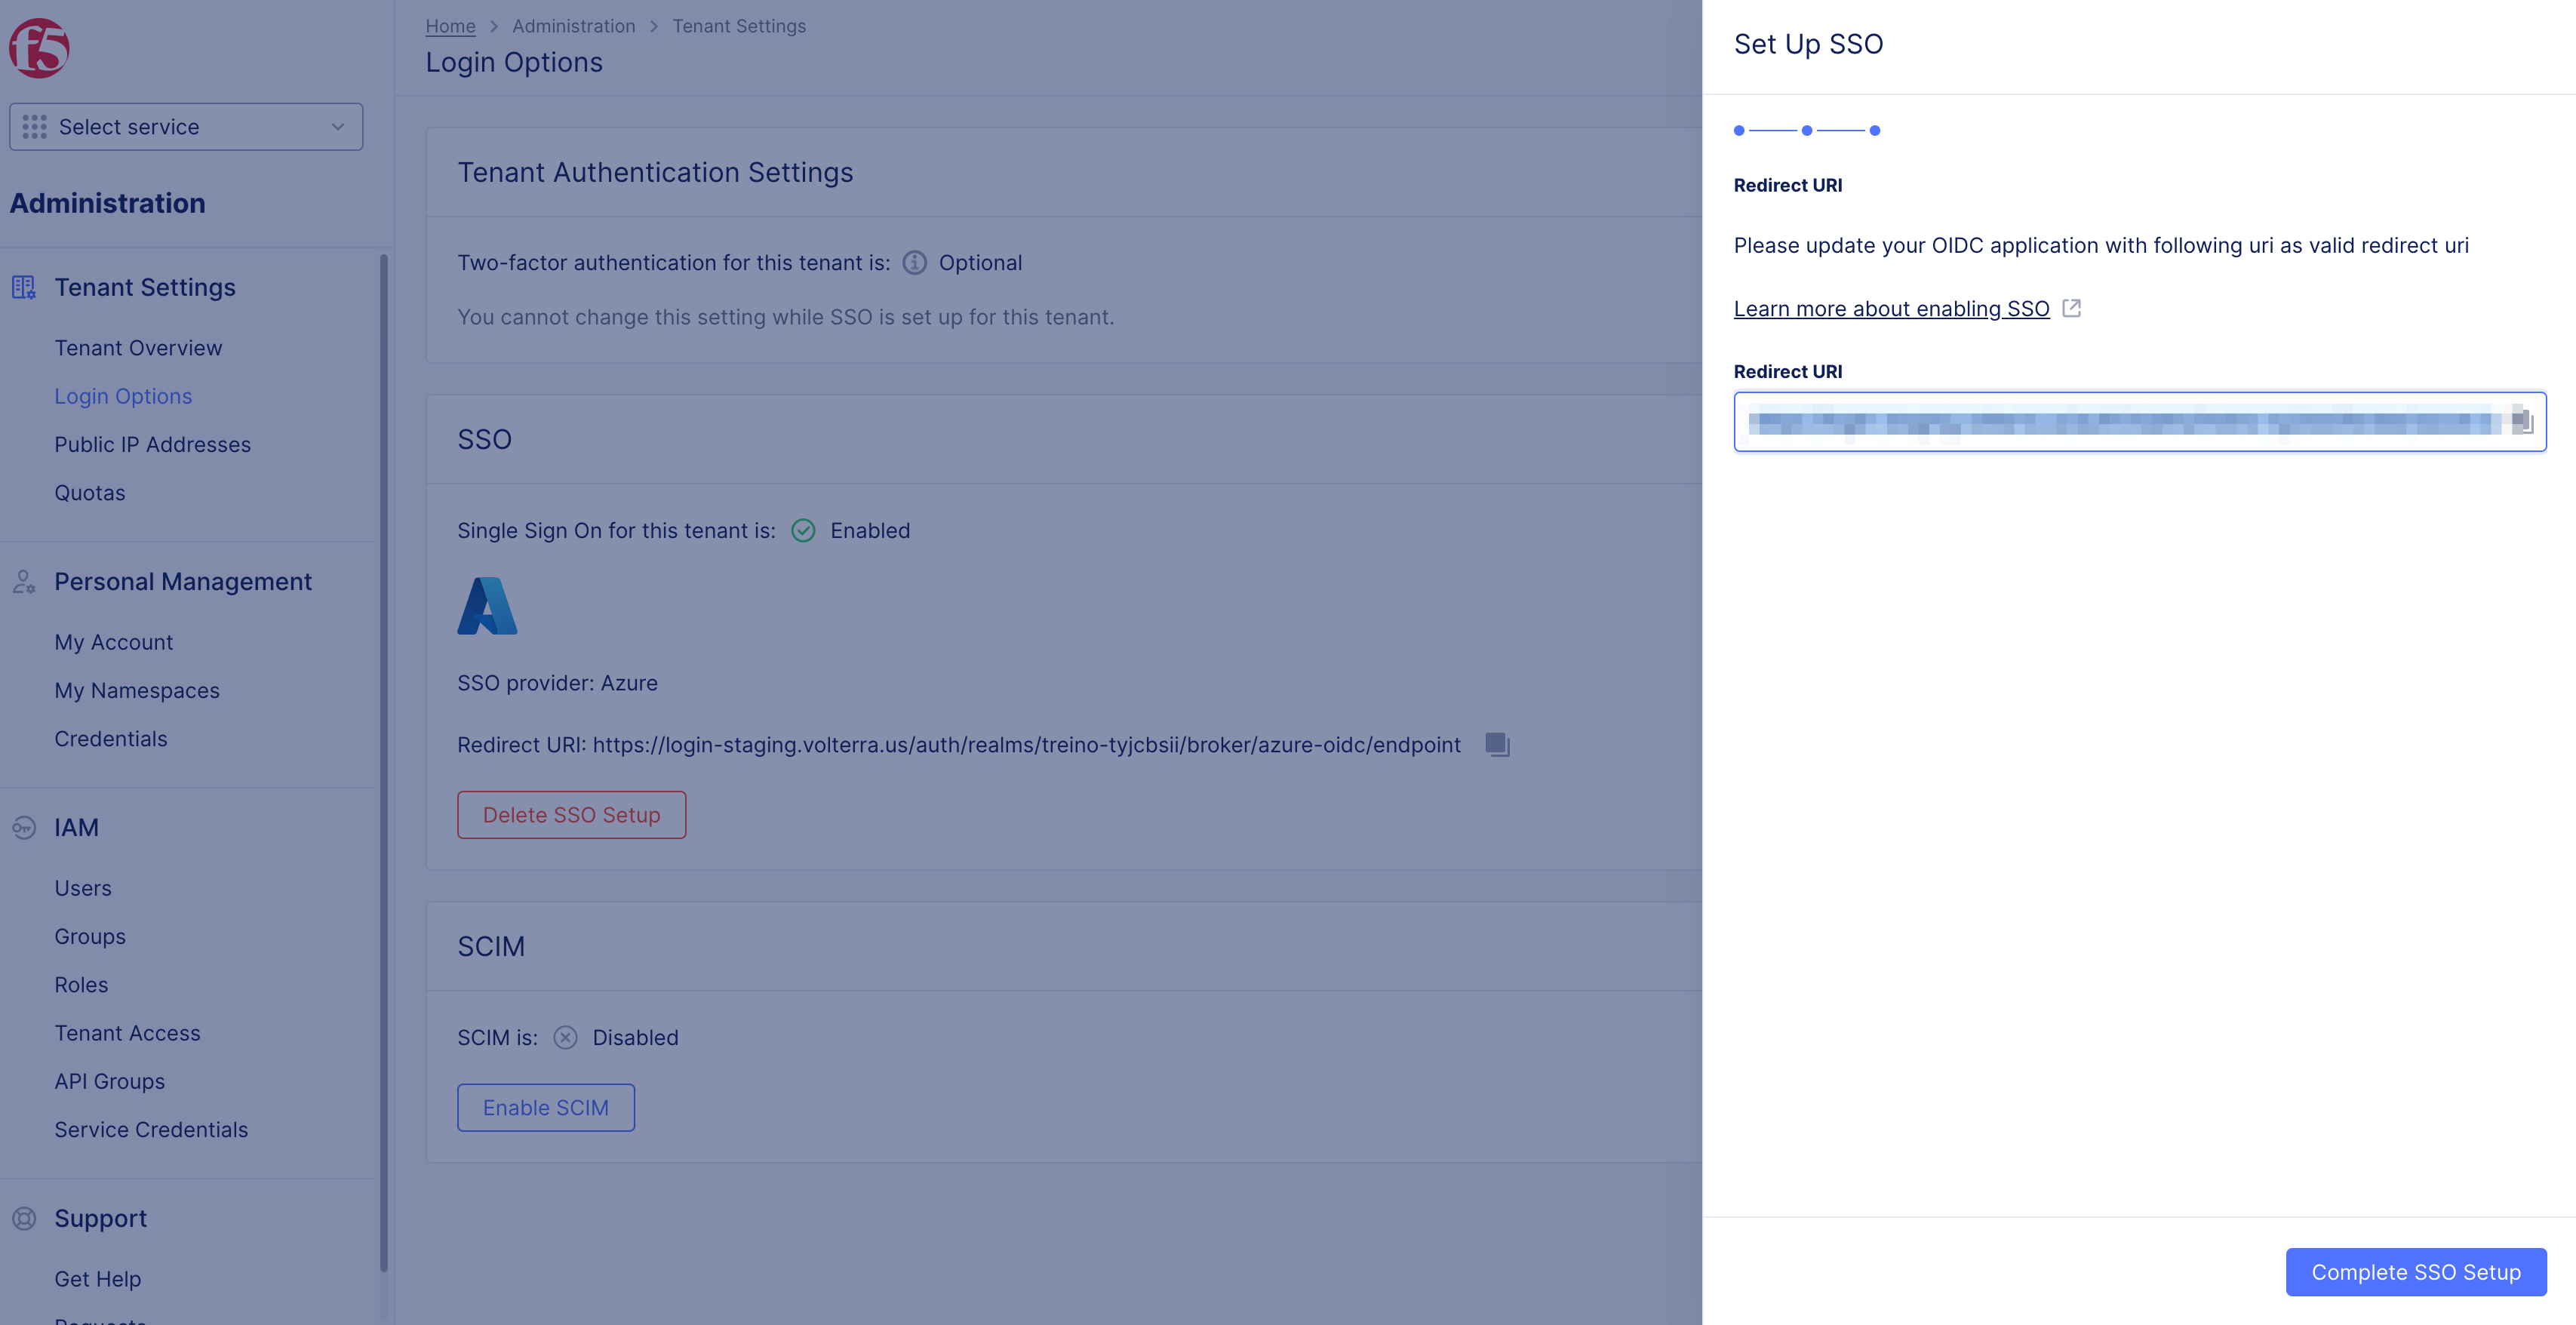
Figure: Redirect URL
Step 9: Complete SSO setup.
-
Copy the displayed redirect URI.
-
Select Done.
Step 10: Add Redirect URI in Microsoft Entra ID.
-
In the Microsoft Entra ID.
-
Select App registrations in left menu.
-
Select the registered application in list F5-oidc-test.
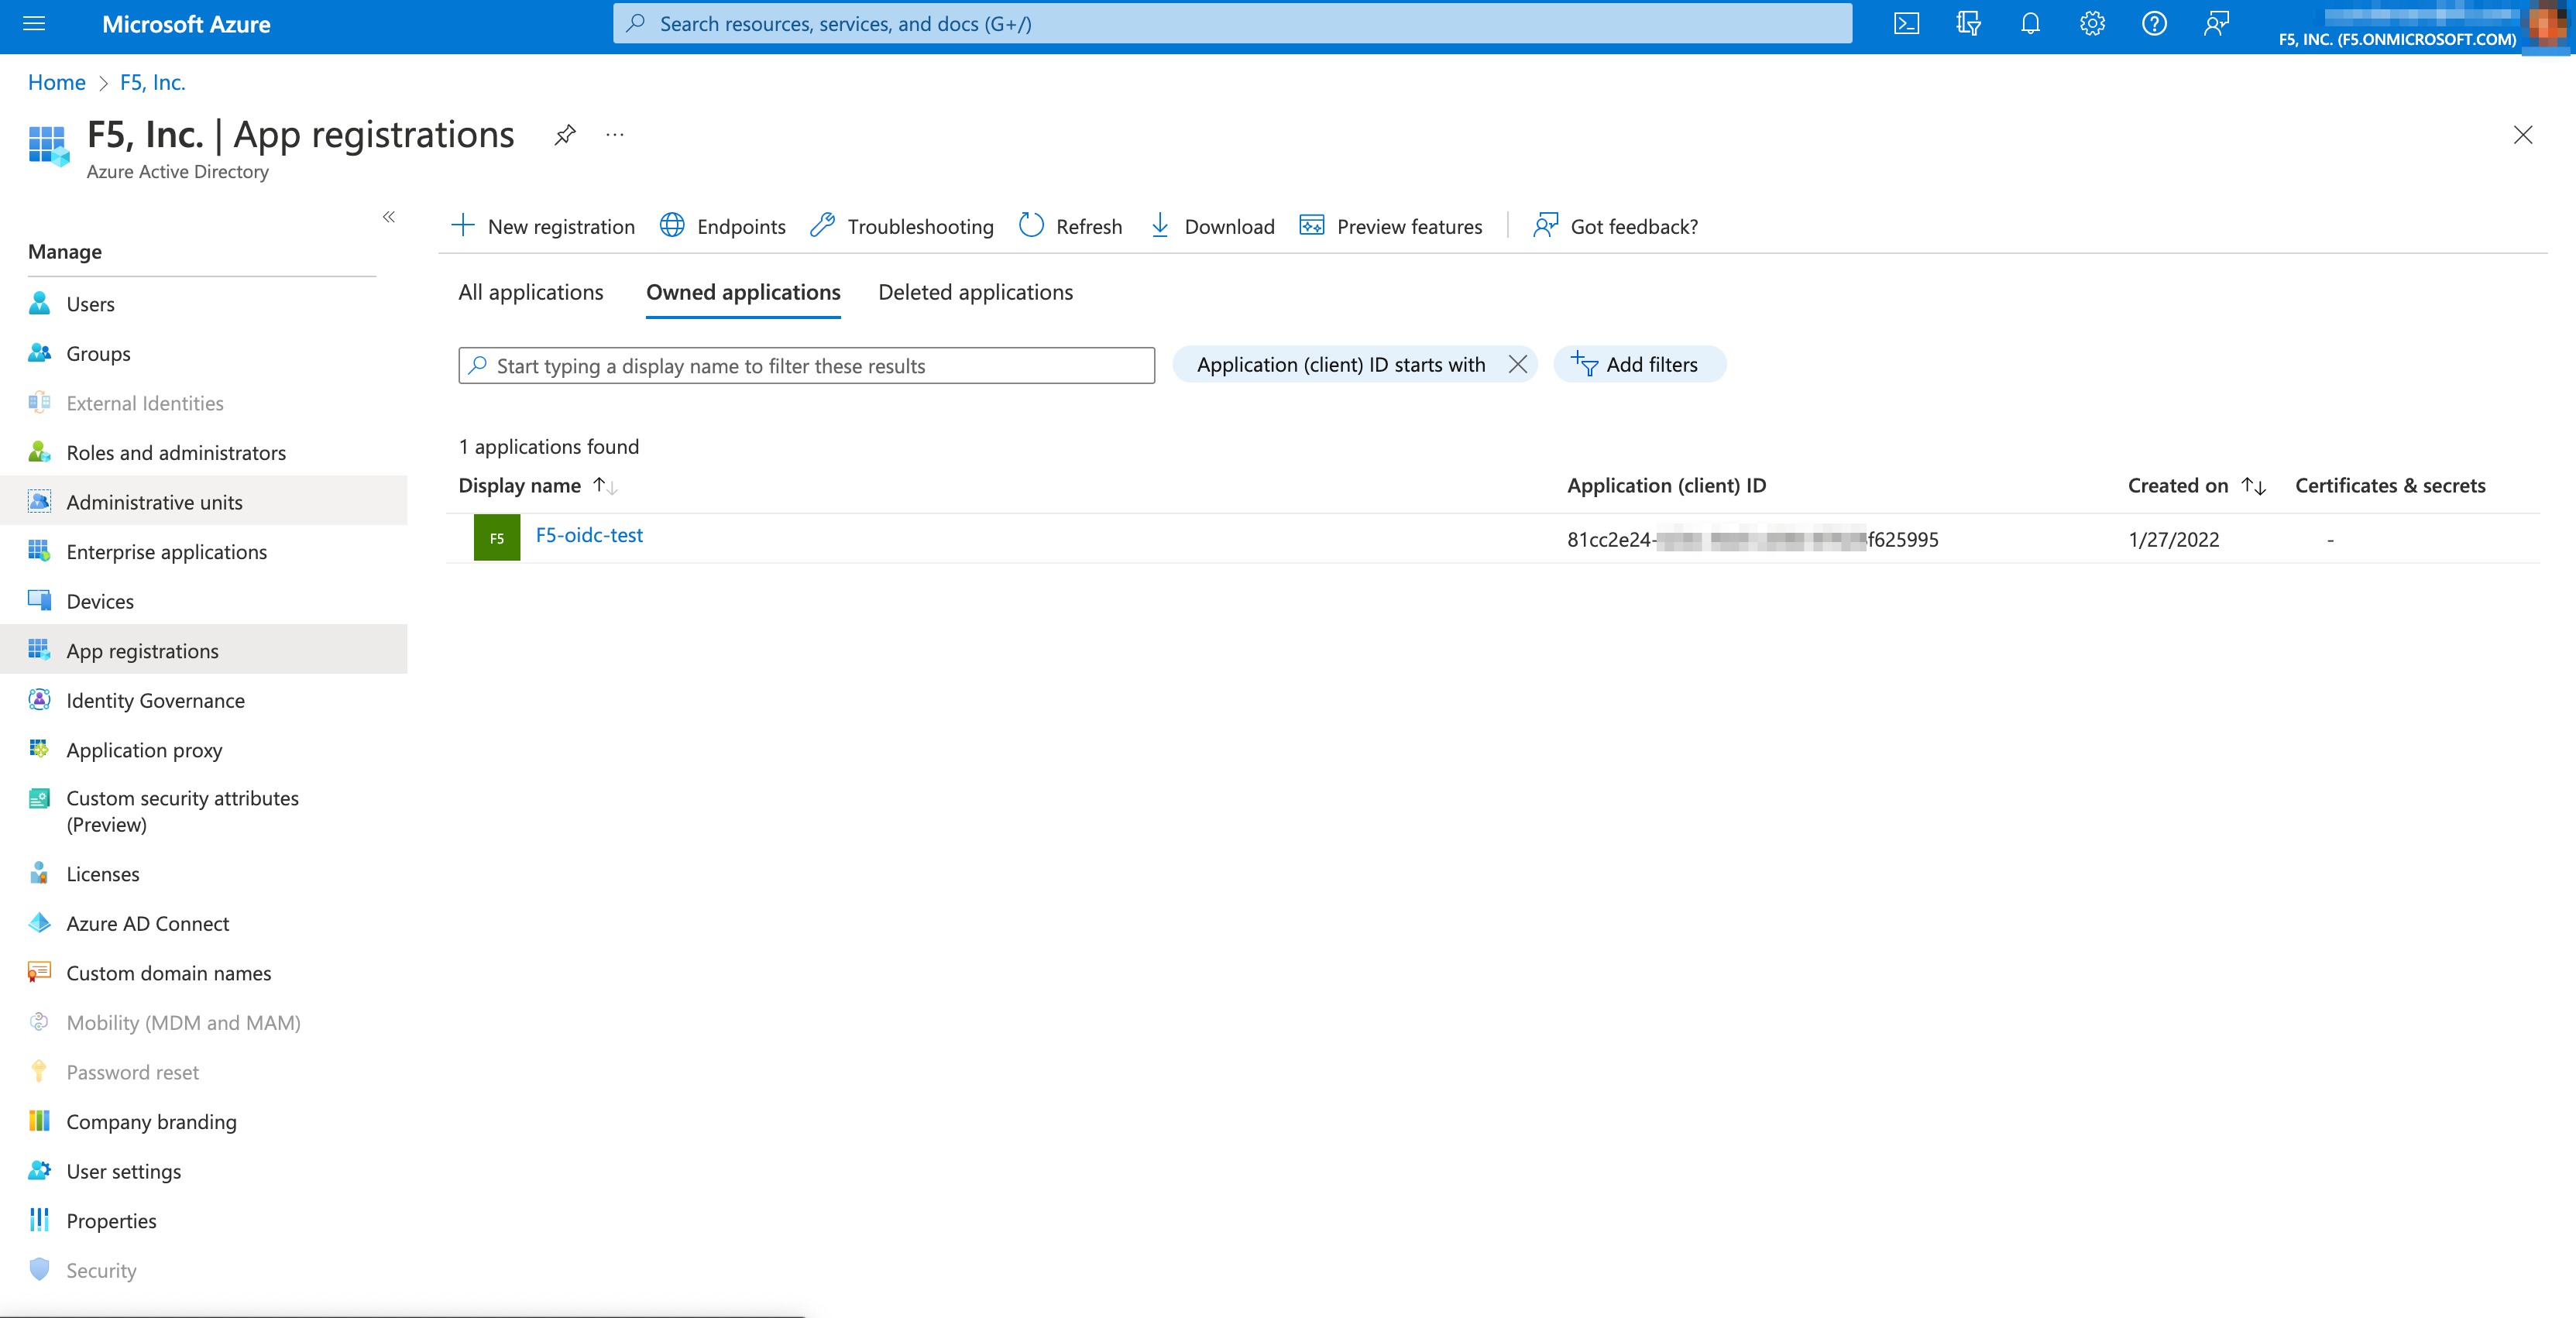
Figure: Add Redirect URI Option
- Select Add a Redirect URI.
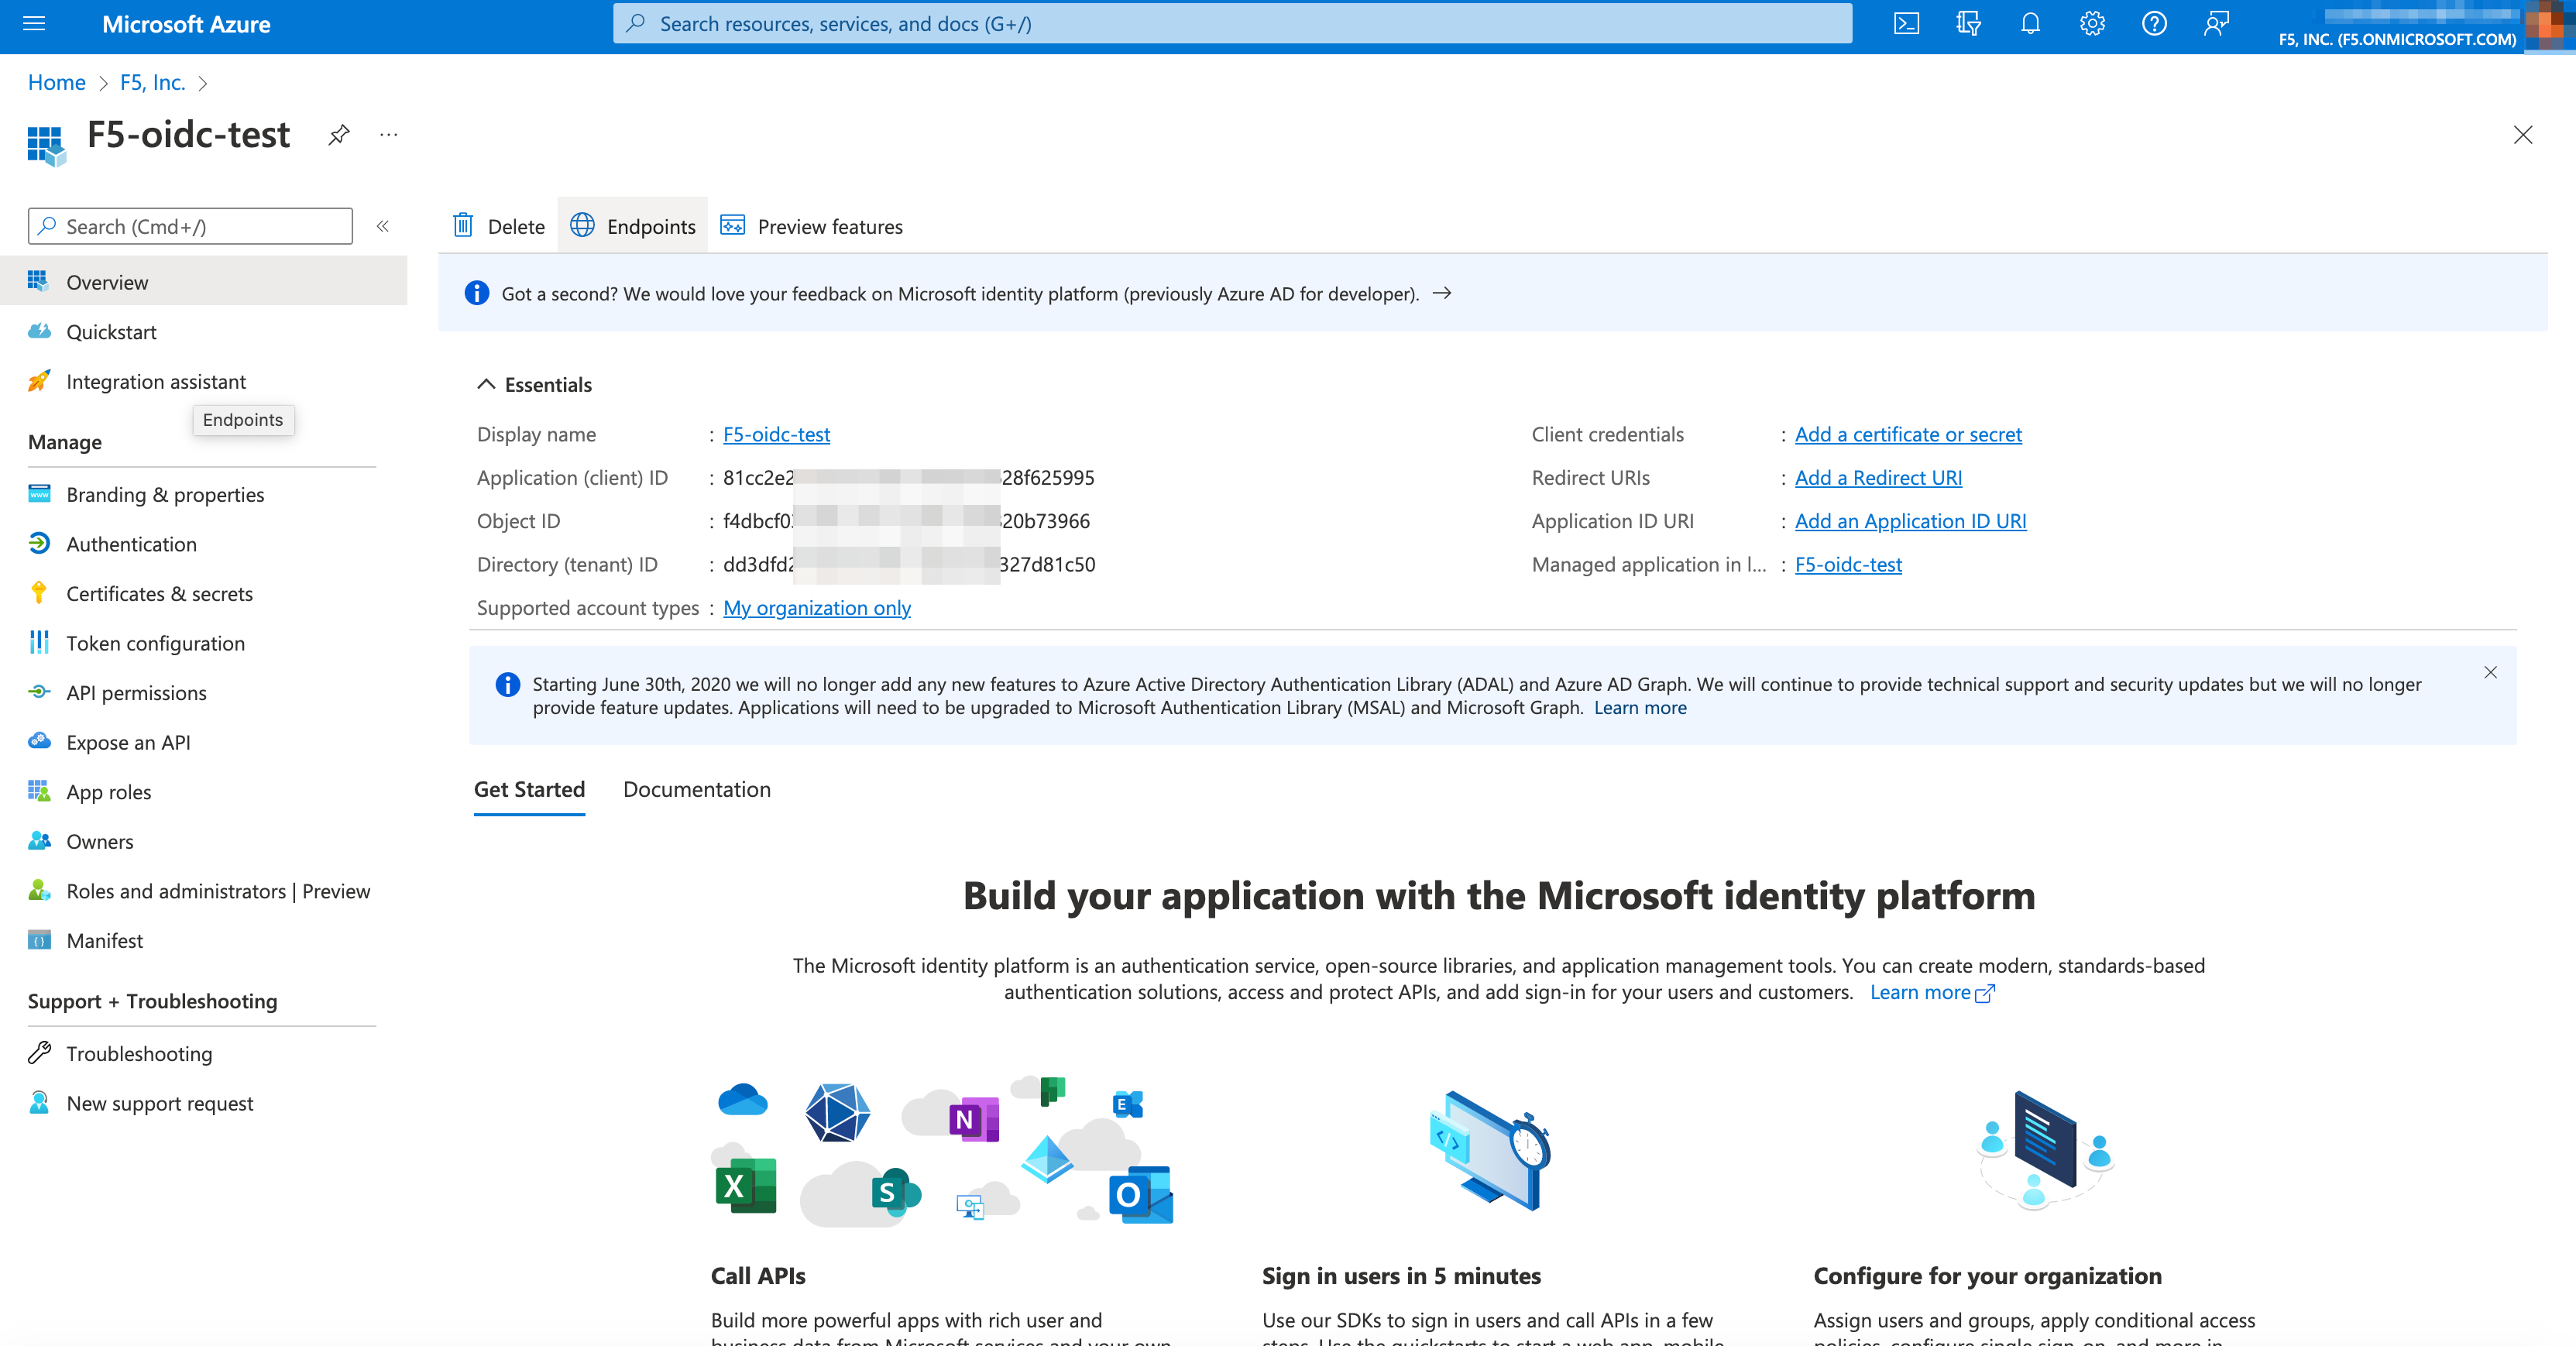
Figure: Configure Redirect URI
- Select + Add a platform.
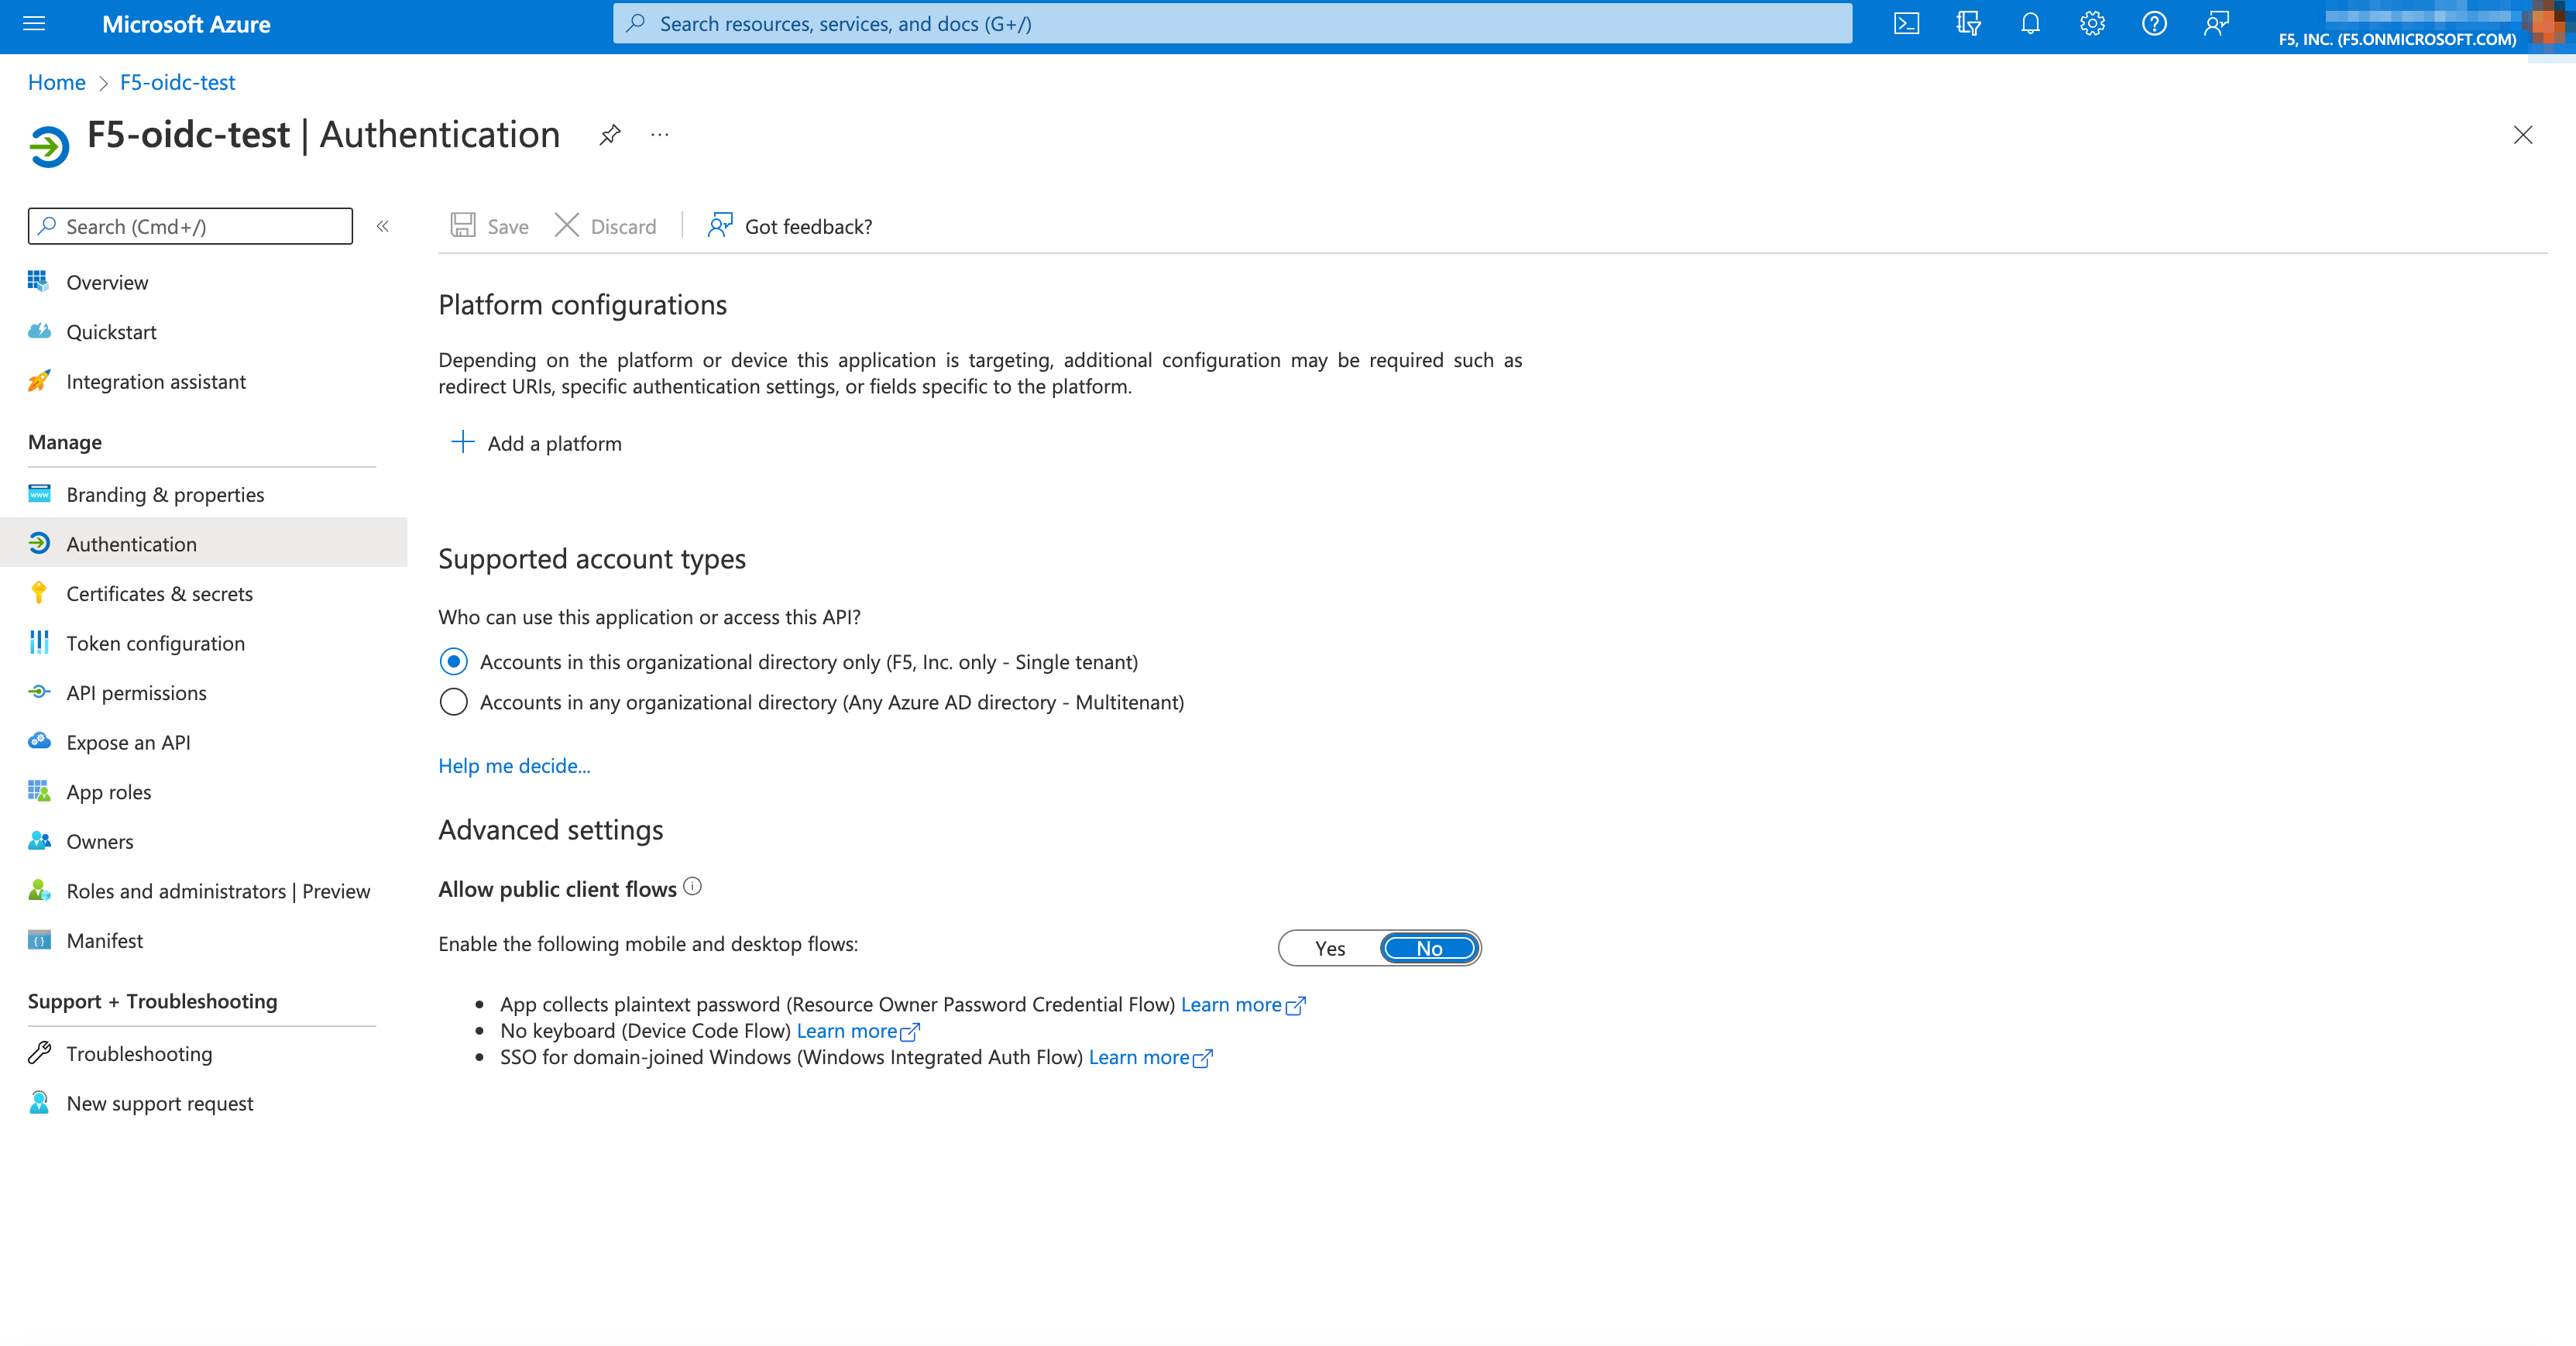
Figure: Configure Redirect URI
- Select Web Applications in right pop-up window.
Note: Refer to Microsoft Documents for more details.
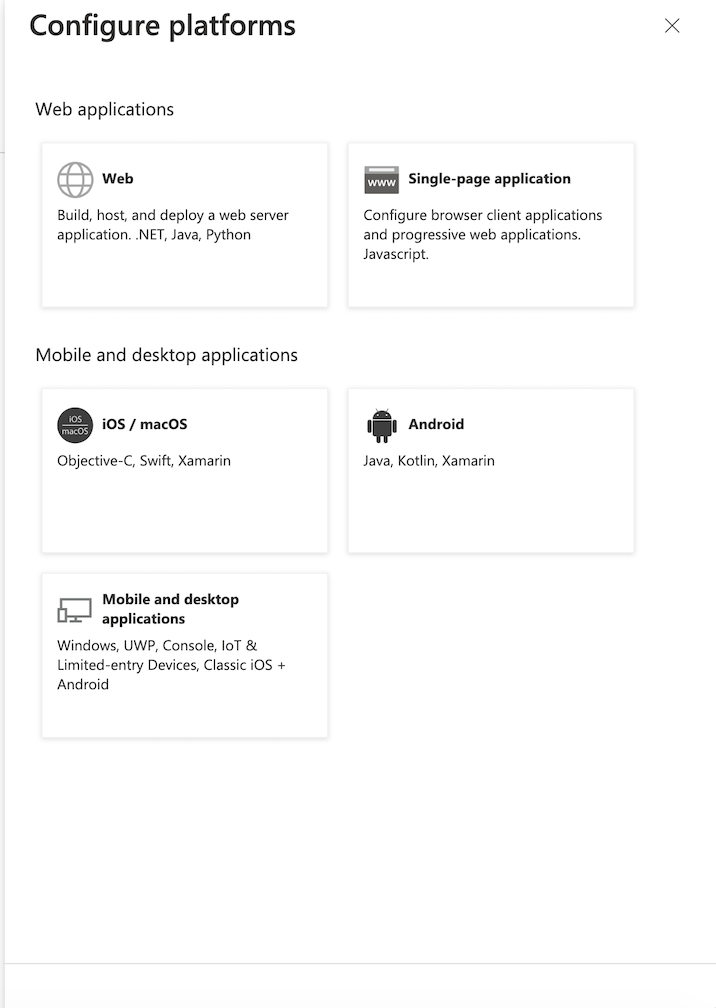
Figure: Configure Redirect URI
- Provide the URI obtained above to complete Azure SSO setup.
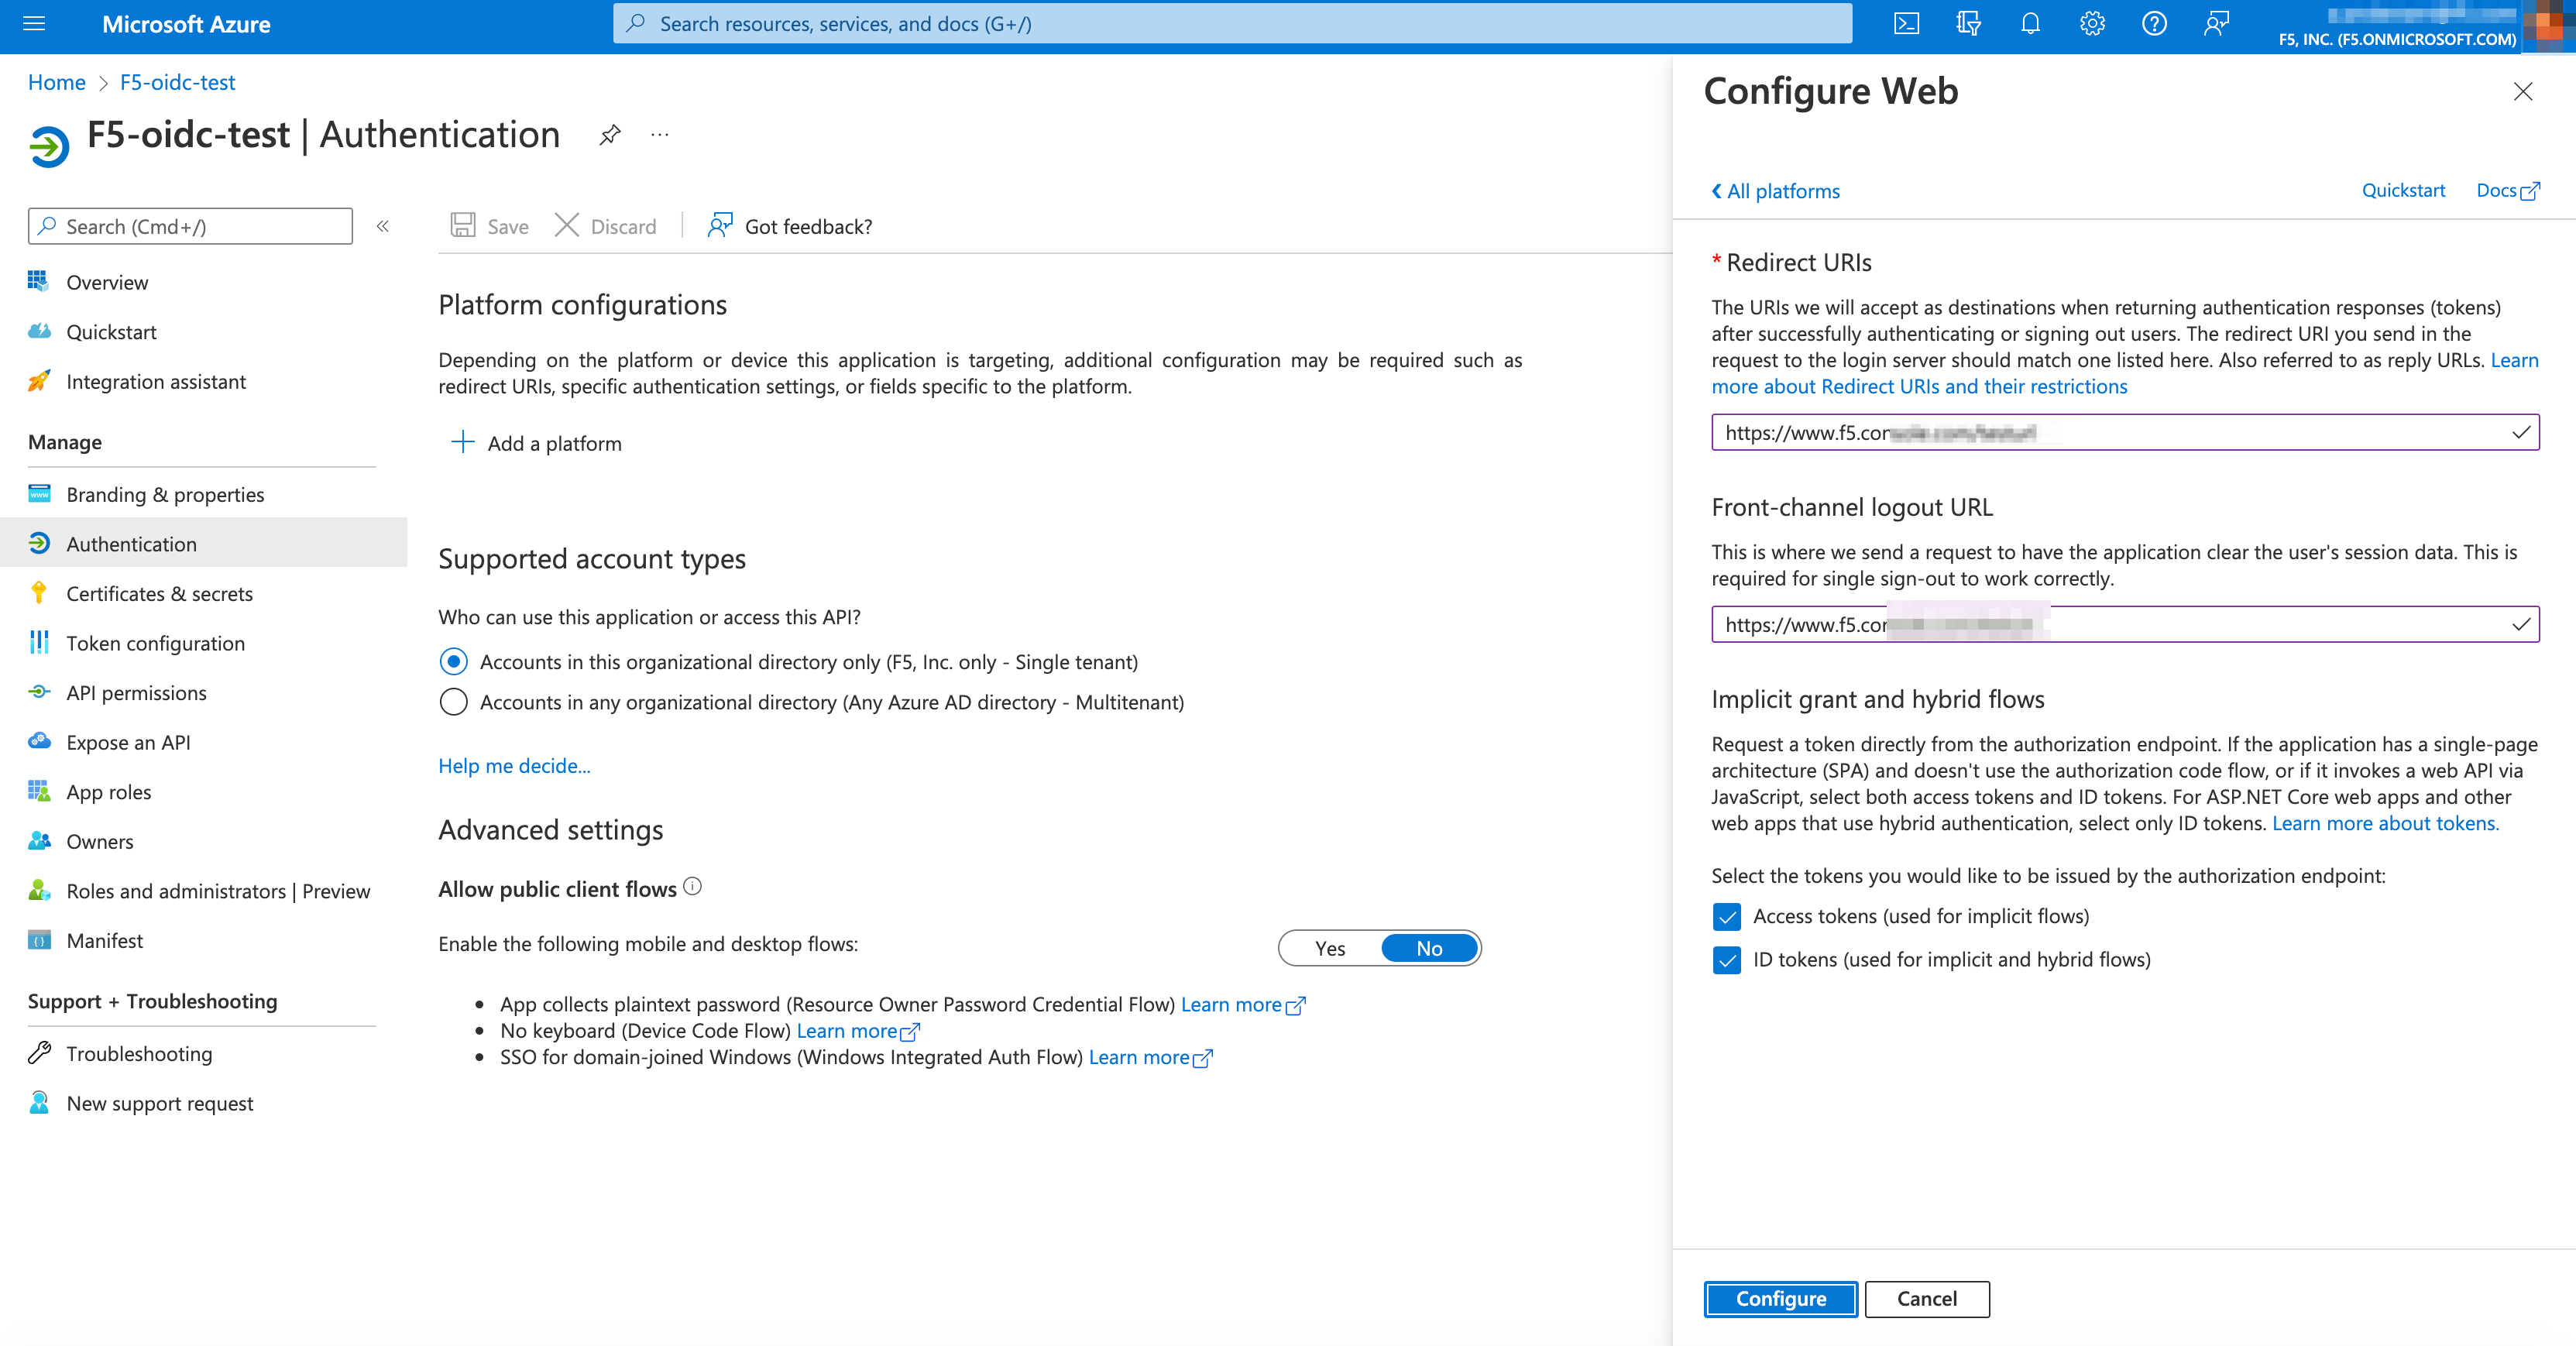
Figure: Configure Redirect URI
-
Select
Configurebutton. -
To confirm, a Web Redirect URIs section is added to Authentication > Platform configurations.
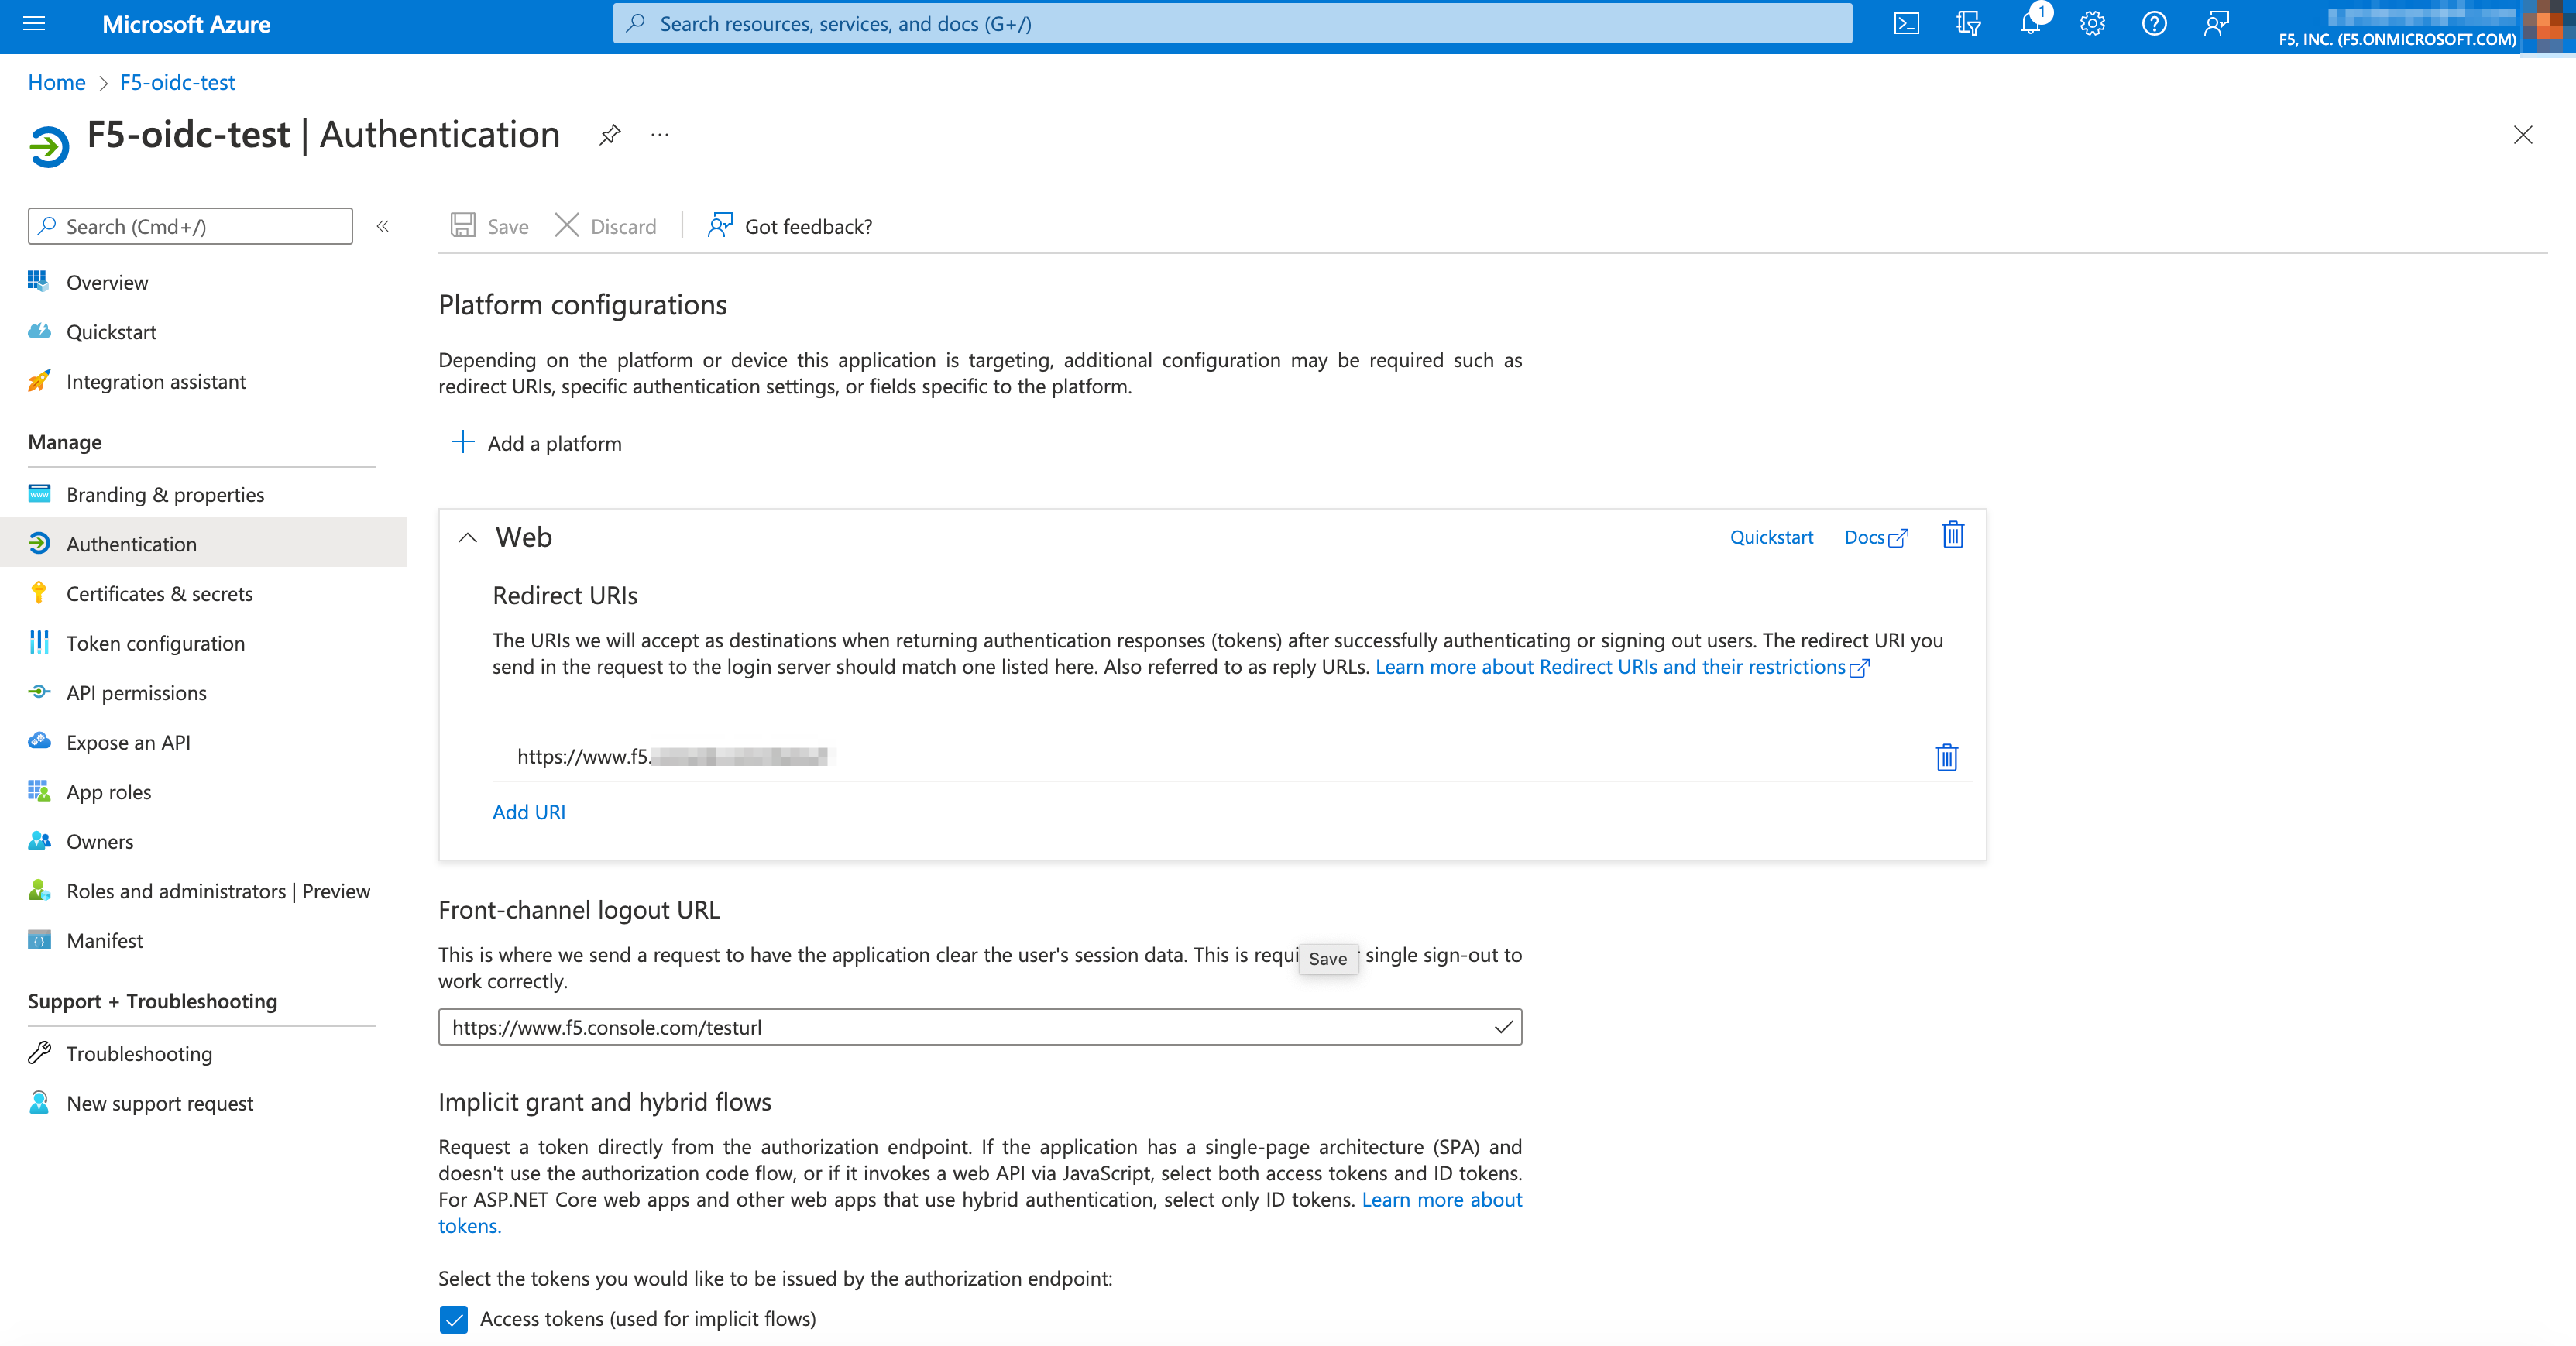
Figure: Configure Redirect URI
Edit SSO Configuration
You can modify an existing Single Sign-On (SSO) configuration to update credentials and secrets without removing the configuration. This eliminates the need to delete and recreate the SSO setup during routine secret rotation cycles. This allows you to rotate secrets faster with less risk, no tenant downtime, and no security gaps.