
Enable SSO - Custom
Objective
This document provides instructions on how to configure Custom Sign-on (SSO) integration to F5® Distributed Cloud Services for your enterprise account. For an overview of F5® Distributed Cloud Console, see About.
Prerequisites
The following prerequisites apply:
- Note: If you do not have an account, see Get Started with Console.
-
A configured identity provider such as Google.
-
For OIDC specifications and supported configuration values, see OIDC reference guide for IdP administrators.
Configuration Steps
Configuring SSO using Custom includes performing the following actions:
- Enable SSO using custom in Console.
Note: Custom setup requires you to be tenant owner user type. Navigate to Administration > IAM > Users. Select on the Show/hide column, select the Type field, and select Apply to display the Type column. For the tenant owner, the Type column displays Tenant Owner and others, it displays User.
Enable SSO Using Custom in F5 Distributed Cloud Console
Step 1: Start SSO setup.
- Open F5 Console home page, select Administration box.
Note: Homepage is role based, and your home page may look different due to your role customization. Select All Workspaces drop-down menu to discover all options. Customize Settings: Administration > Personal Management > My Account > Edit work domain & skills button > Advanced box > check Work Domain boxes > Save changes button.
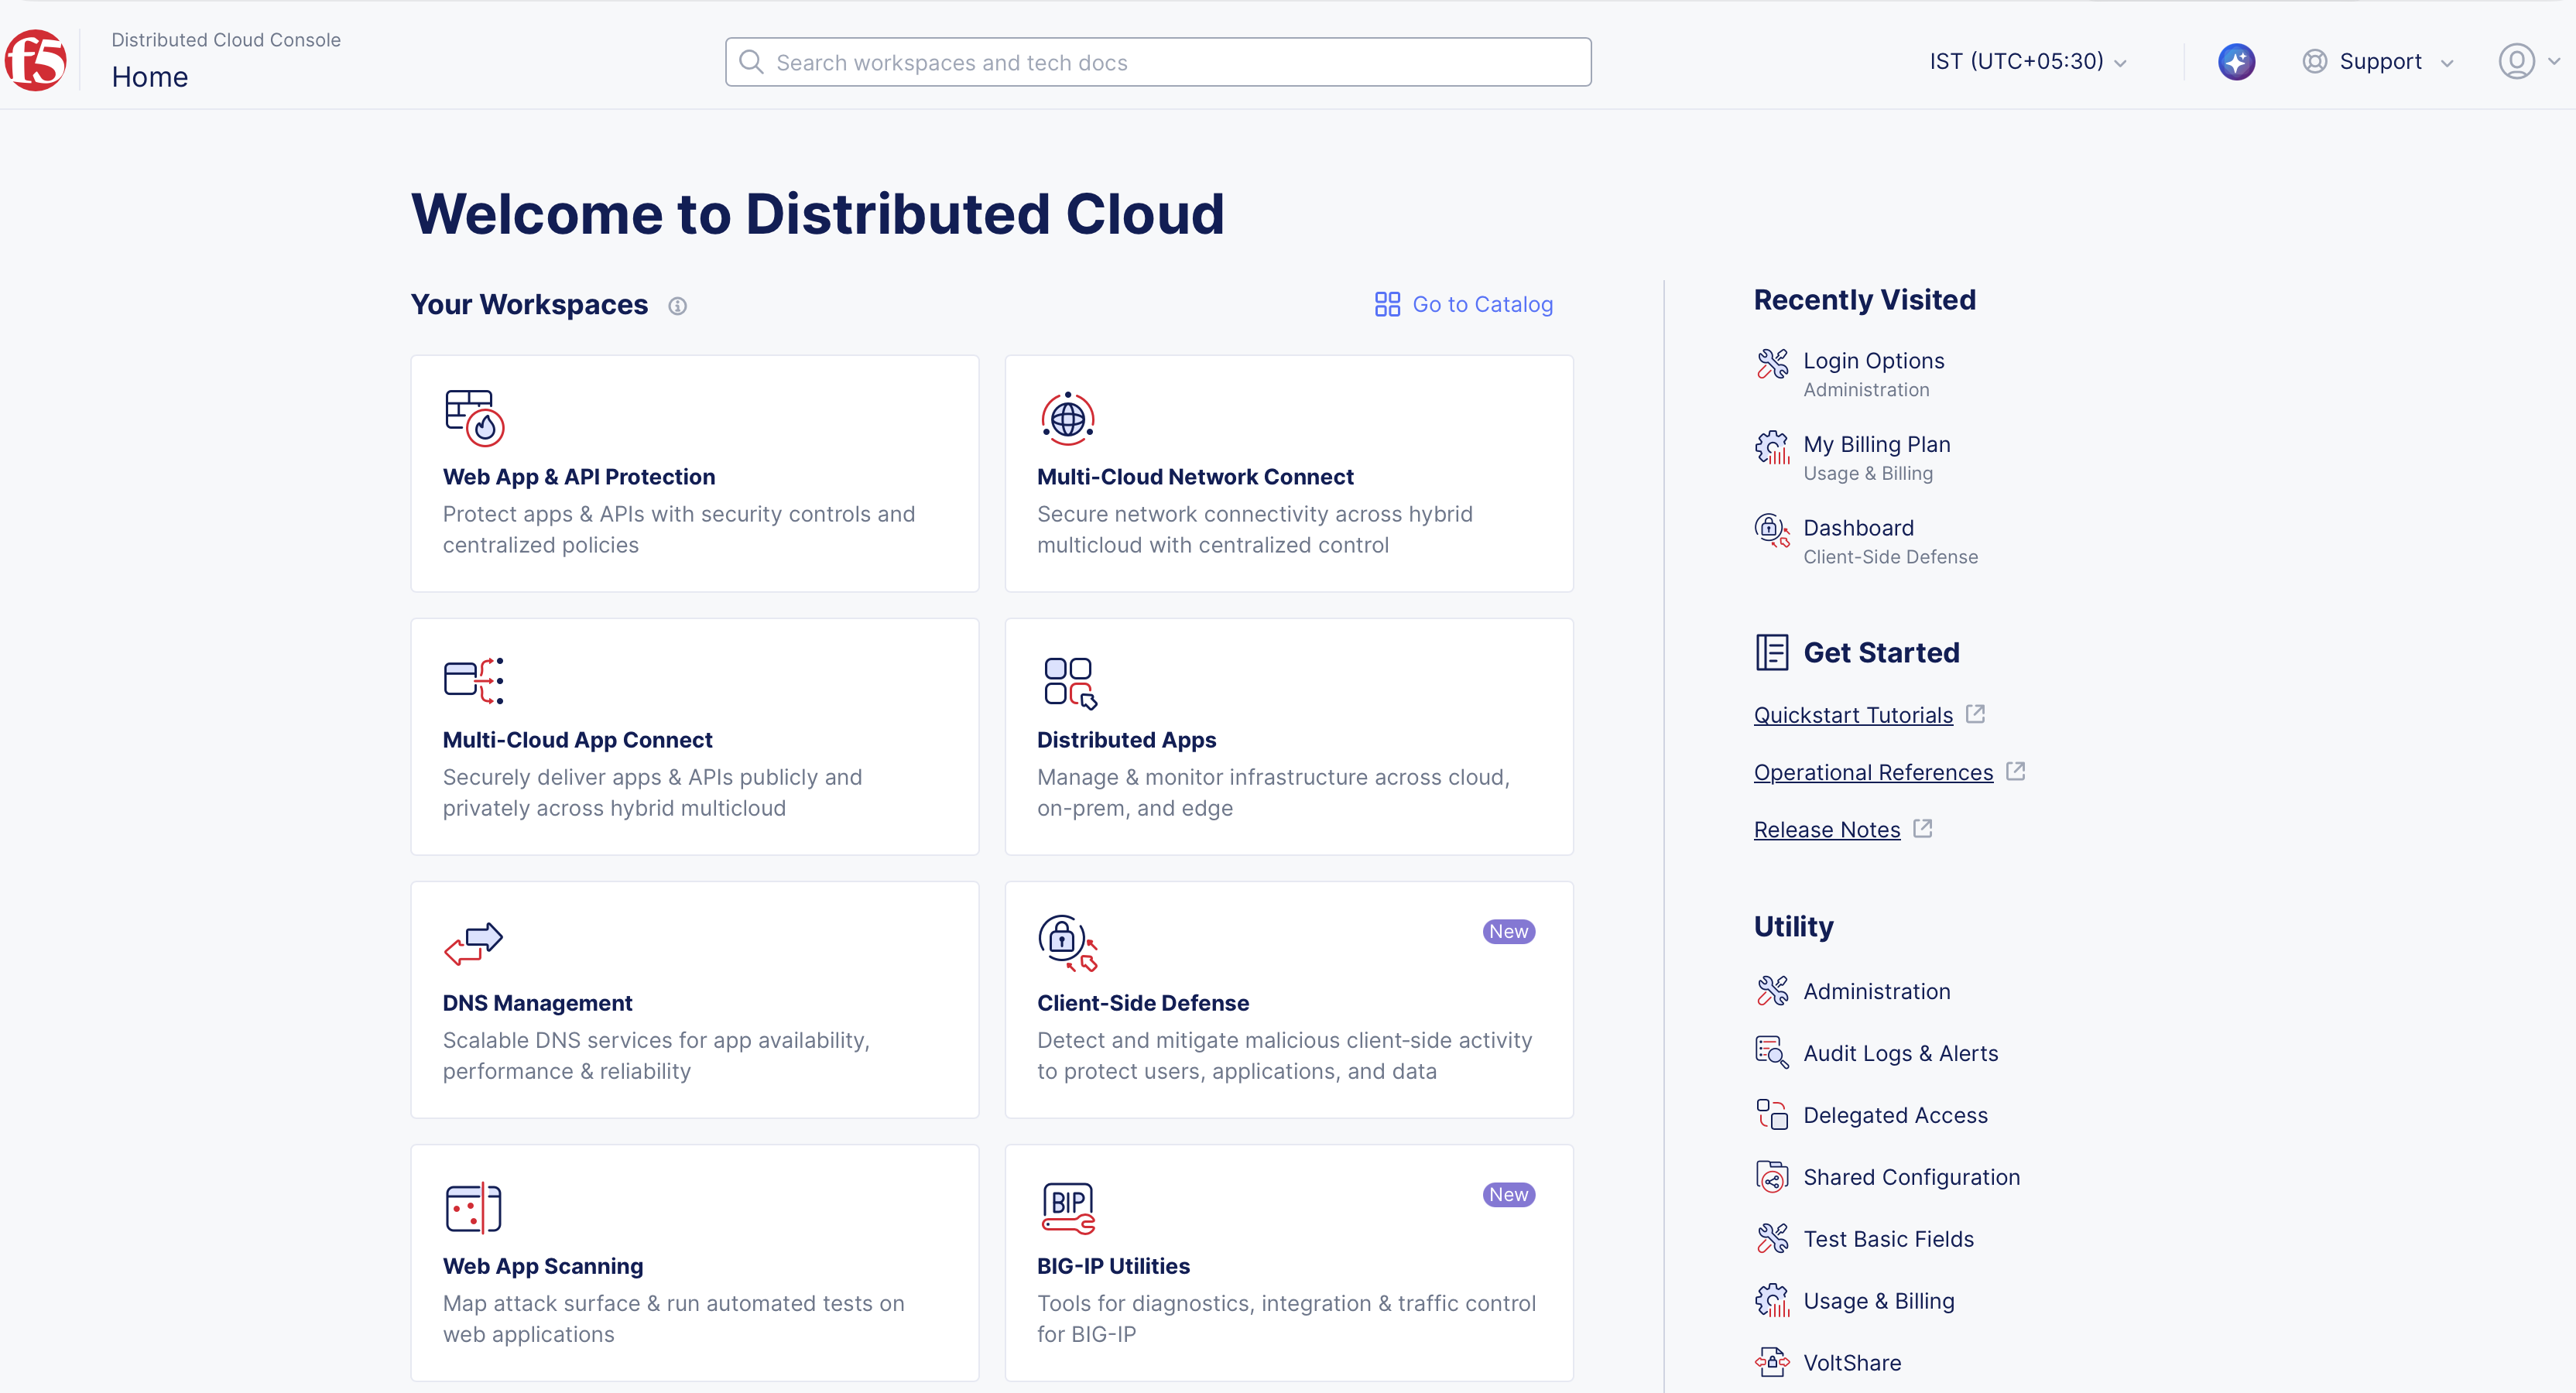
Figure: Homepage
- Select Tenant Settings in left column menu > select Login Options.
Note: If options are not showing available, select Show link in Advanced nav options visible in bottom left corner. If needed, select Hide to minimize options from Advanced nav options mode.
- Select Set up SSO in SSO section.
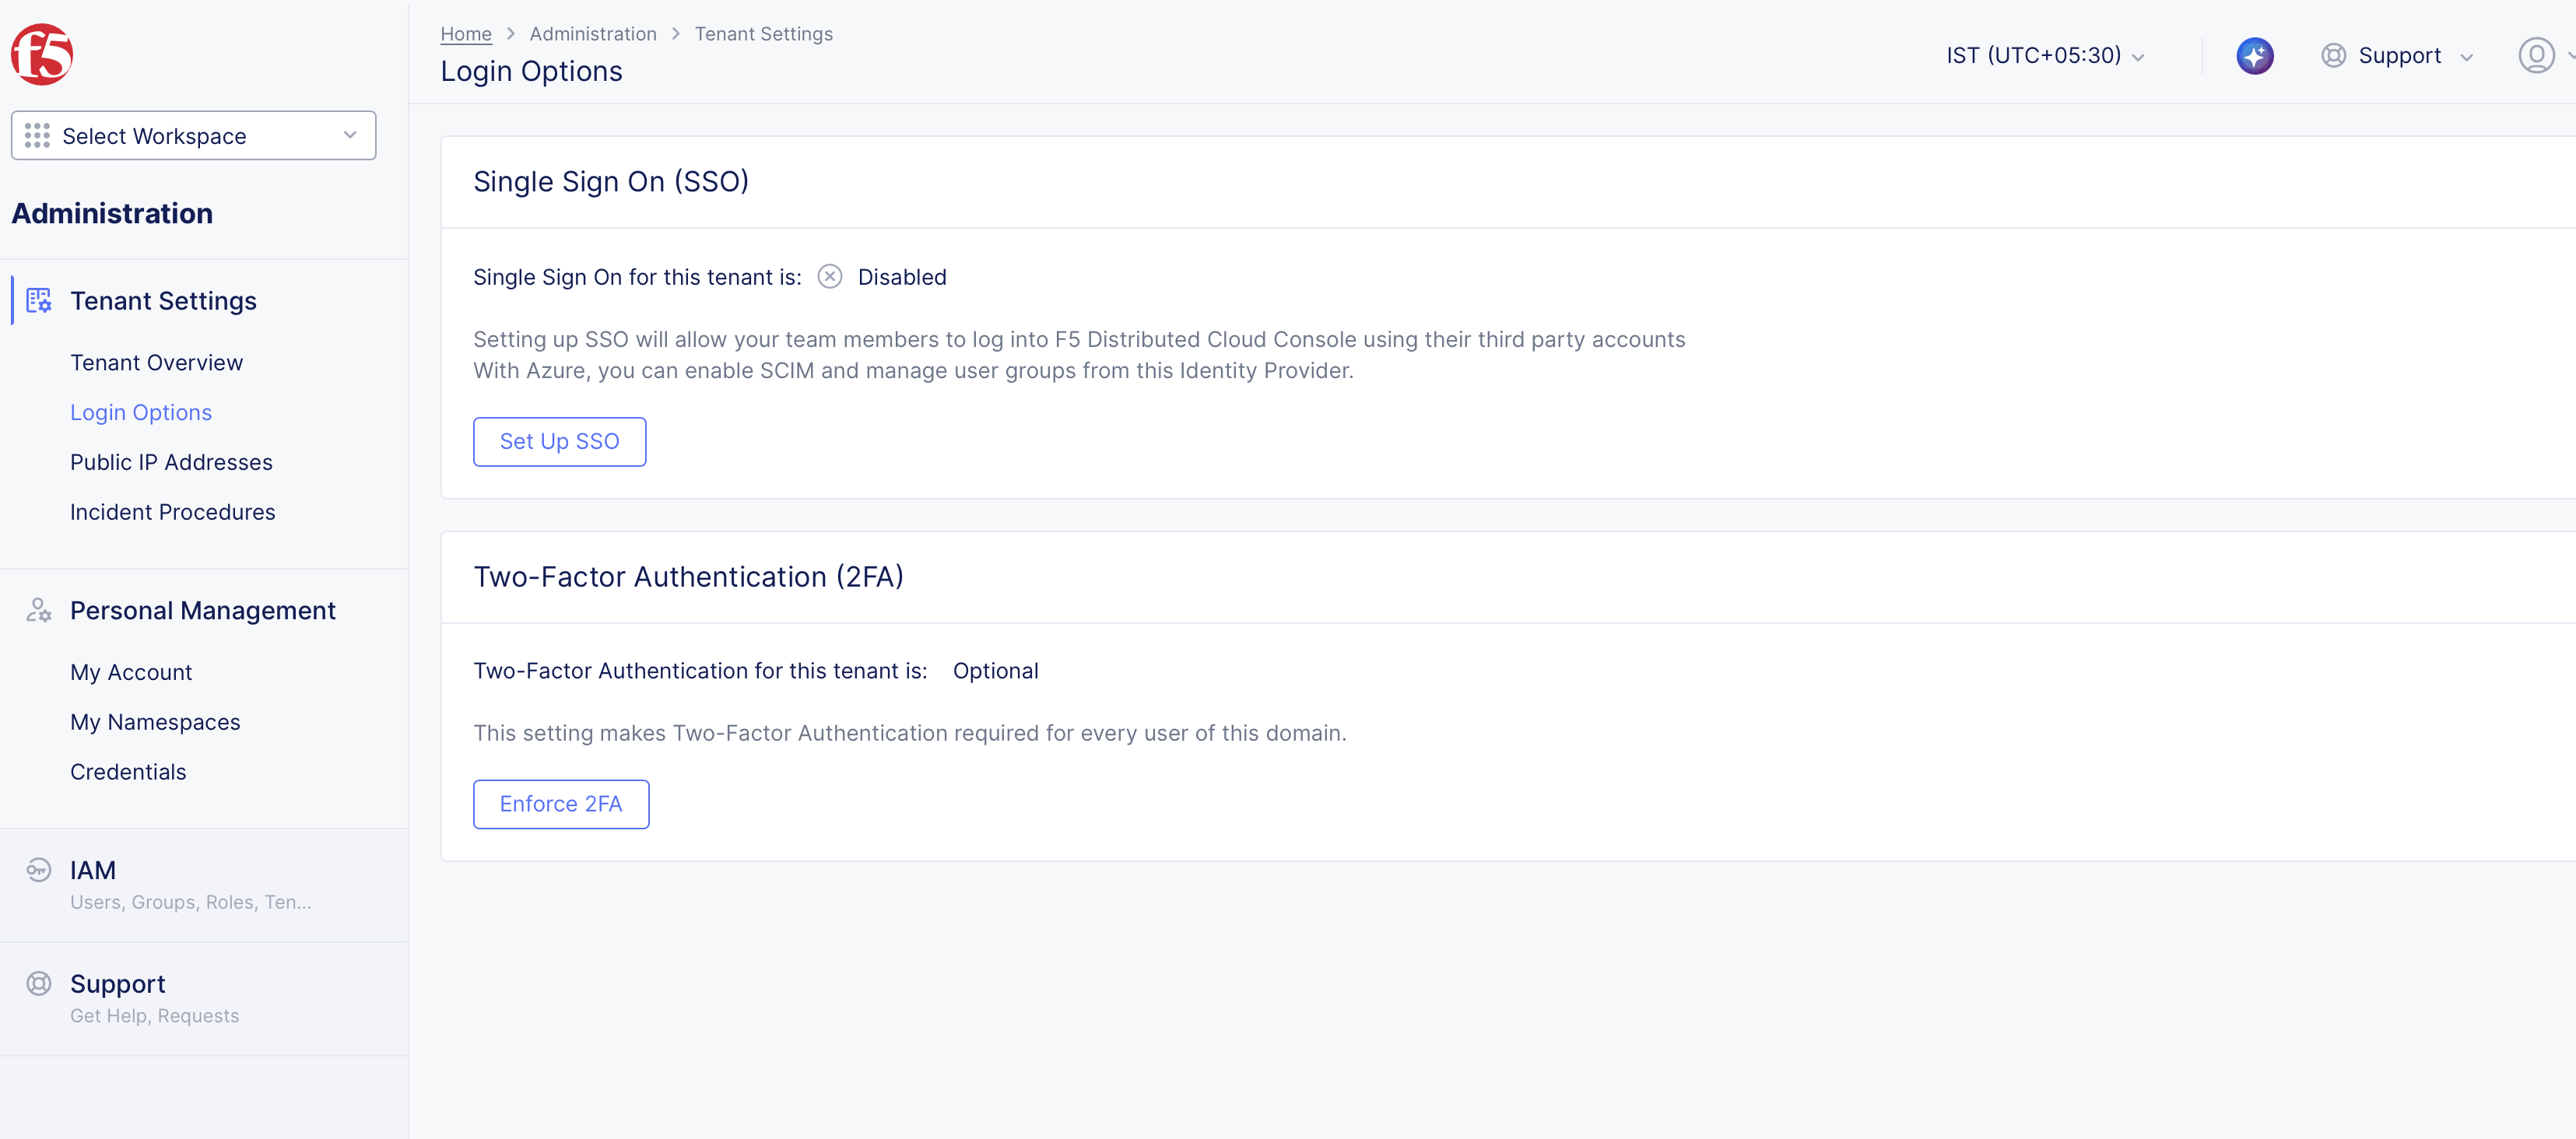
Figure: SSO Setup Page
Step 2: Set Up SSO.
Note: Copy items from your custom OIDC providers to set up SSO in Console. For supported OIDC specifications and expected values, see OIDC reference guide for IdP administrators.
-
Select Custom option in pop-up form.
-
Select Next button.
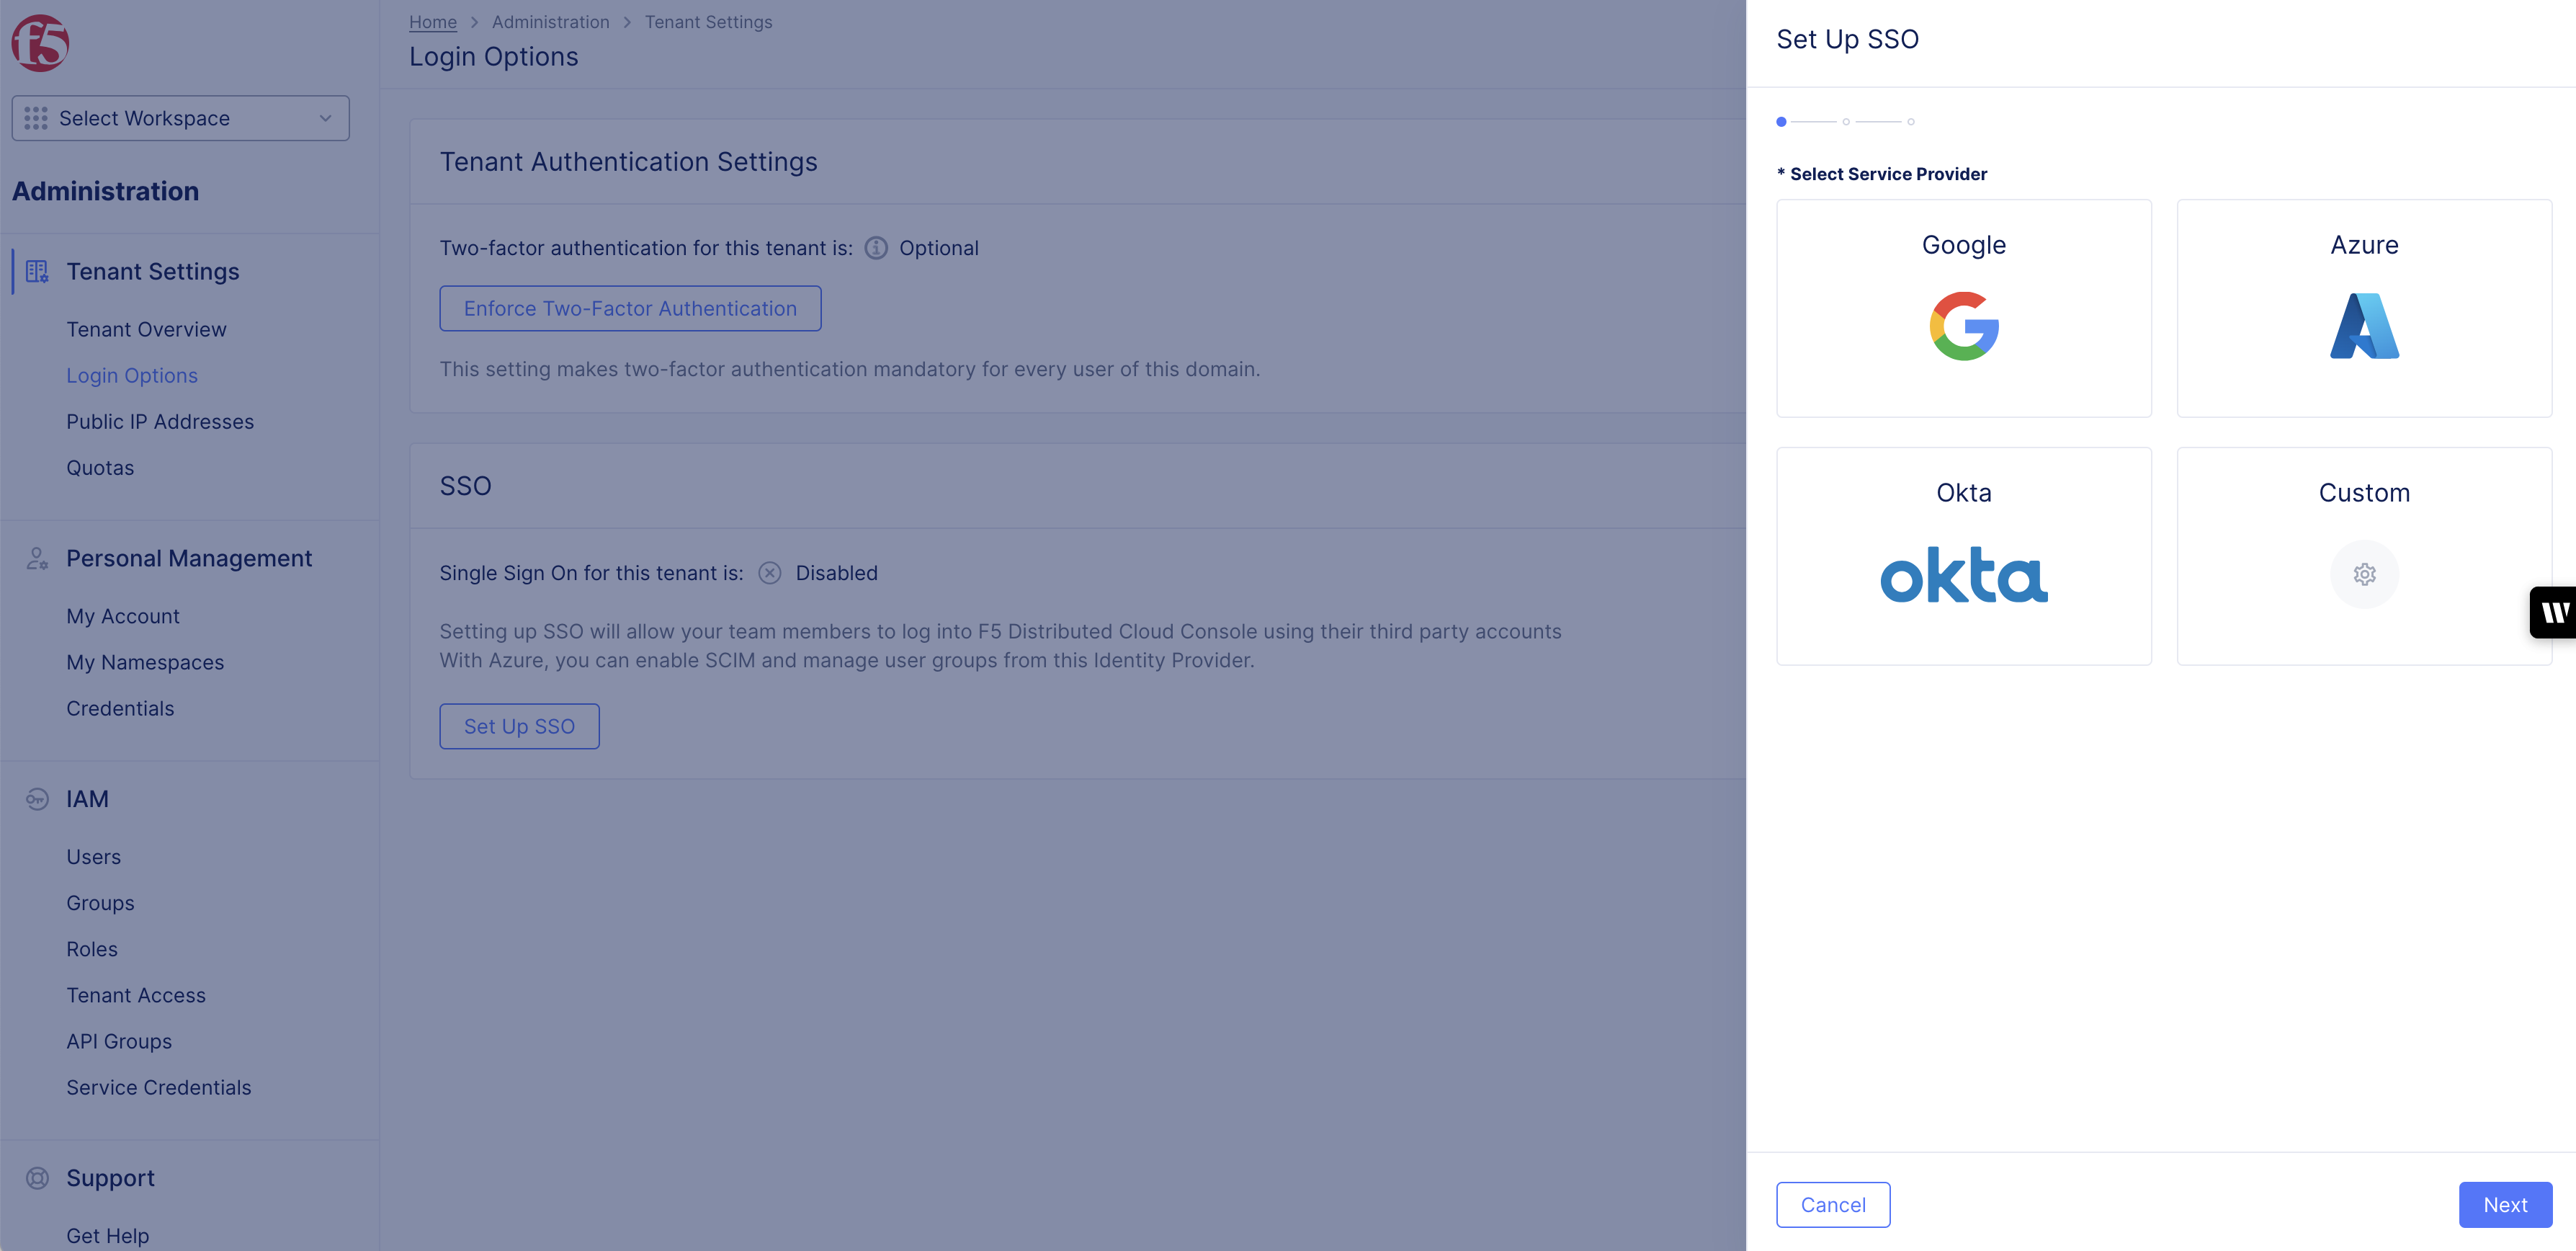
Figure: SSO Create Clients
-
Enter Display name in Set up SSO pop-up form.
-
Enter Client ID obtained from previous steps.
-
Configure Basic Authorization under Authorization Code Flow. You can now configure Proof Key for Code Exchange (PKCE) as an alternative to the standard authorization code flow.
-
Select Client Secret under Client Authentication Method. You can now use private key JSON Web Token (JWT) for client authentication as a more secure alternative to a basic client secret.
-
Enter Default Scopes.
-
Enter Authorization URL.
-
Enter Token URL.
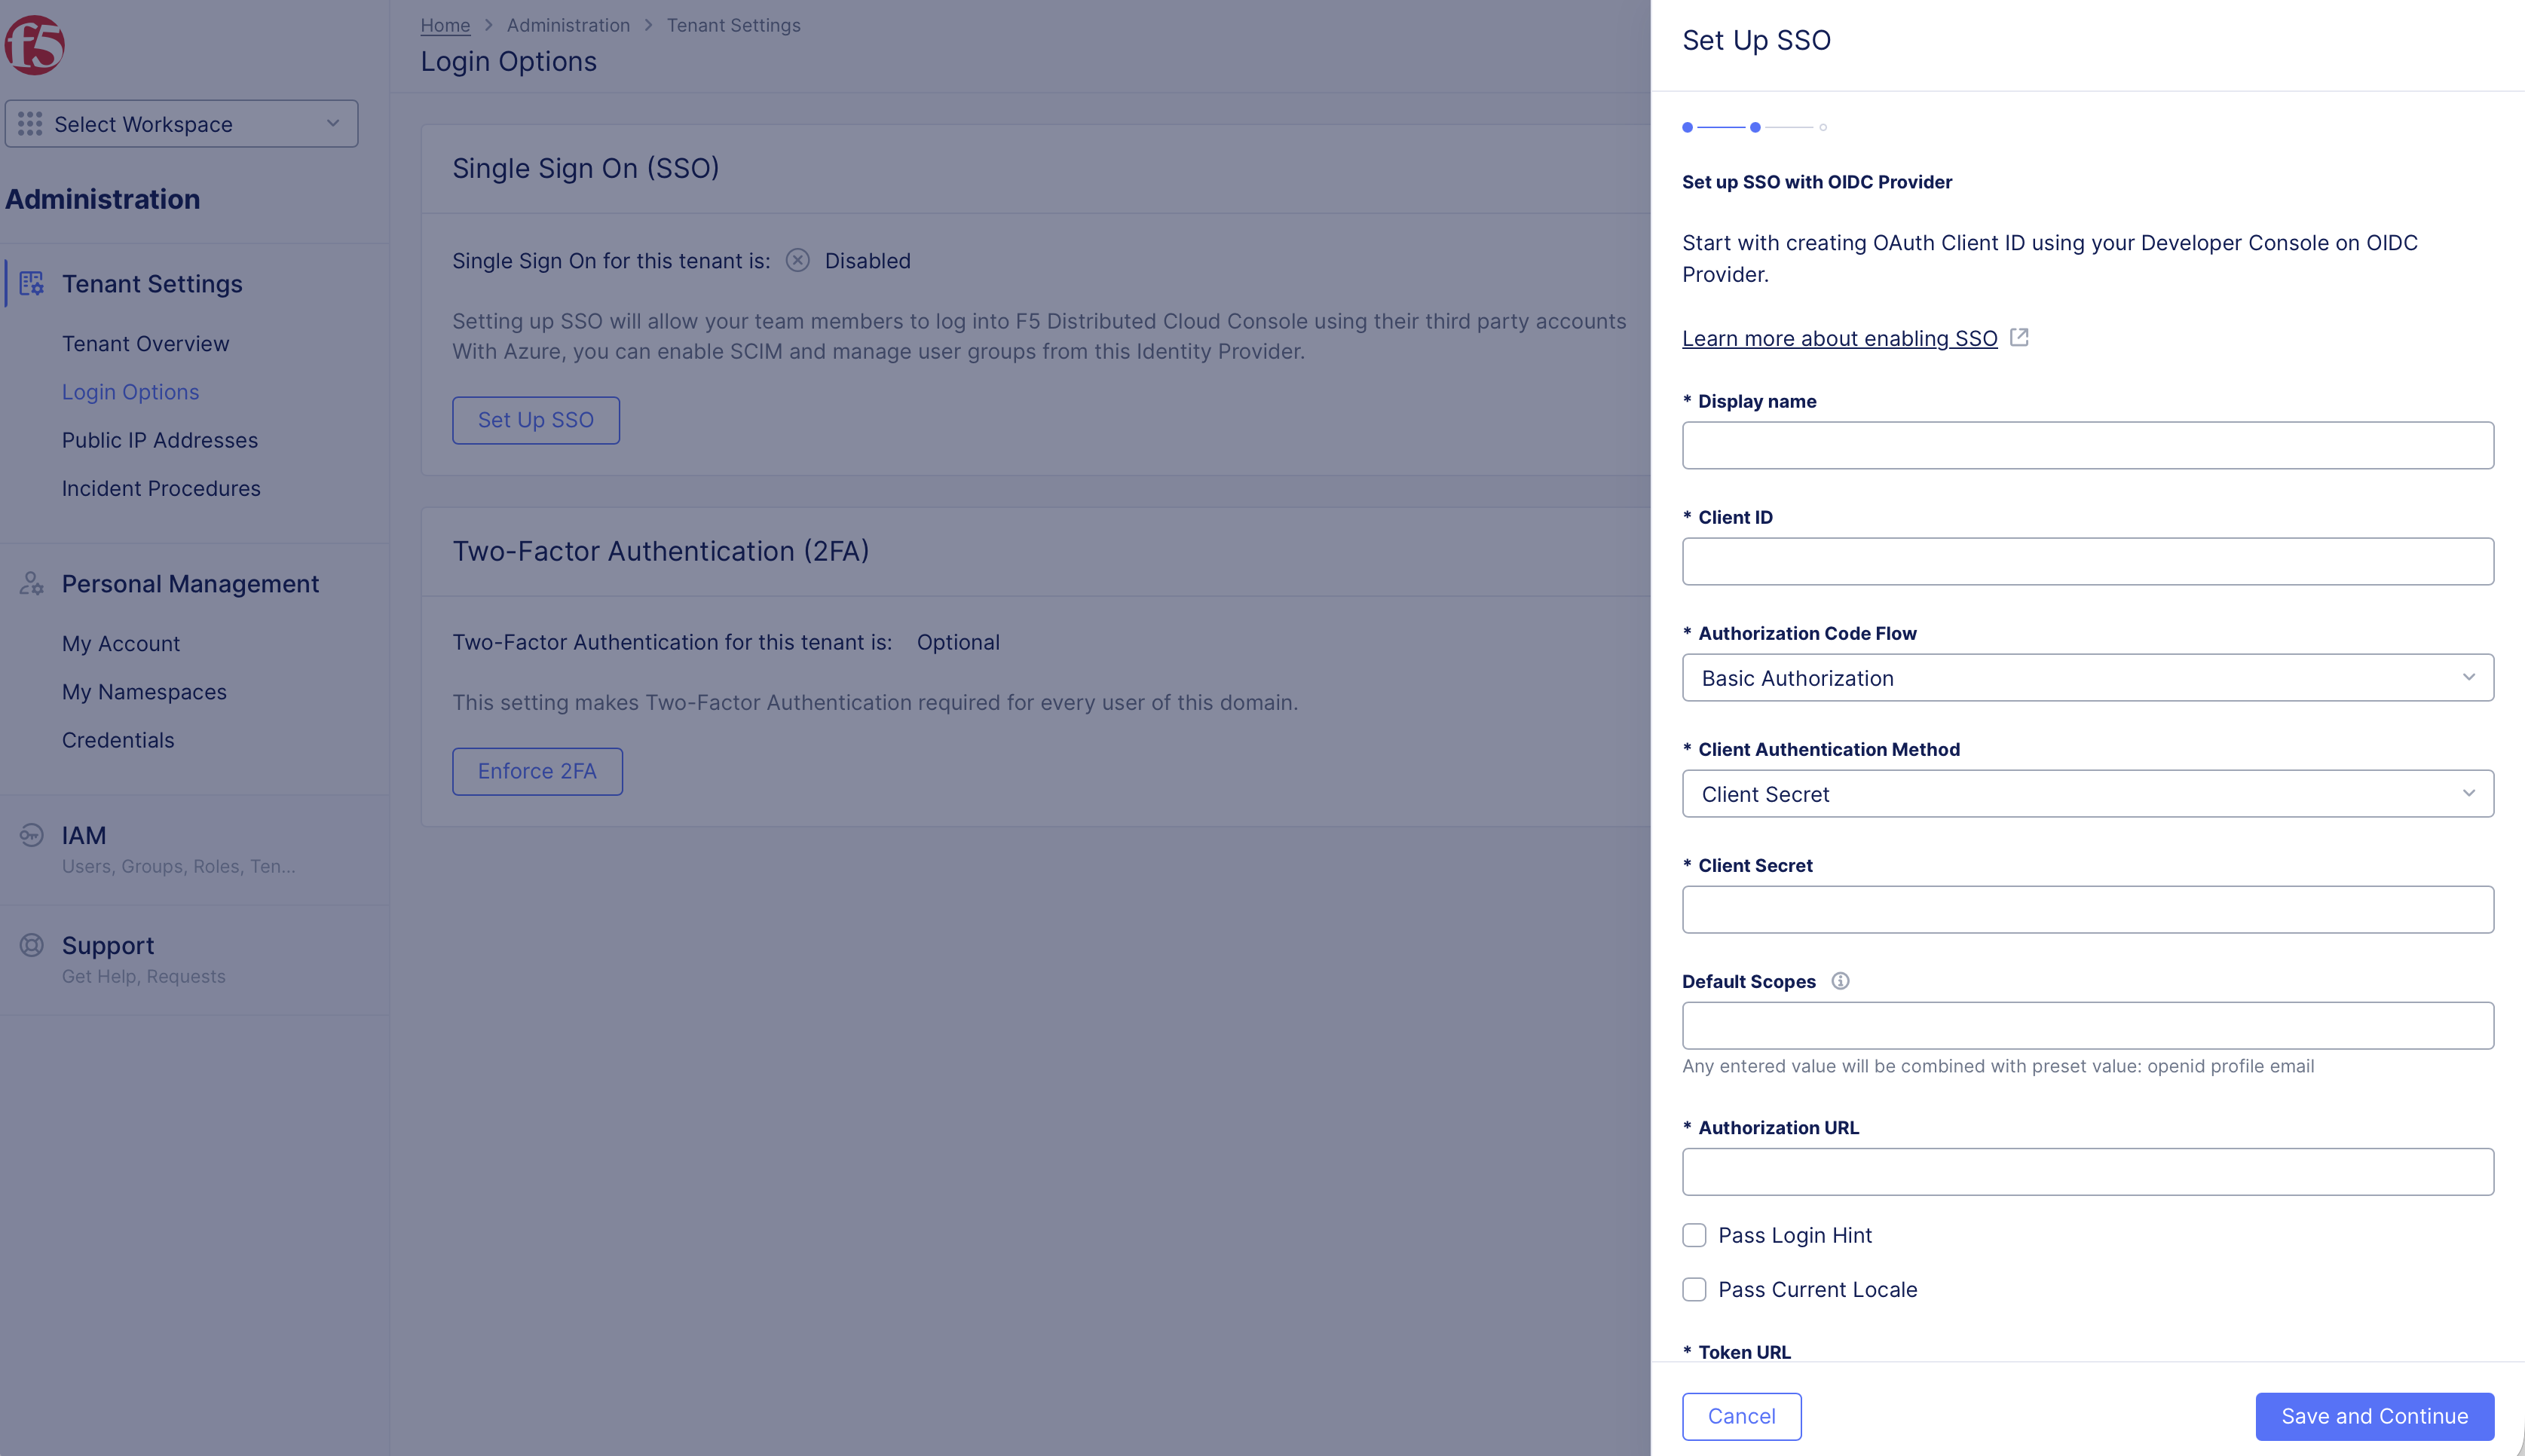
Figure: SSO Create Clients
- Select Save and Continue button.
Step 3: Copy Redirect URL.
- Copy the displayed values of the Redirect URL field in the Redirect URL screen.
Note: This is used in next step.
- Select Done.
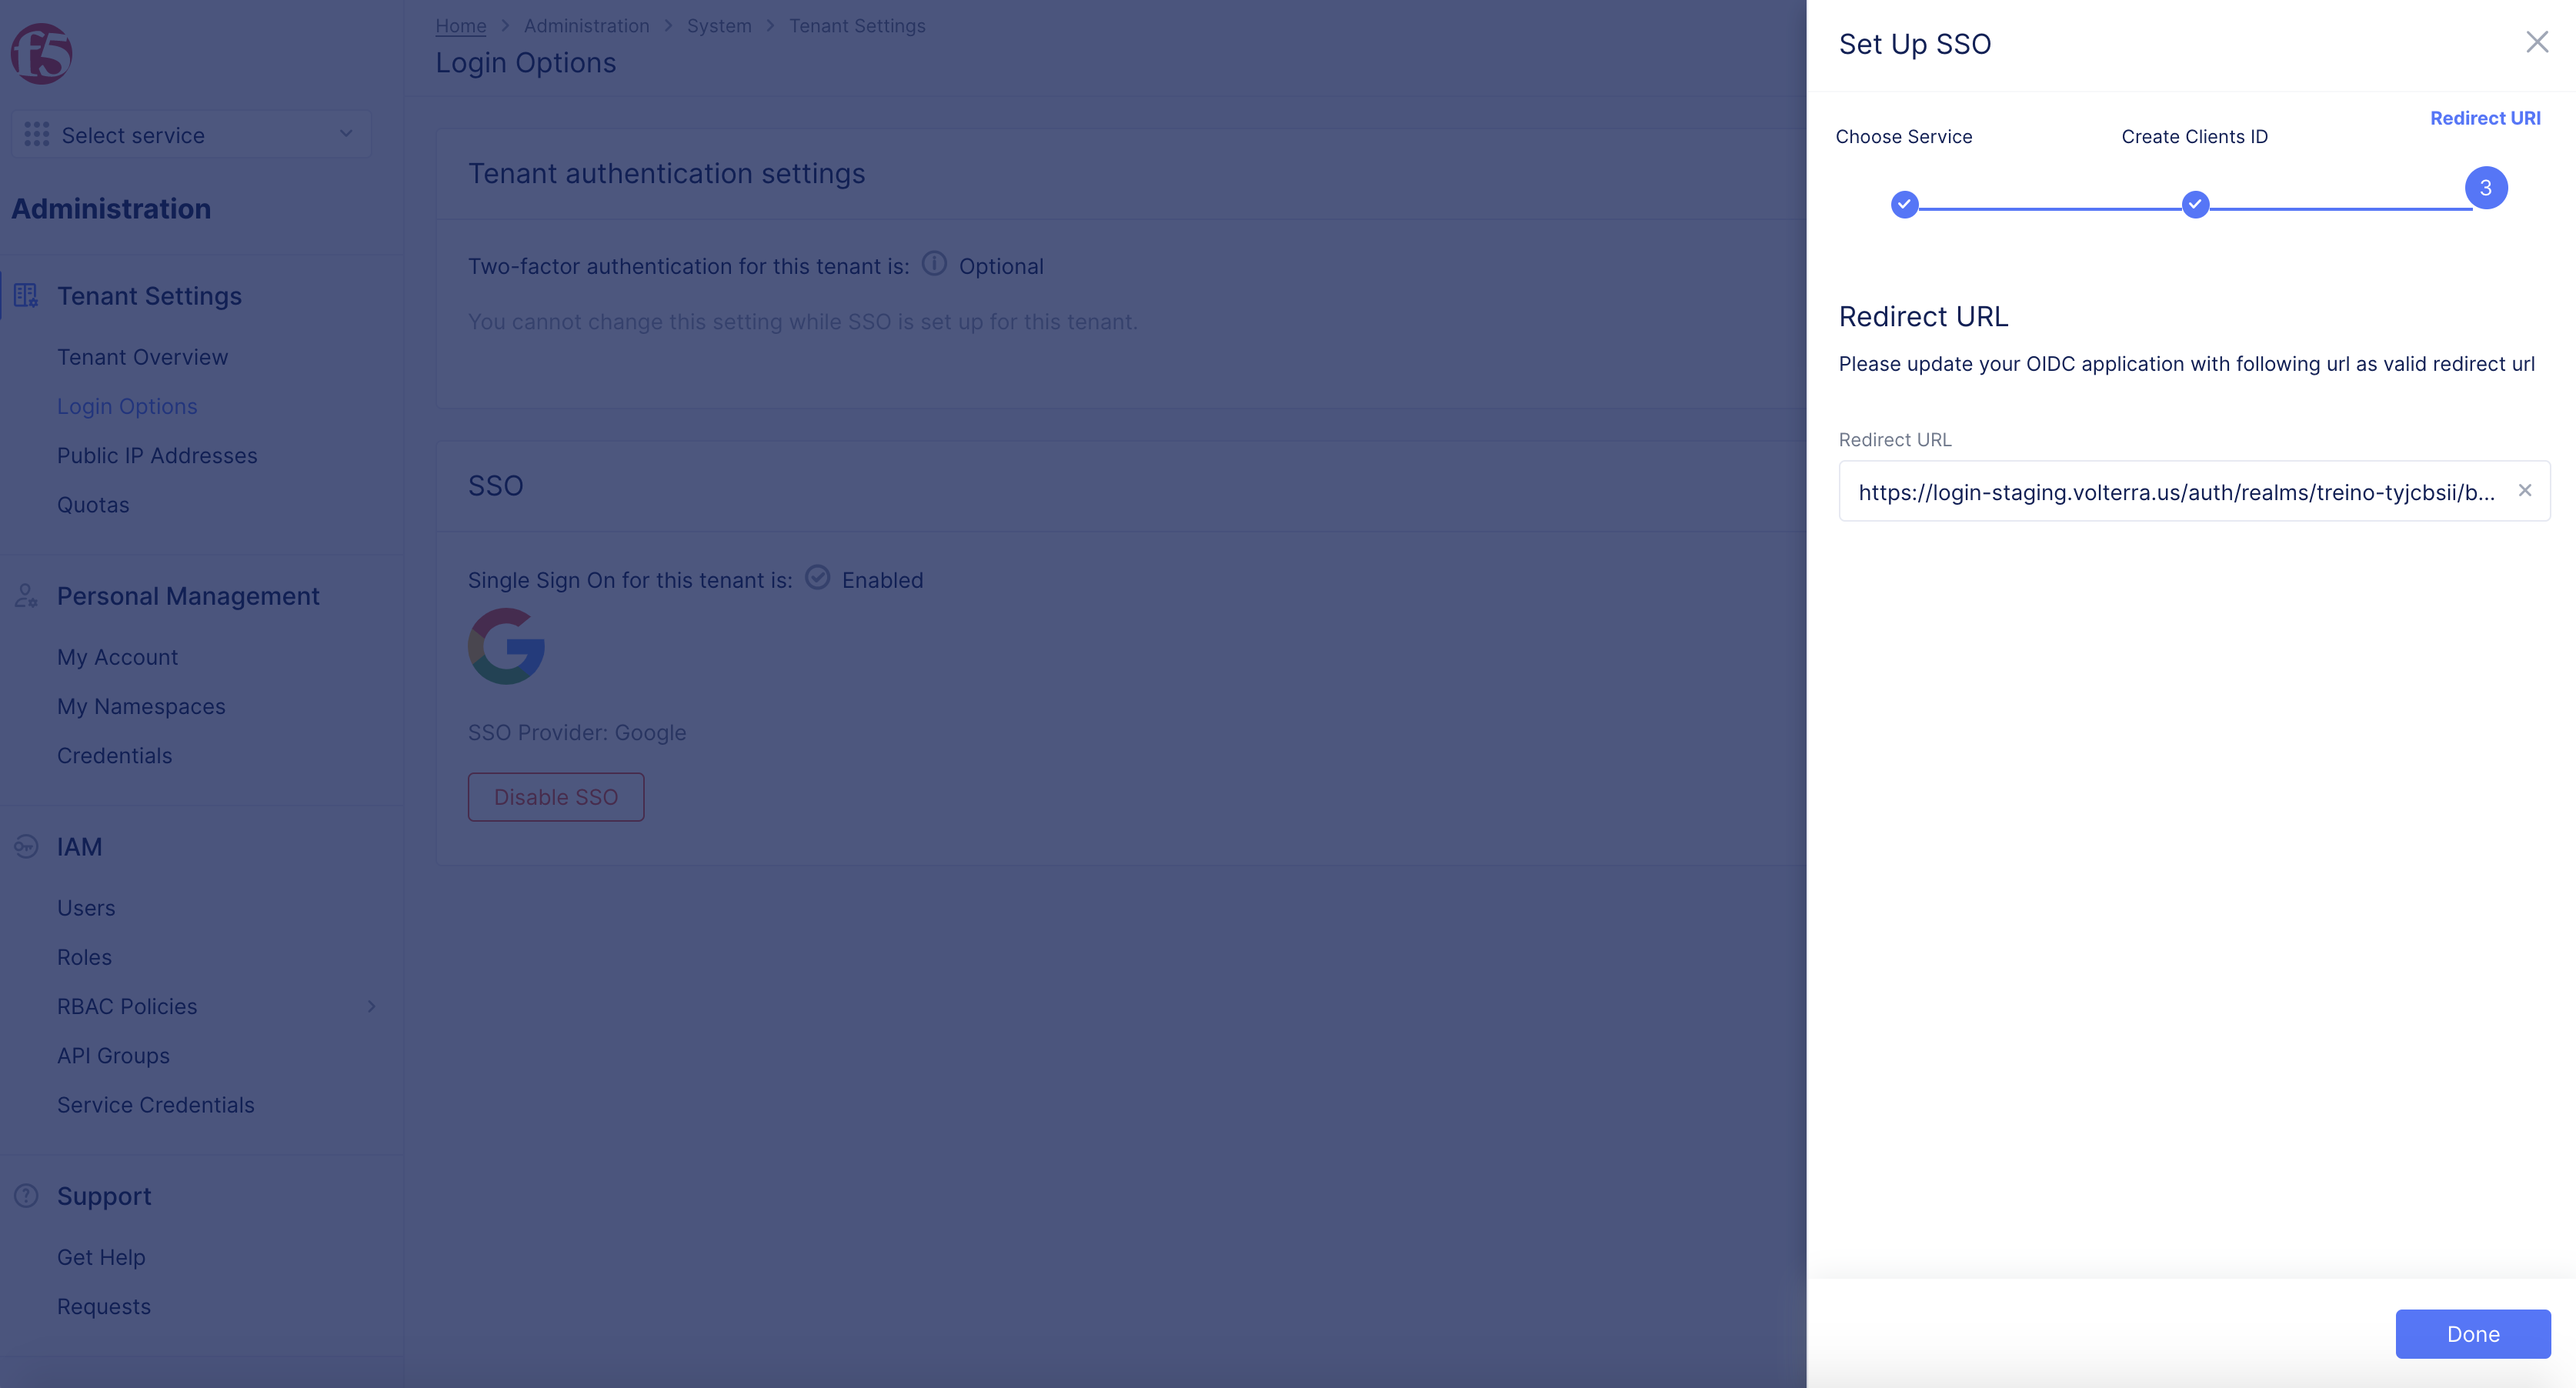
Figure: Redirect URL
Step 4: Add Redirect URL in Custom Application Settings.
-
Log into custom, open General tab of your application settings.
-
Select Edit.
Step 5: Sync Redirect URL in OIDC.
-
Copy URL redirect link.
-
Enter URL in OIDC.
Step 6: Complete SSO Setup.
Log out of Console.
Edit SSO Configuration
You can modify an existing Single Sign-On (SSO) configuration to update credentials and secrets without removing the configuration. This eliminates the need to delete and recreate the SSO setup during routine secret rotation cycles. This allows you to rotate secrets faster with less risk, no tenant downtime, and no security gaps.